
Today, I contemplated how common plantain looks quite amazing when it gets to grow. We’ve actually transplanted some into our yard. It’s a useful plant but it’s typically mowed down, pulled out, or worse.
Today, I contemplated how common plantain looks quite amazing when it gets to grow. We’ve actually transplanted some into our yard. It’s a useful plant but it’s typically mowed down, pulled out, or worse.
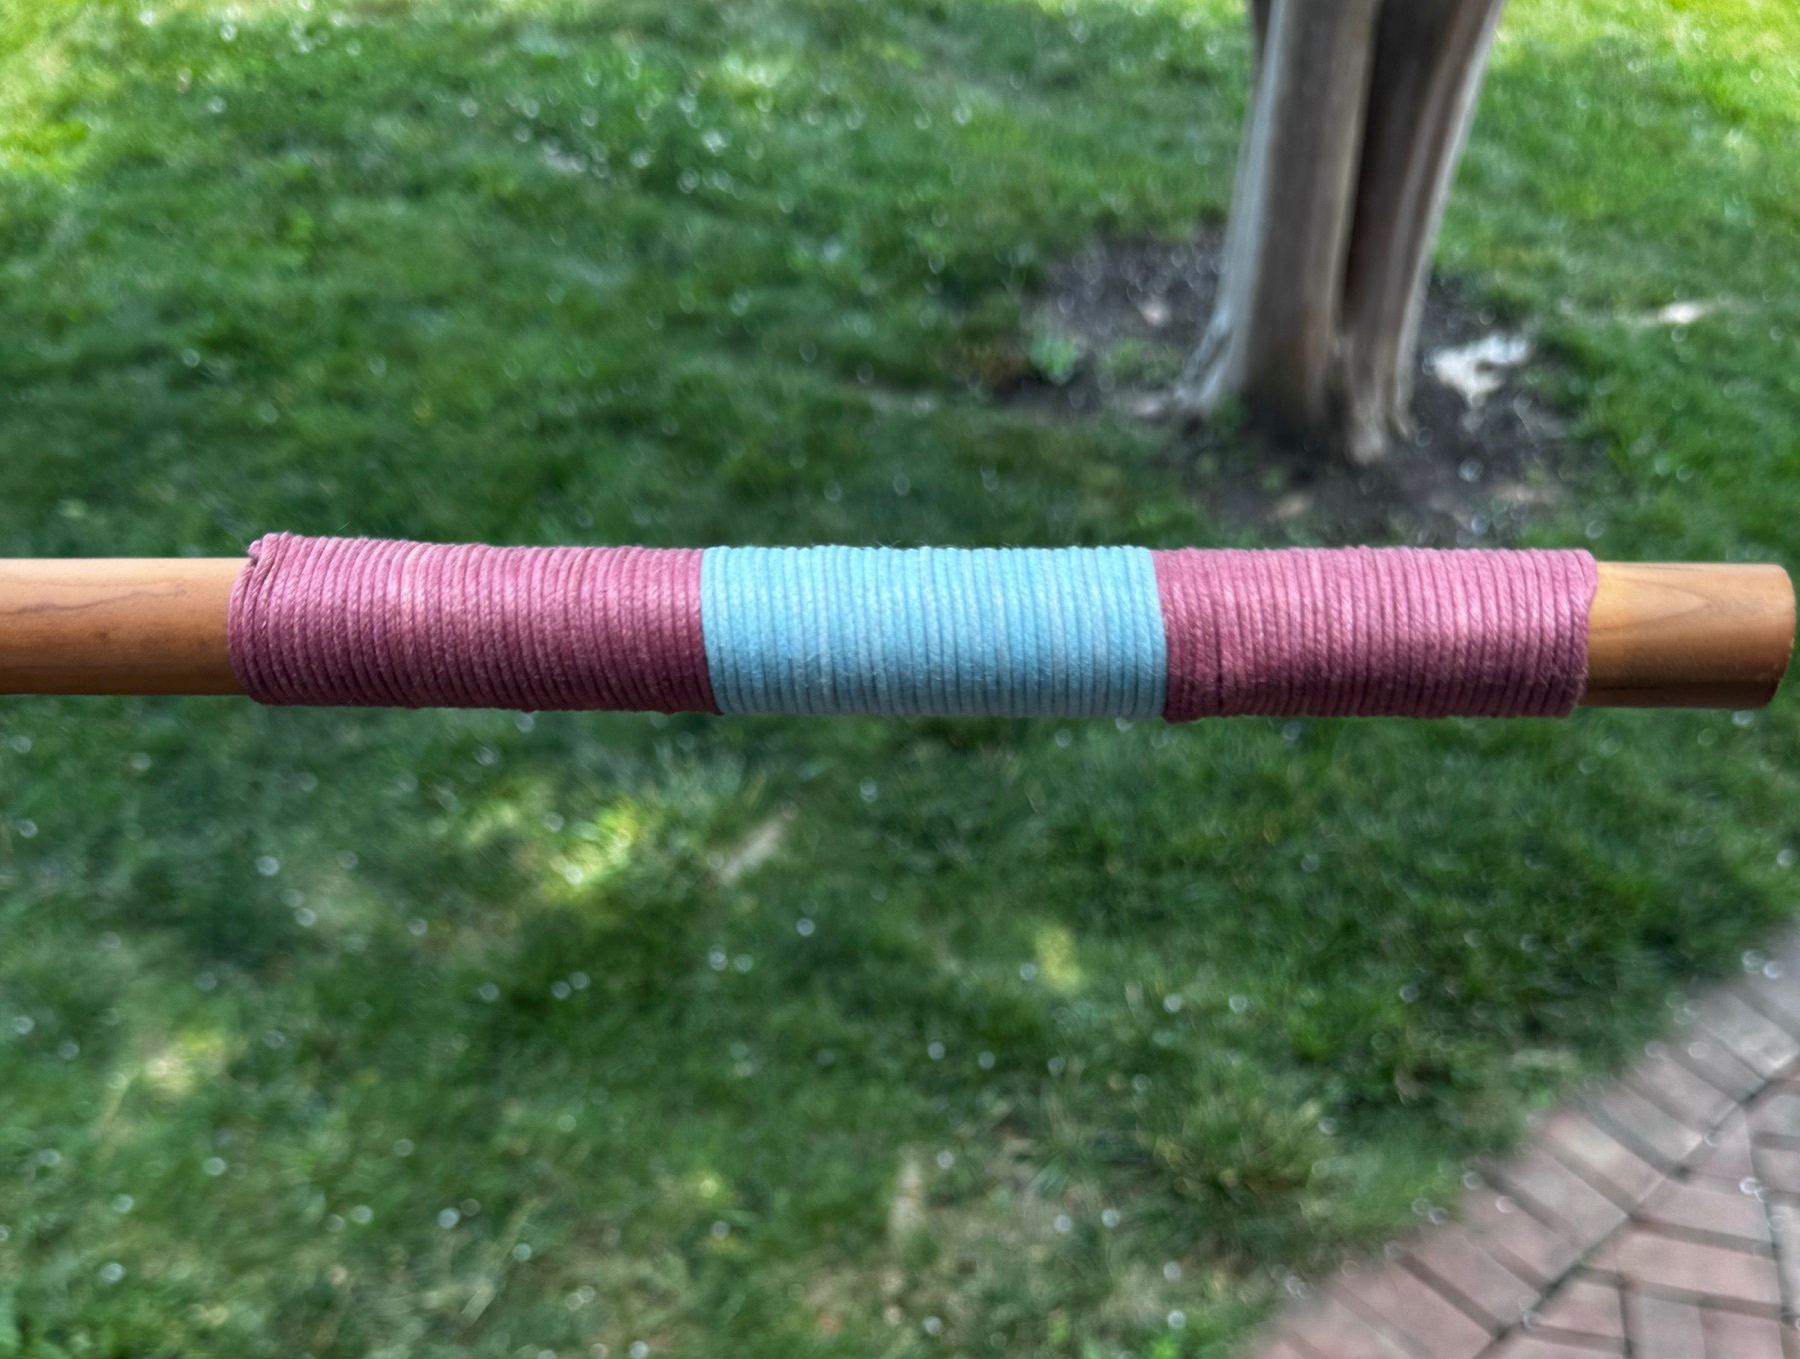
Until today, it never occurred to me that I could cord wrap a handle with multiple colors to make simple designs. Here’s my first attempt. I like it.
It’s that time of year again when the mountain laurels bloom and I once again can’t resist taking a bunch of photos.

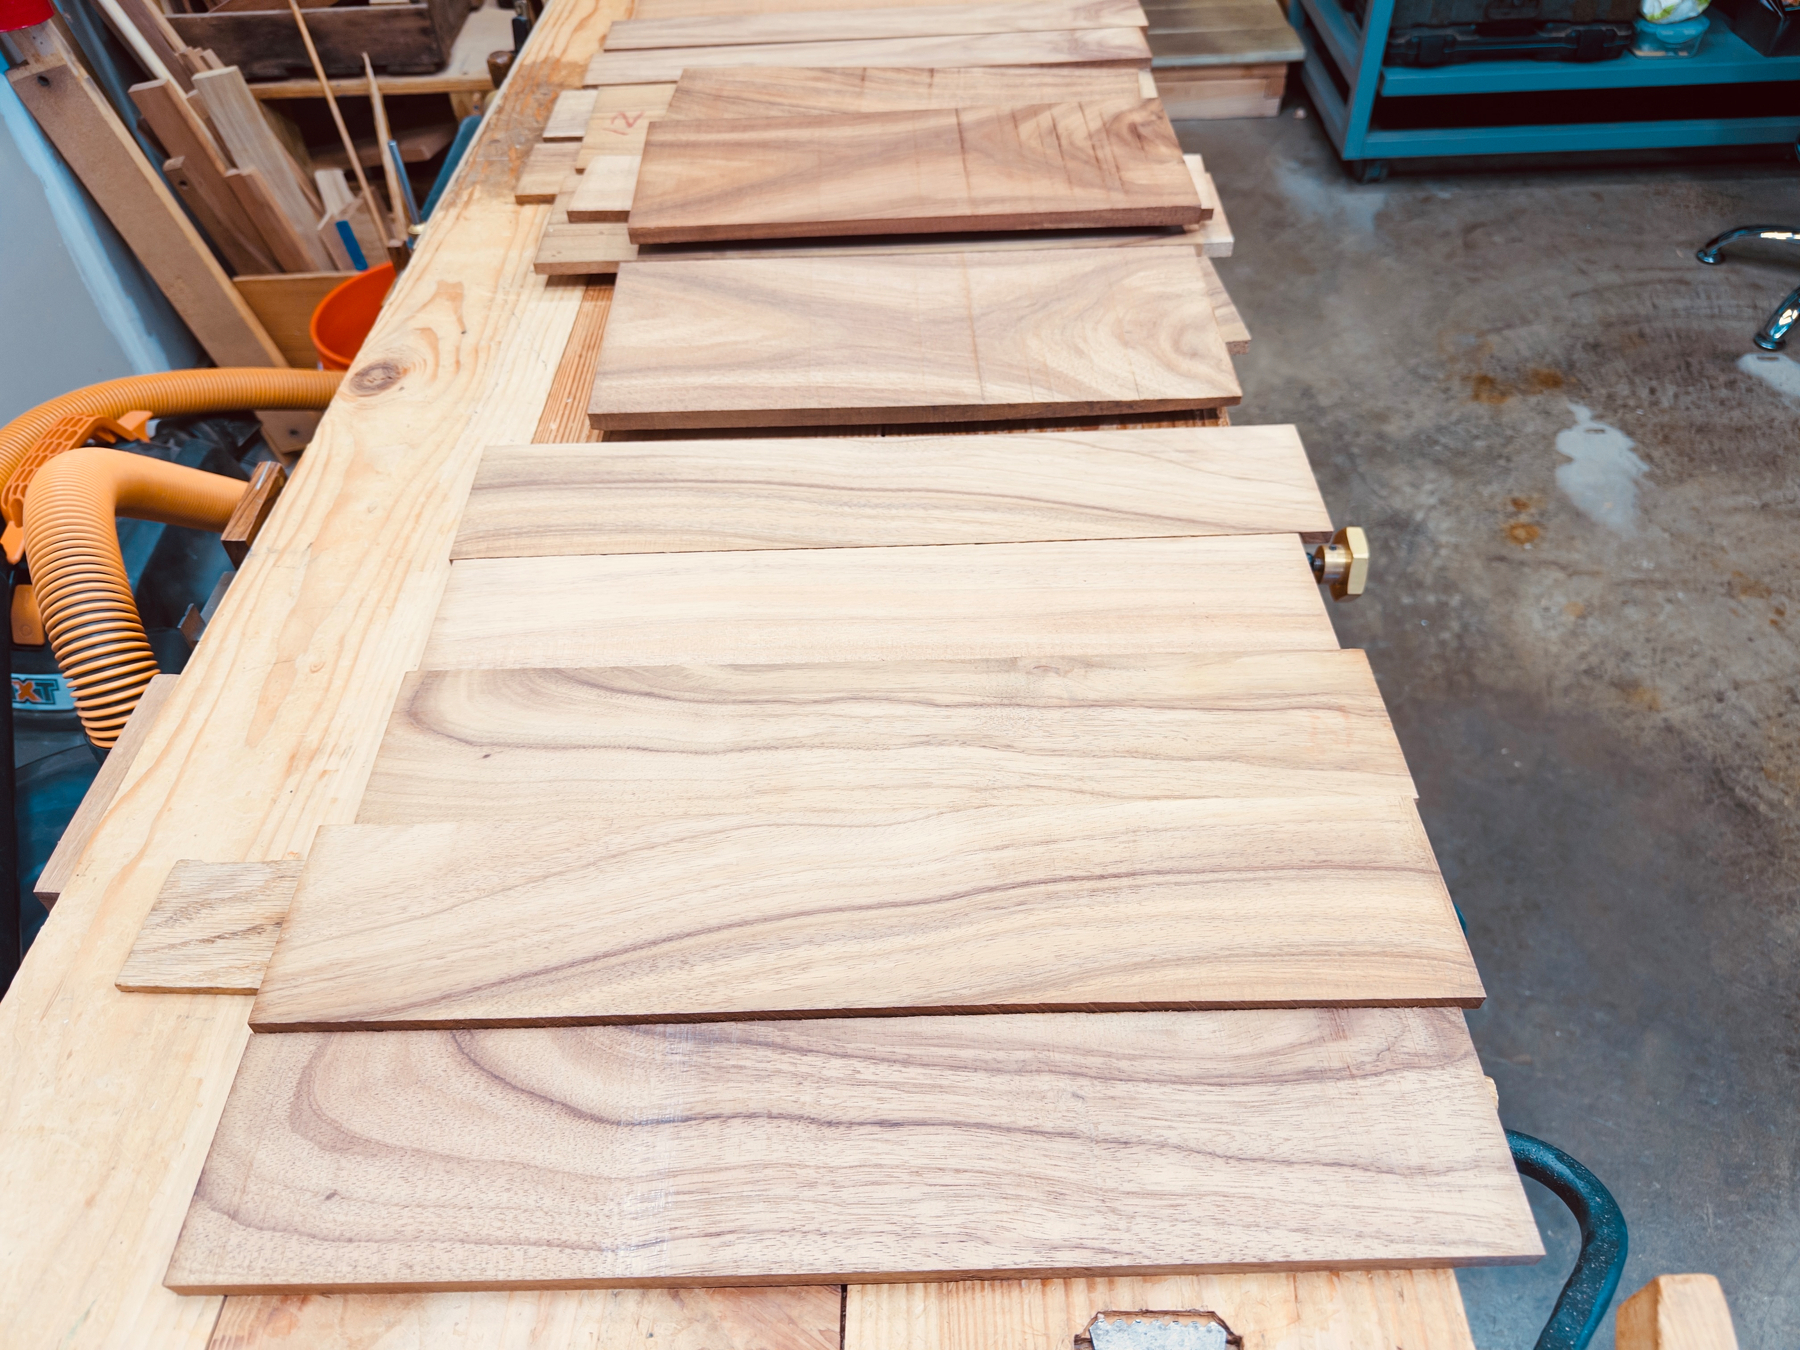
Look at this lovely grain. I joined a guild with a community shop 45 minutes away. Today, I resawed these small Koa boards there with a bandsaw. I’m a hand tool shop, but there are times when I want to use a bandsaw. I love the idea of community-shared equipment, and not just for woodworking.
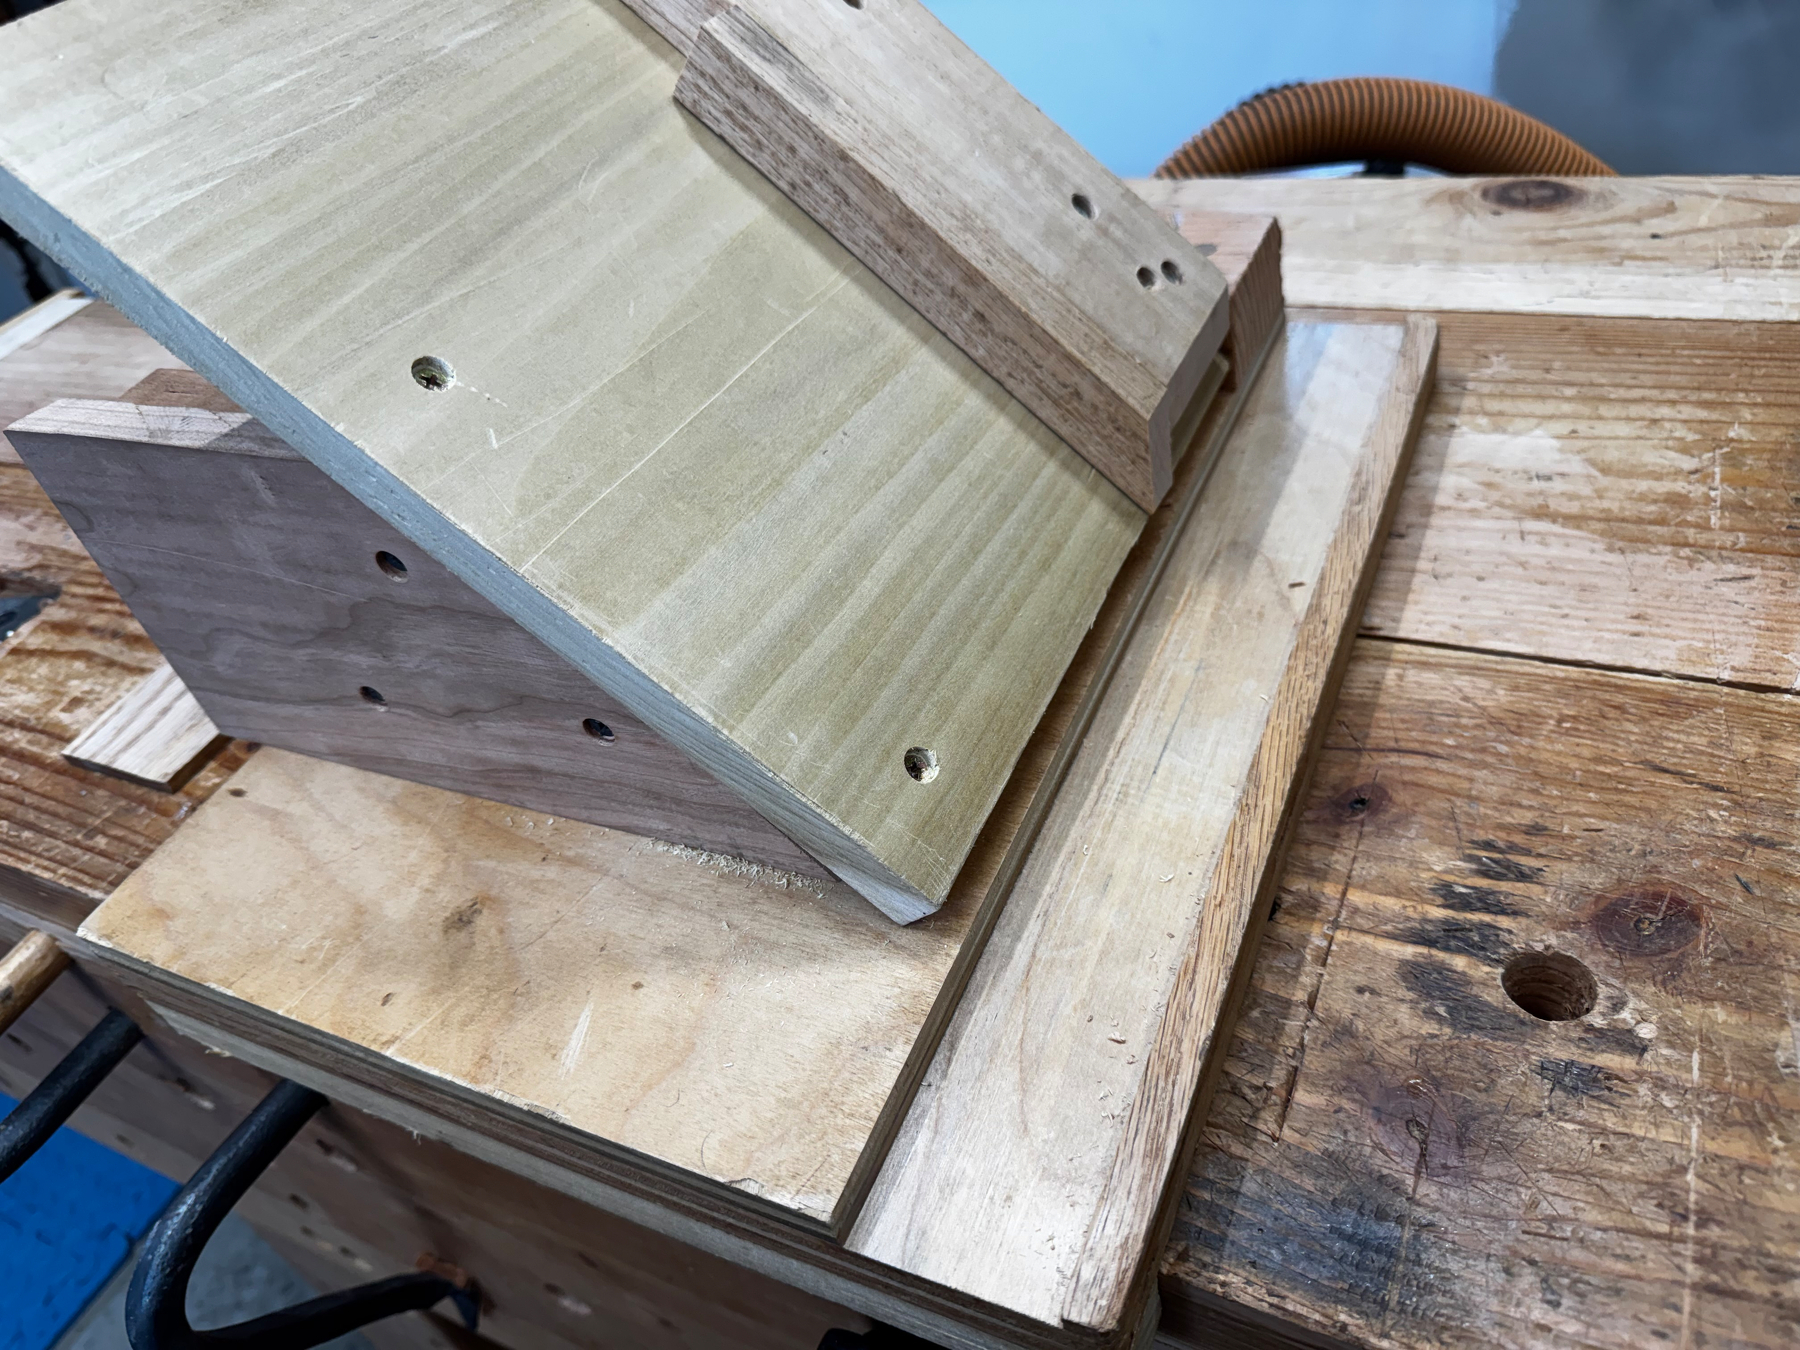
I had an old regular shooting board I wasn’t using so I made a donkey’s ear attachment to shoot long 45 degree miters. I wanted something fast to build and precise, so I mounted the board on two cheap plastic rafter squares. It’s not pretty, but works great and completed it in about an hour.
Experimenting with a new box design and getting better a matching grain around the sides. This has a floating base and raised top. All completed with hand tools, except for one cheat: I cut the hole in the lid with a forstner bit.


Beautiful spot where Beaver Creek meets Antietam Creek in Washington County, Maryland. Fishing wasn’t good, but the scenery was great. Normally at this time of year, the water levels are a couple of feet higher. Like much of the country, we are in drought conditions in the spring. Not great.

Recently returned from a trip to Western Maryland, where we stayed in one of the few mid-Atlantic spots with no cell service. The fishing was excellent, but the water levels are way too low for April. It’s strange to see a phone booth these days.

Just finished installing a three-barrel rain catchment system for our backyard with a kit from BlueBarrel. It was a fun project. BlueBarrel is worth checking out if you’re looking for rain barrel options.

I stepped away from posting (and woodworking) for a couple of months, but I’m back with a simple project. This is a barebones bed frame to hold a tatami mat, creating useful storage space underneath. Total lumber cost was $50. I made it in a day with hand tools, except for the screw assembly — I splurged and used a power drill for that!
