Posts in "handtoolschool"

Sewing Machine Table Conversion, Part Two

I recently completed my project to turn an early 20th century sewing station into a 21st century internet station. I used sapele for this build (second only to walnut as my favorite handtool wood to work with). Here is some documentation so I don’t forget what I did.

Securing the cabinet to the cast iron base

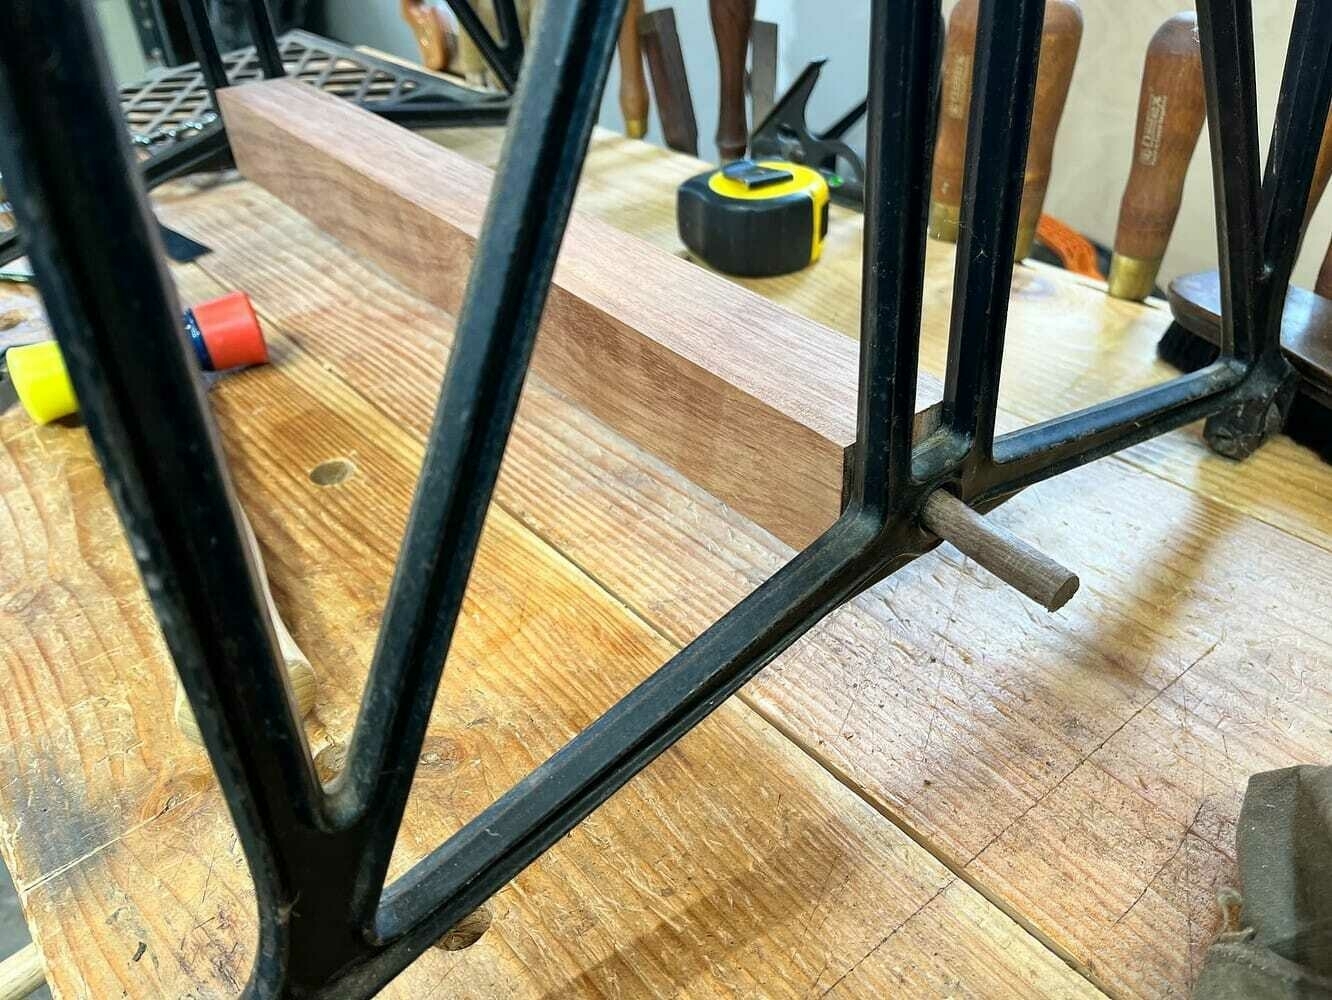
I made a simple base from a scrap piece of bubinga I had laying around. It’s held in place by two walnut dowels I hand cut (pounded out with a dowel plate) to fit through the existing cast iron screw holes where the base of the old treadle was held in place with big screws. These dowels go through the screw holes and into the wood where I drilled some holes. My aim for this project was to complete it without any screws or other hardware, so these two dowels and two top dowels I document later are what keep in solidly locked in place.
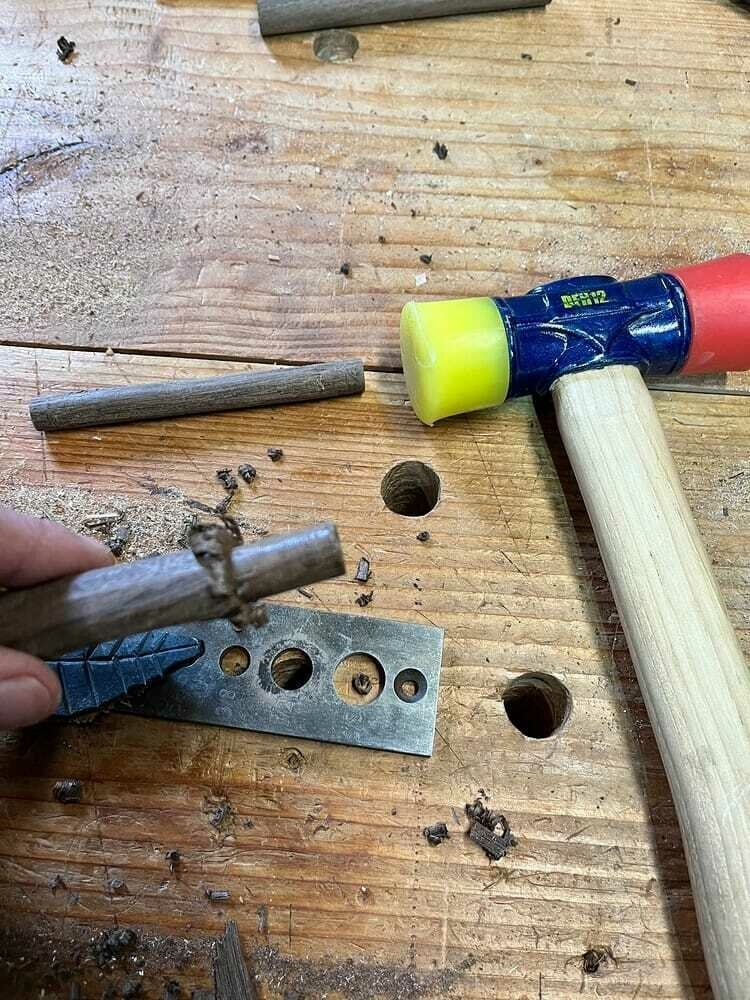
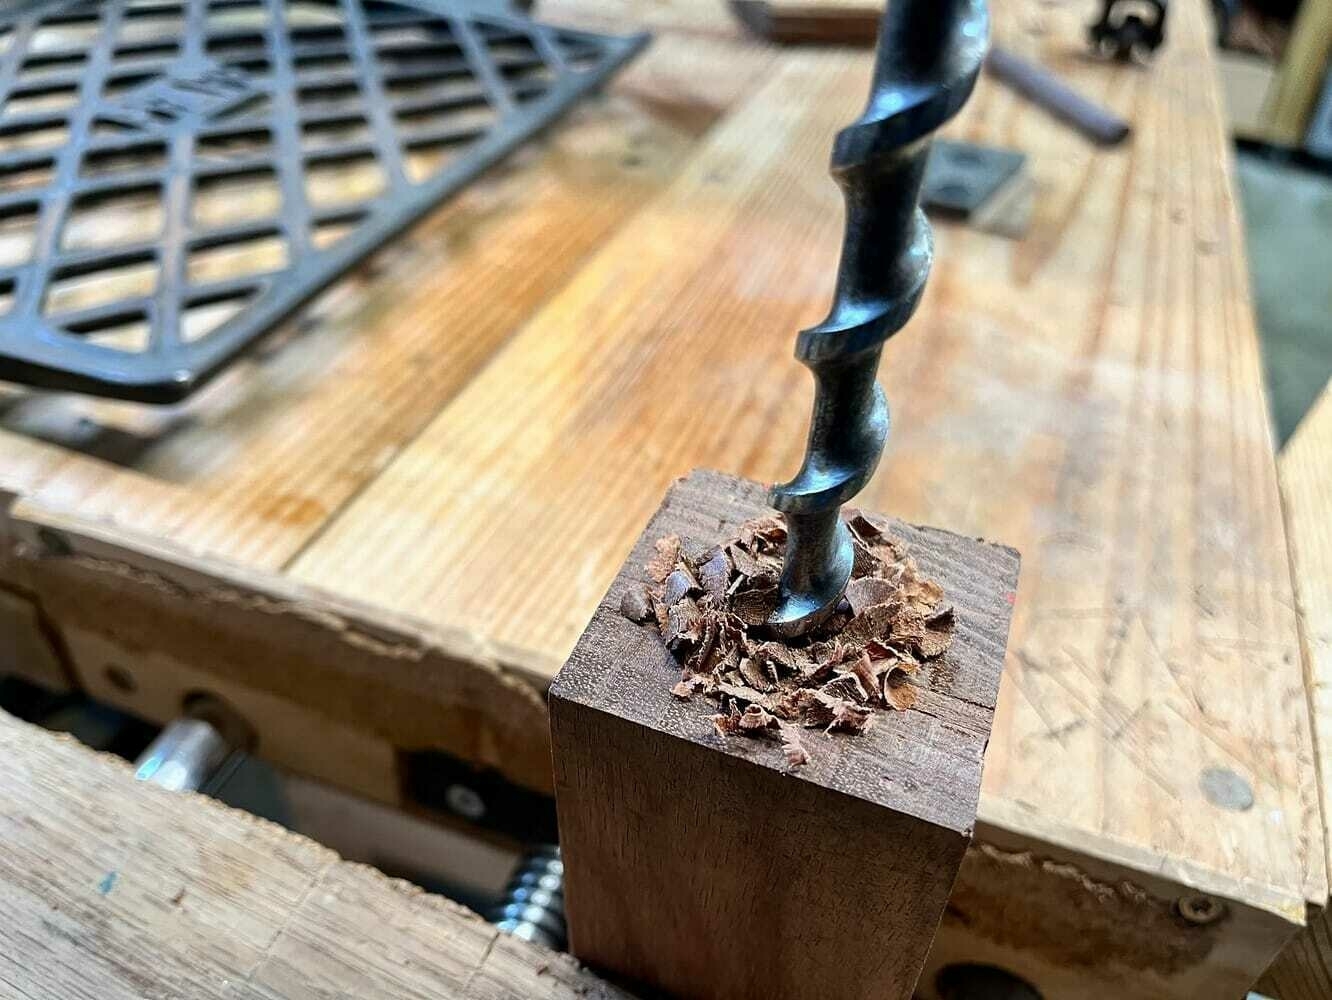
a partially handcut walnut dowel with a jig and hammer used to pound it out. close-up of using hand drill to drill holes into ends of bubinga base. The bubinga base in place with dowels in the iron frame.

Building the cabinet

I had to join two boards to have the width I needed for the base and sides.
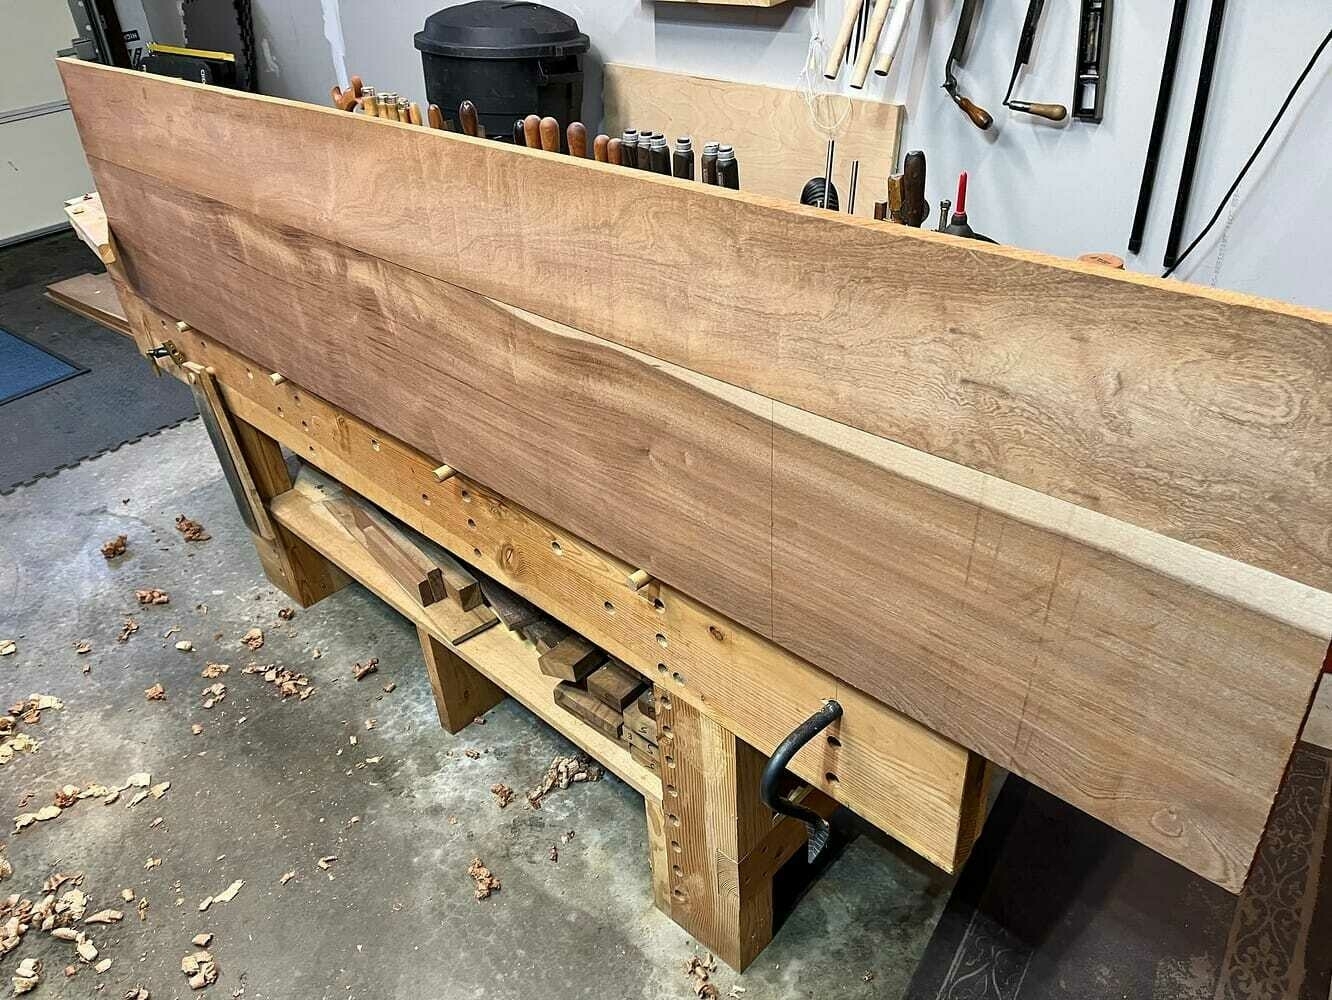
two long sapele boards aligned and glued together on shop bench.

Each side was cut at angles to match the angle of the cast iron sewing machine table base.
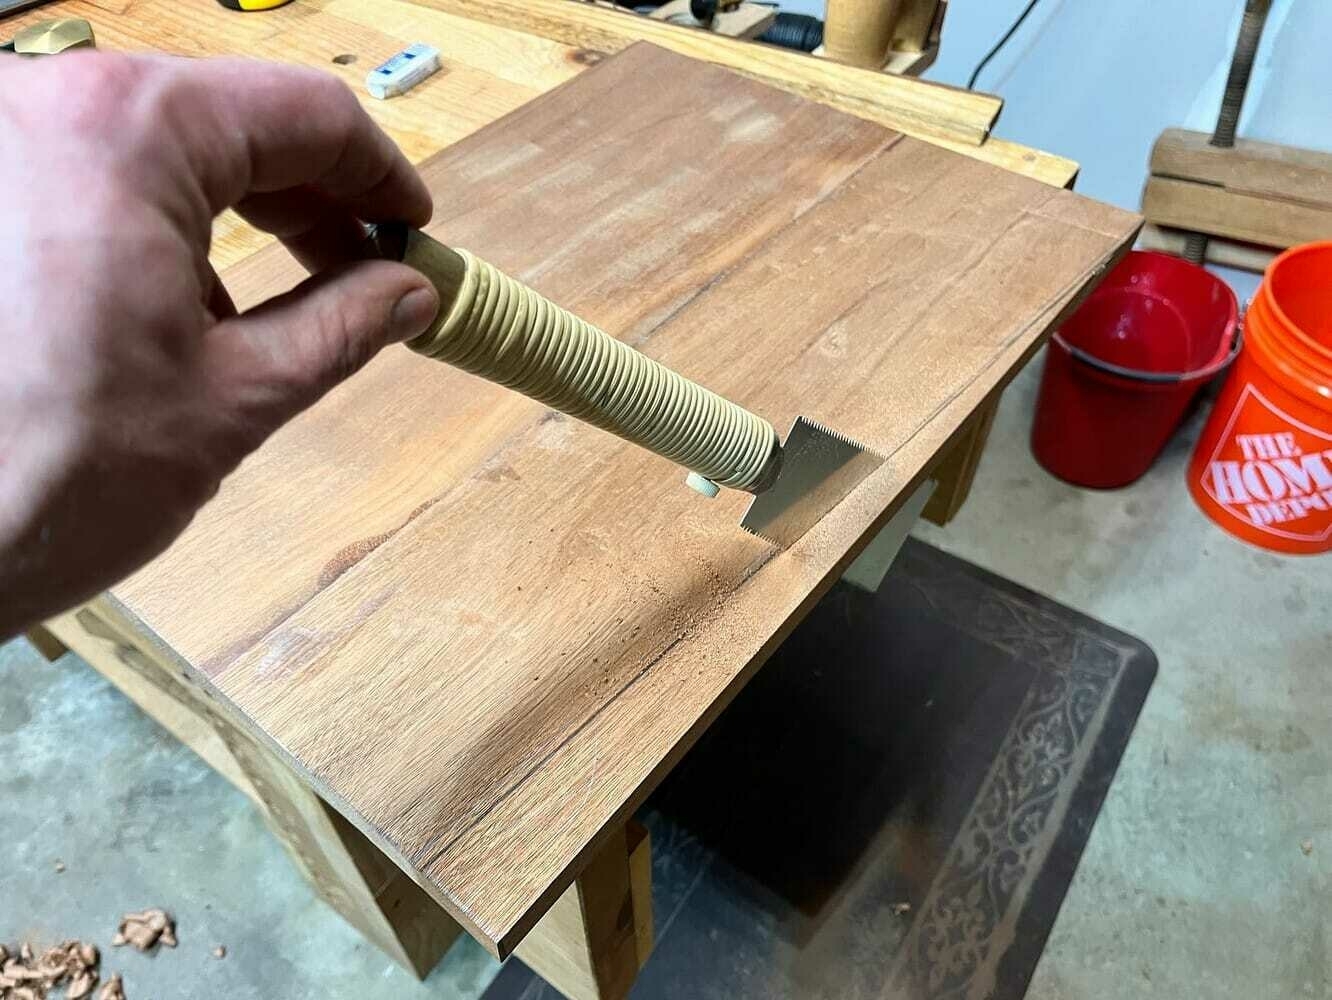
Close-up of cutting the side angles to match the angle of the sewing machine base, with Japanese saw.

The base of the cabinet was a simple square, thankfully no angles.
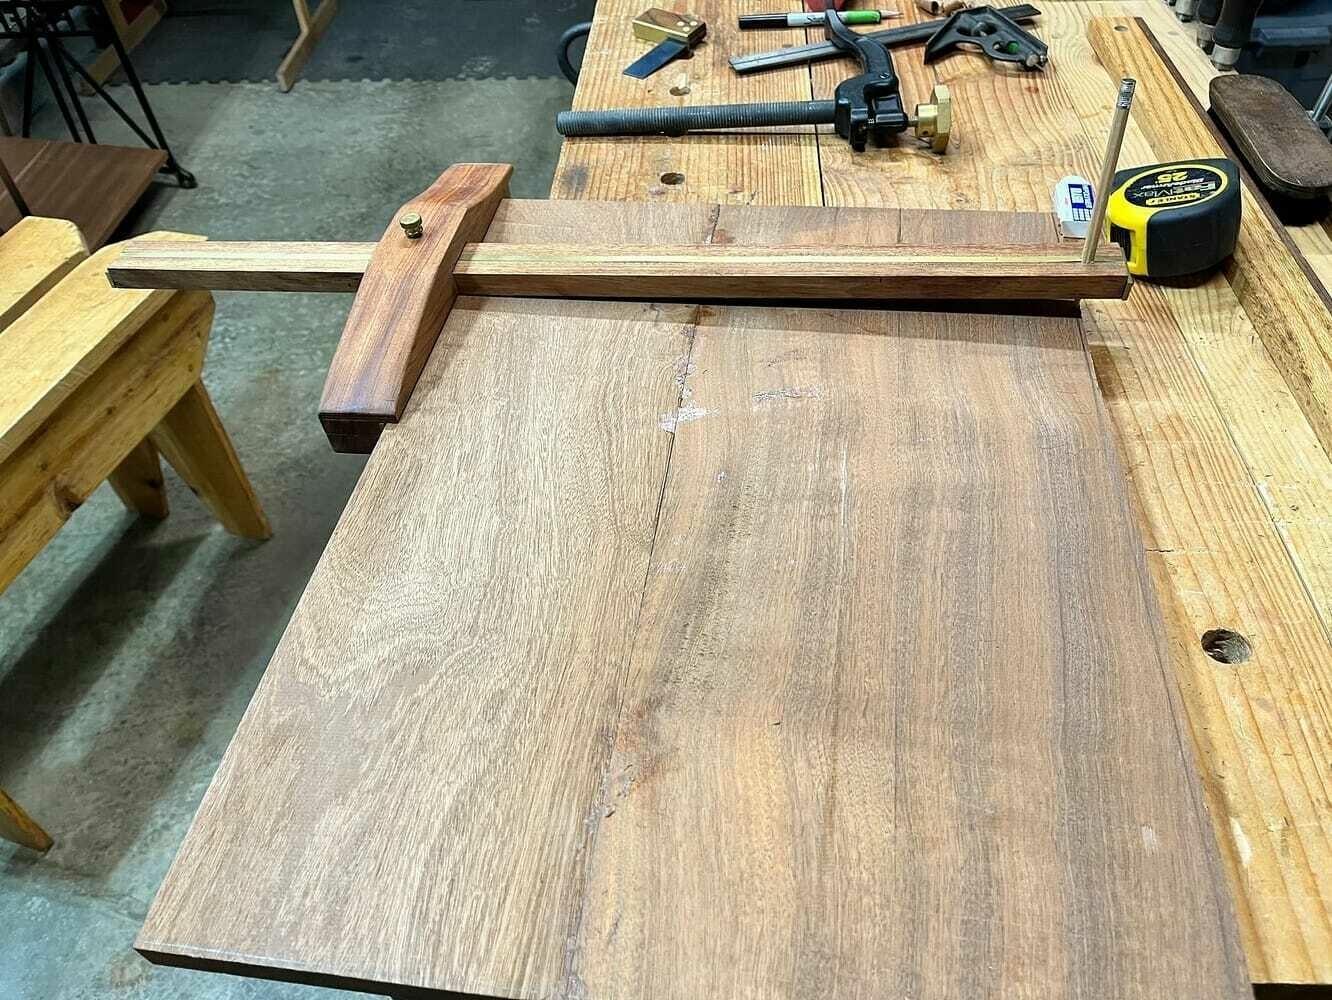
Preparing to cut the base by marking lines on benchtop.

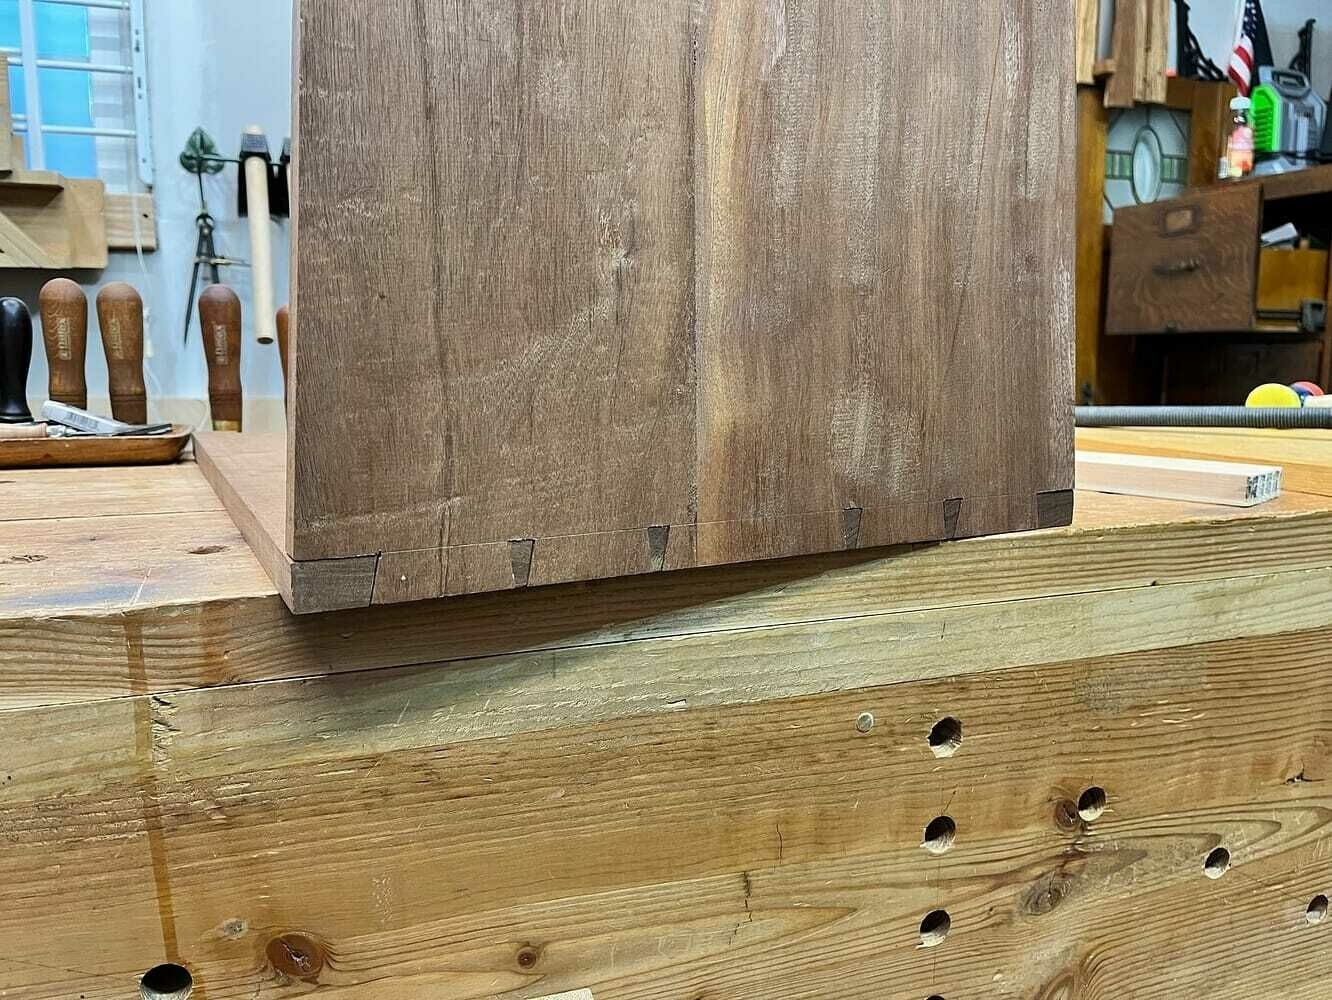
The sides were joined to the base with dovetails, I used a variable width just because I had never tried to do differing widths before. Turned out well.
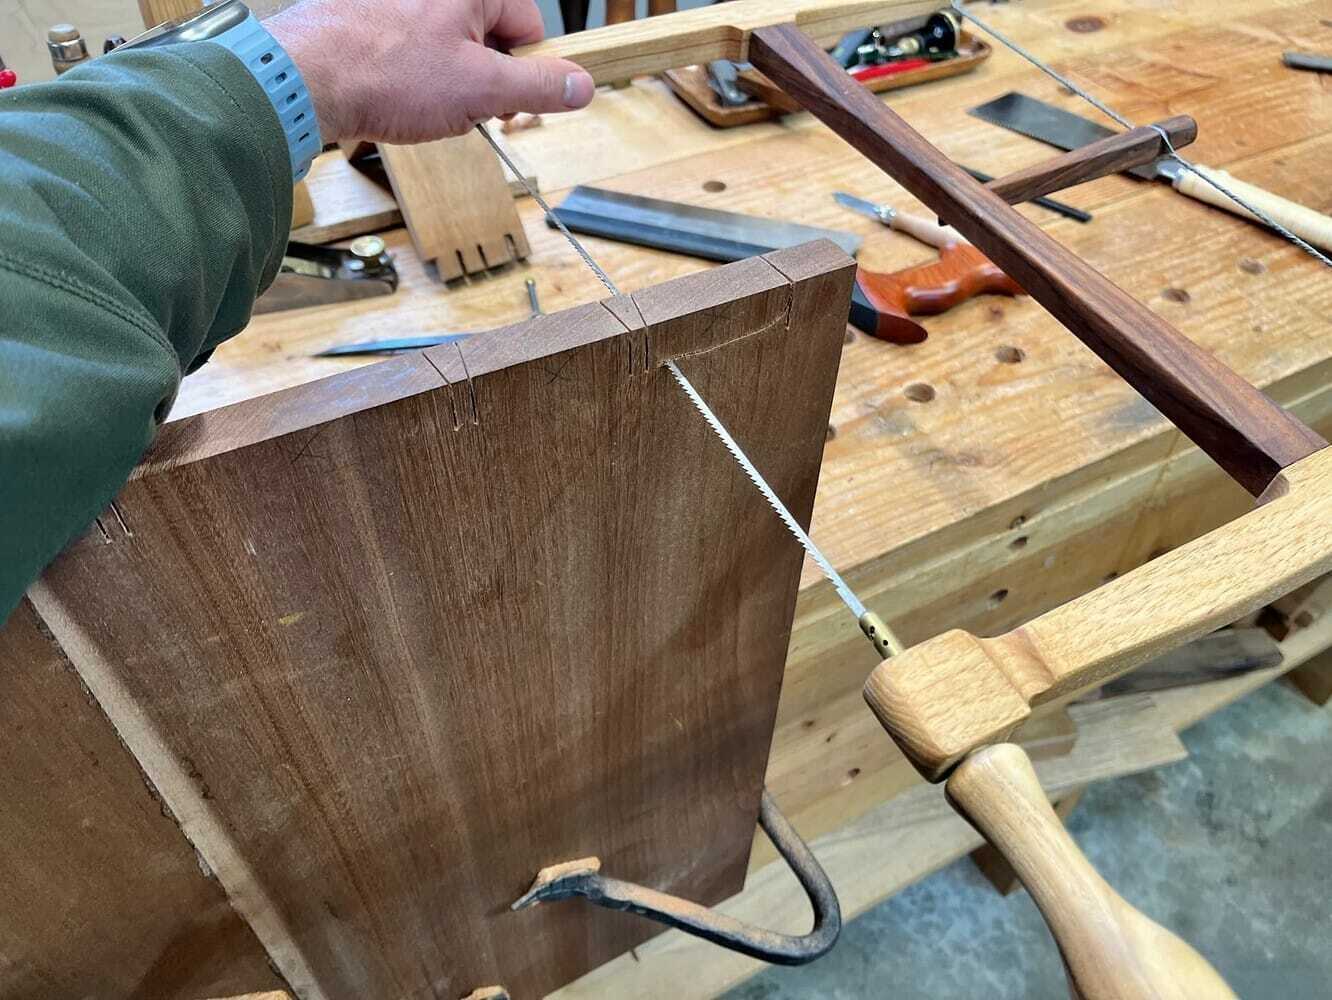
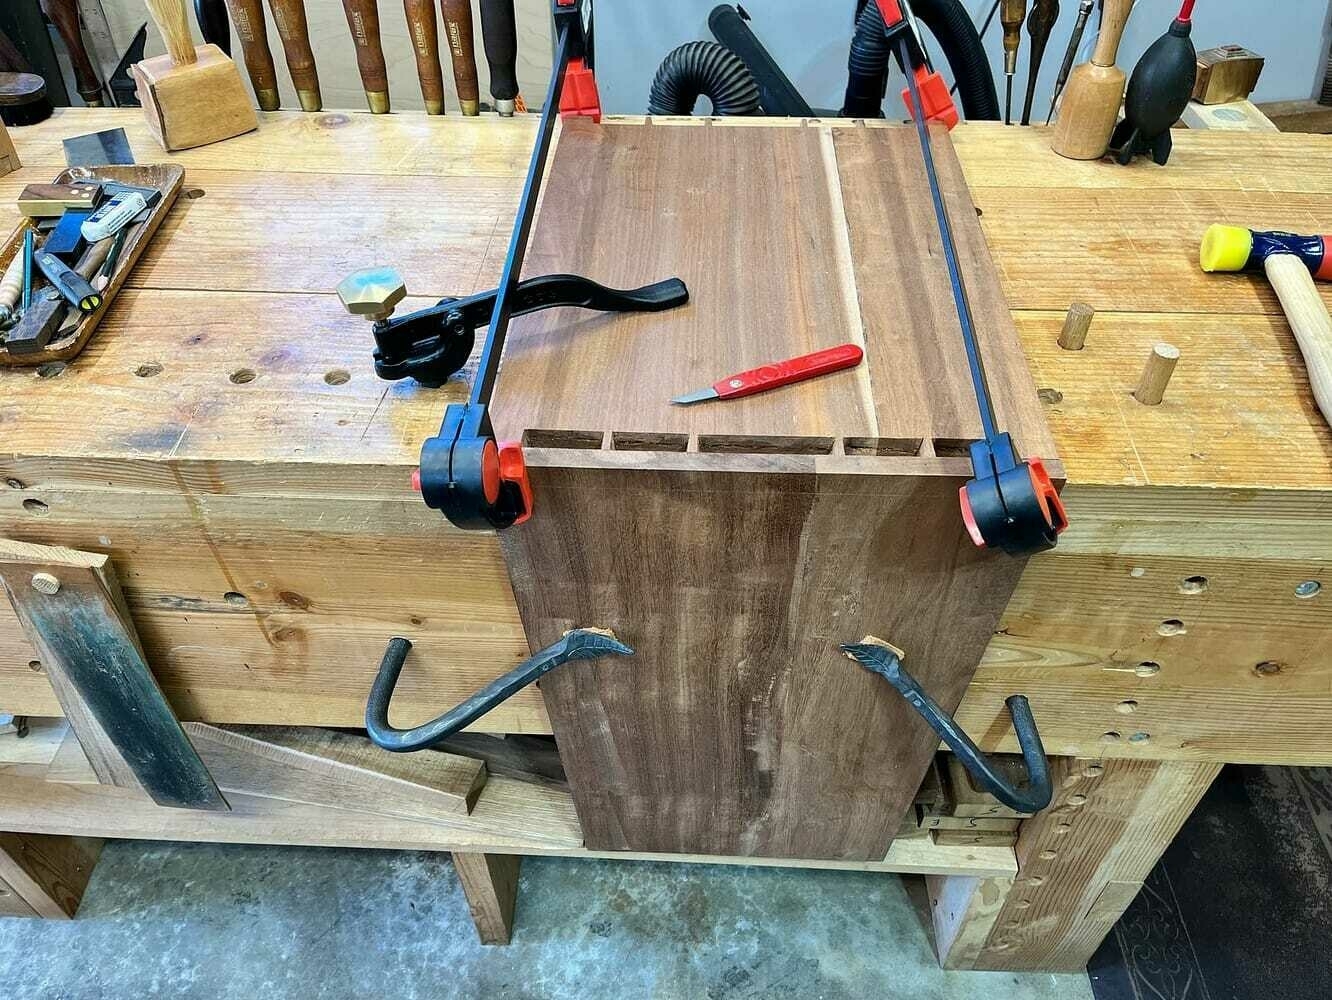
Cutting dovetail waste out with bow saw. Aligning the pins to mark out the tails in the cabinet A joined edge showing completed dovetails, dry fit.

This cabinet is for computer bits that get warm, so I wanted to maximize airflow, so I left the top open, held in place with two dovetailed arms in the front and back to keep it mechanically solid.
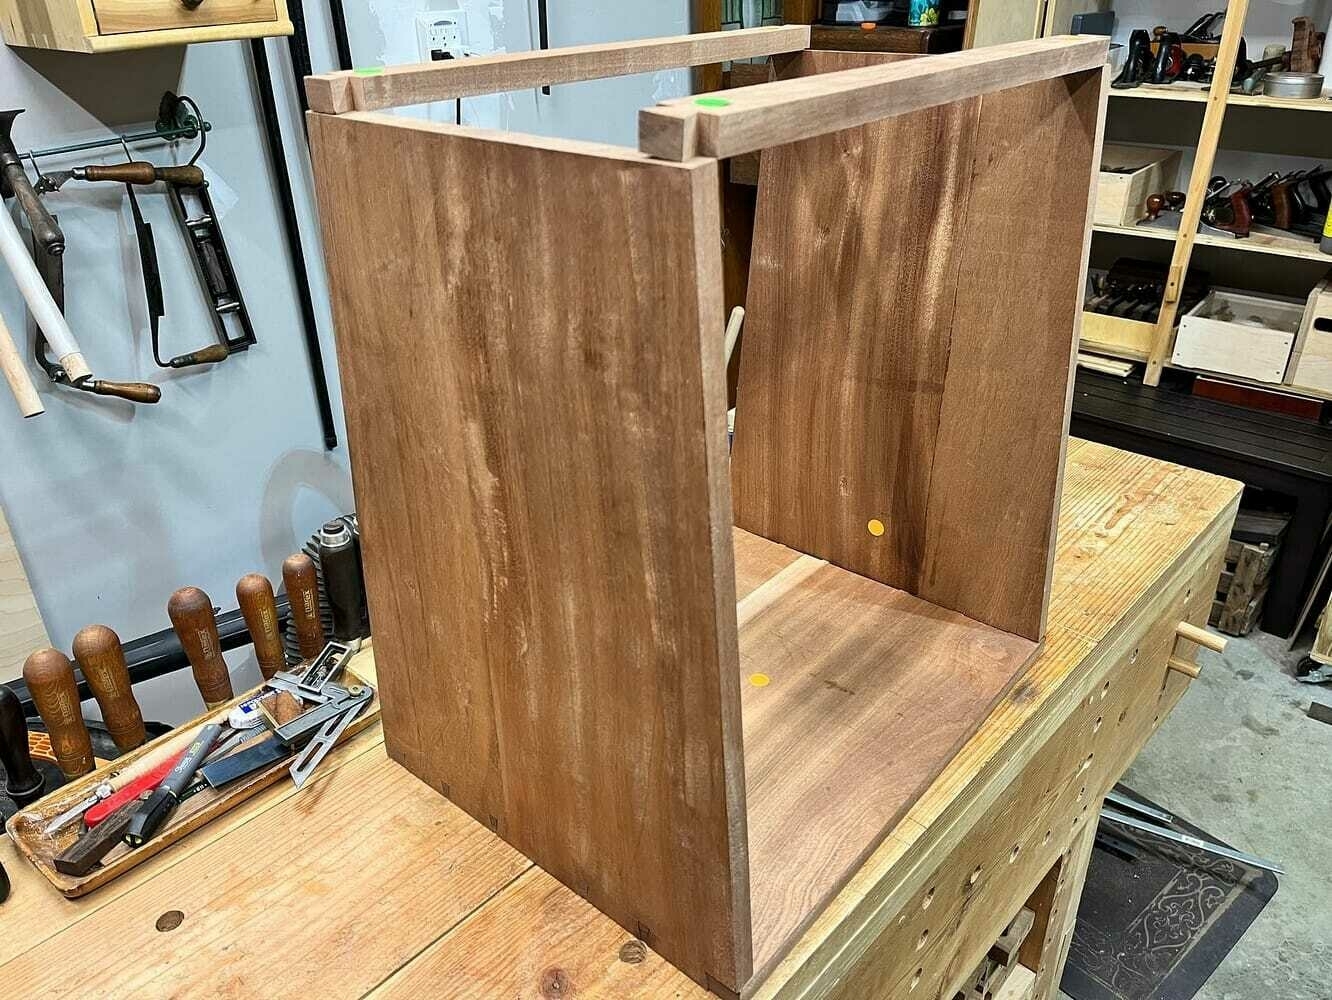
Dry fit cabinet with two arms cut with dovetails for holding the top together.

Here’s the first dry fit of the cabinet frame.
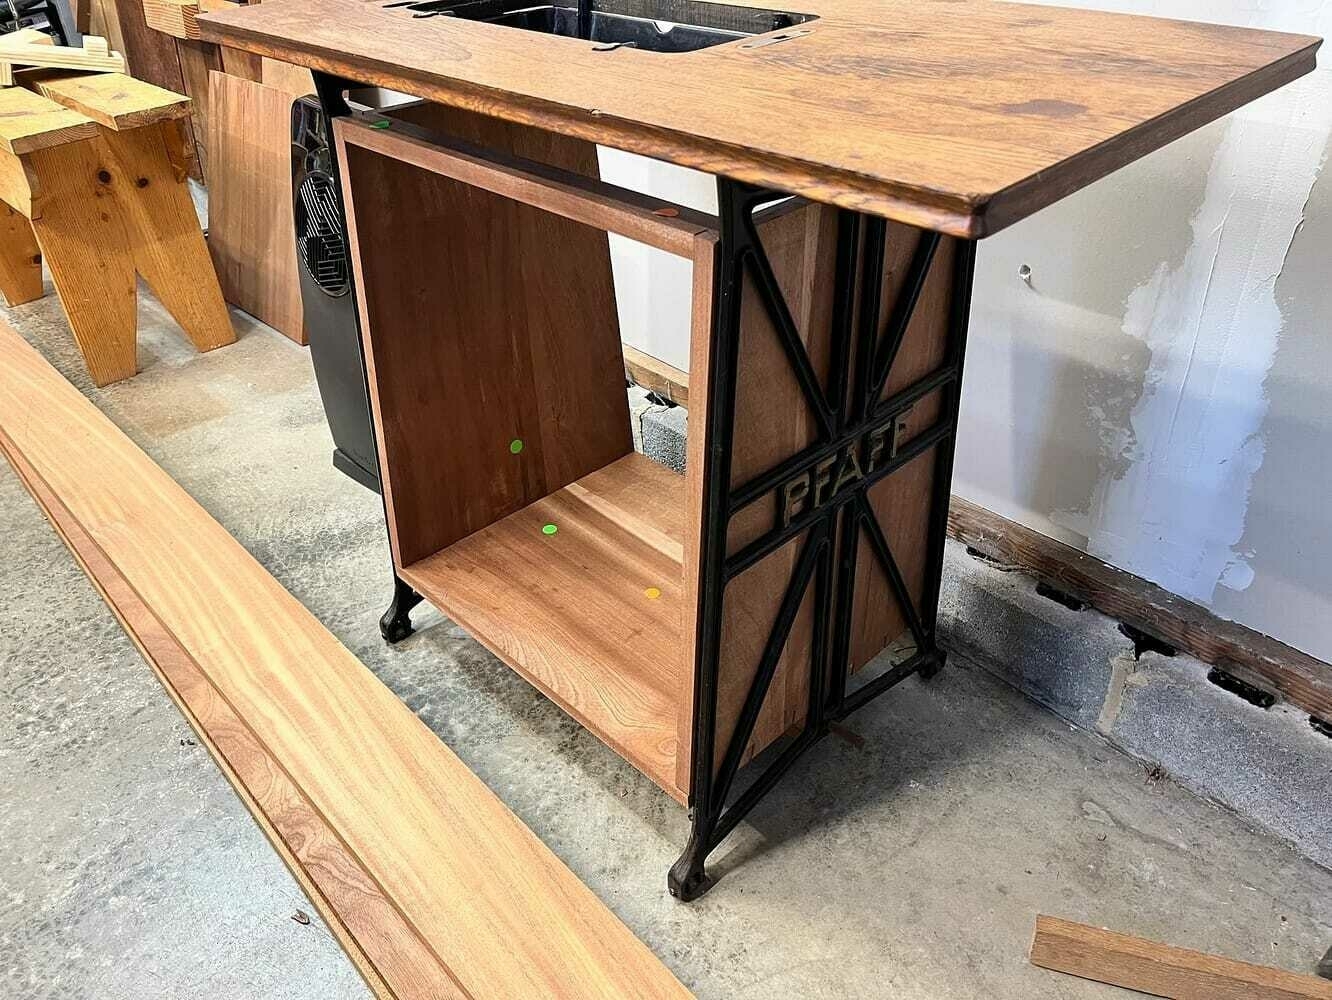
The dry fit cabinet placed in the sewing machine table base.

The innards

My design was for two shelfs to hold a wi-fi router, a 5-port ethernet switch, a Hue hub, a Synology, an outlet extender, and a big ol’ UPS power supply (I have 9 total items to plug in, including some equipment that will be placed on top of the table and on the floor next to this table), but I did not want to see a crapload of cables. So I decided to make an angled back panel to hide the UPS and cabling. Here’s what the inside of each side looked like before the cuts.
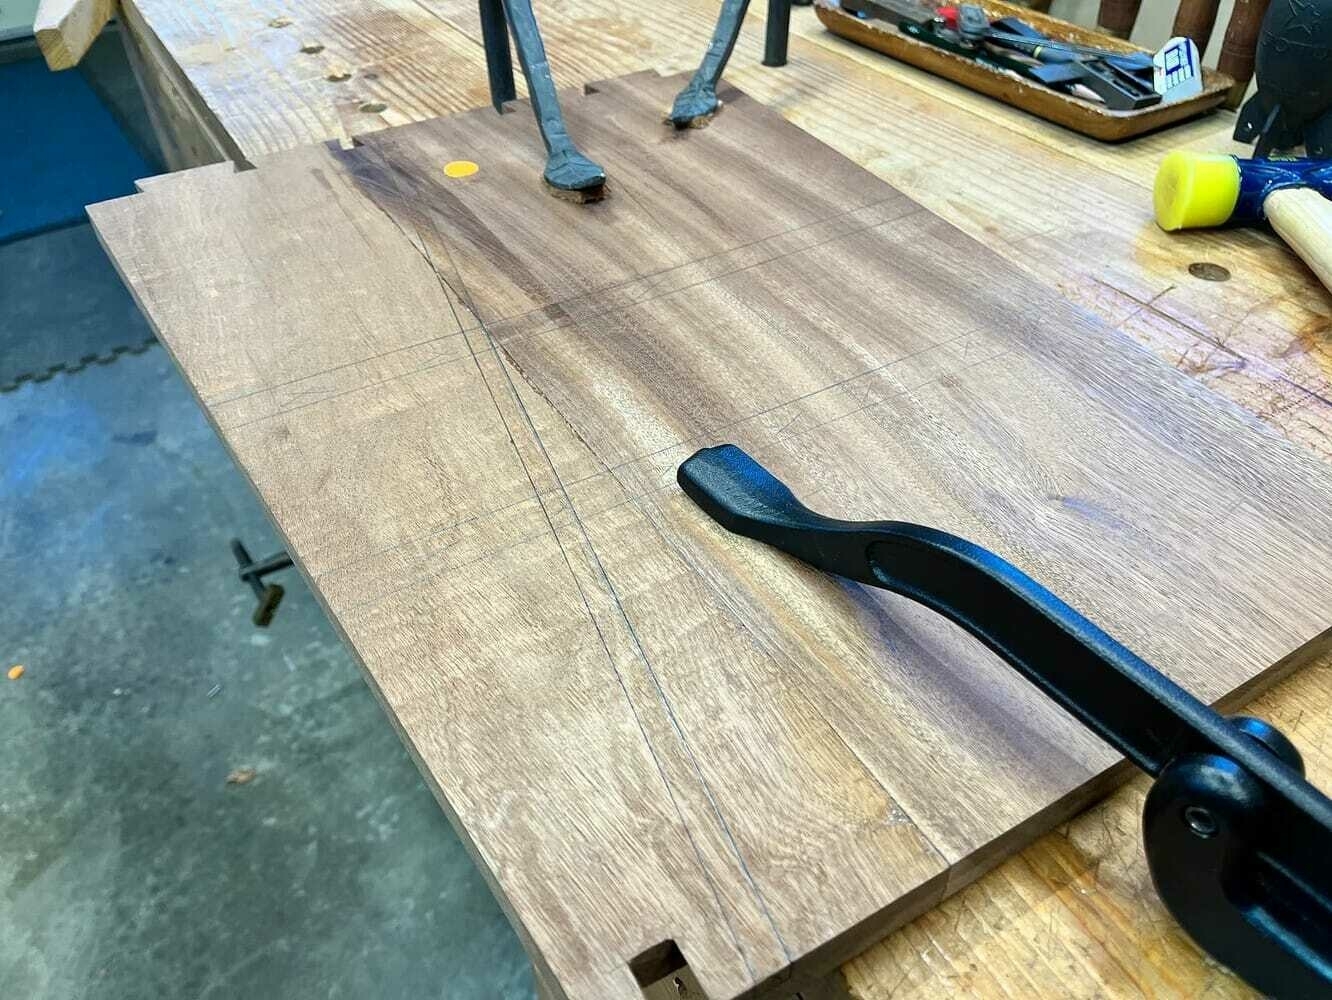
Side panel showing drawn out lines for shelf dadoes and angled groove.

The shelf dadoes were easy enough to saw, chisel, and router out, but the angled grooves were a challenge. I couldn’t saw the edges of this groove given the length and angle (at least I couldn’t figure out how to do that), so I slowly and carefully cut out these angled grooves with my hand router. The angled grooves are cut to fit a 1/4 plywood back with some wiggle room (a bit wide).
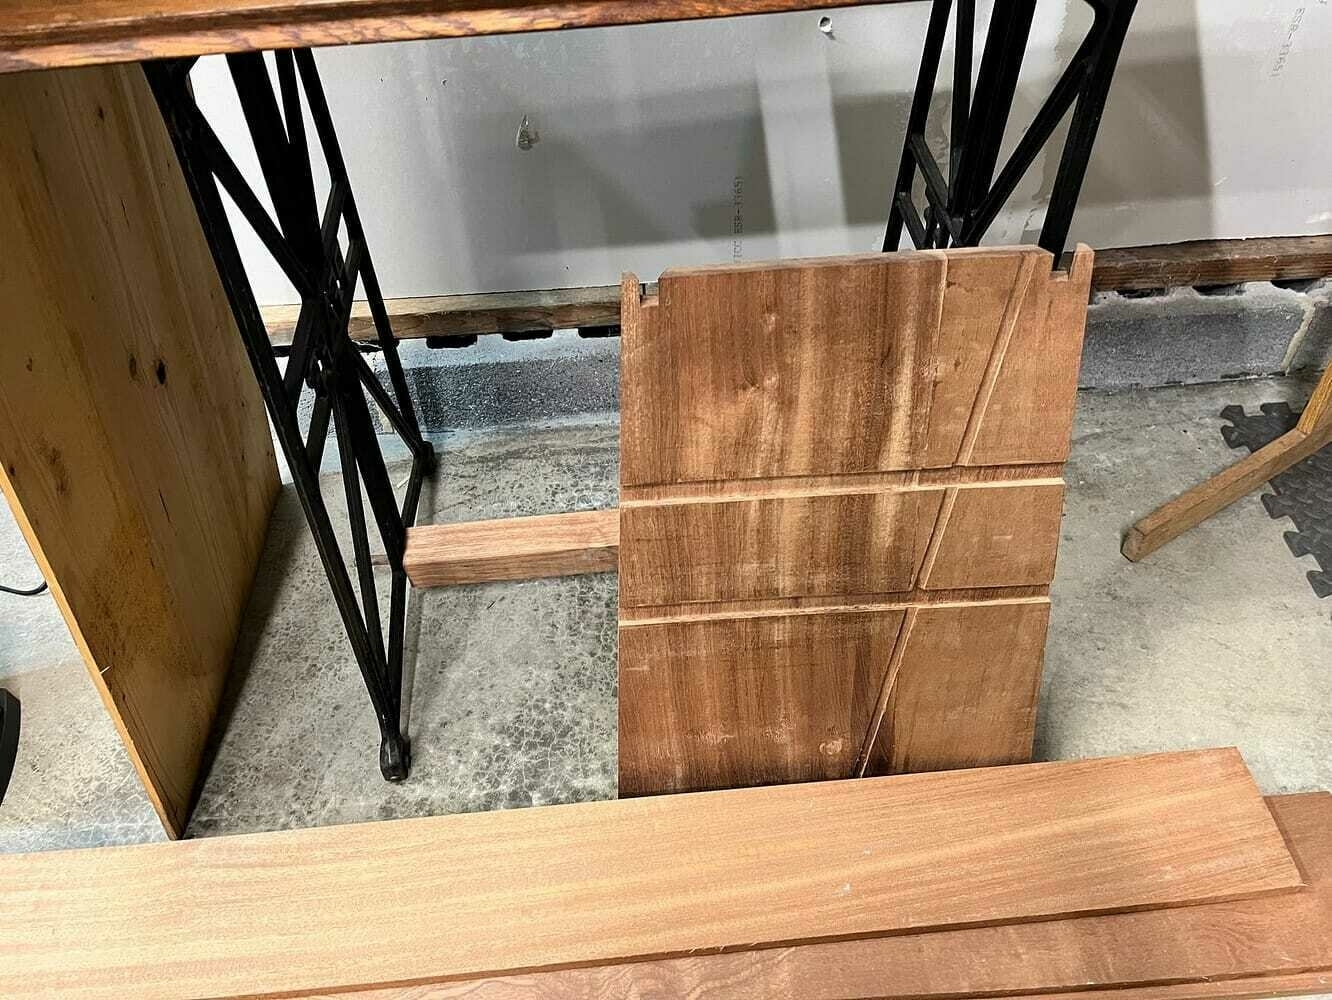
Completed inner side, showing angled groove and dadoes for shelves.

I used the offcuts from the overhang of the shelfs shown here to use as supports in the back. These thin pieces are used to give me a place to attach ties to keep cables tied nicely up. I liked this solution because there was is no waste and the bars on back will serve a useful function.
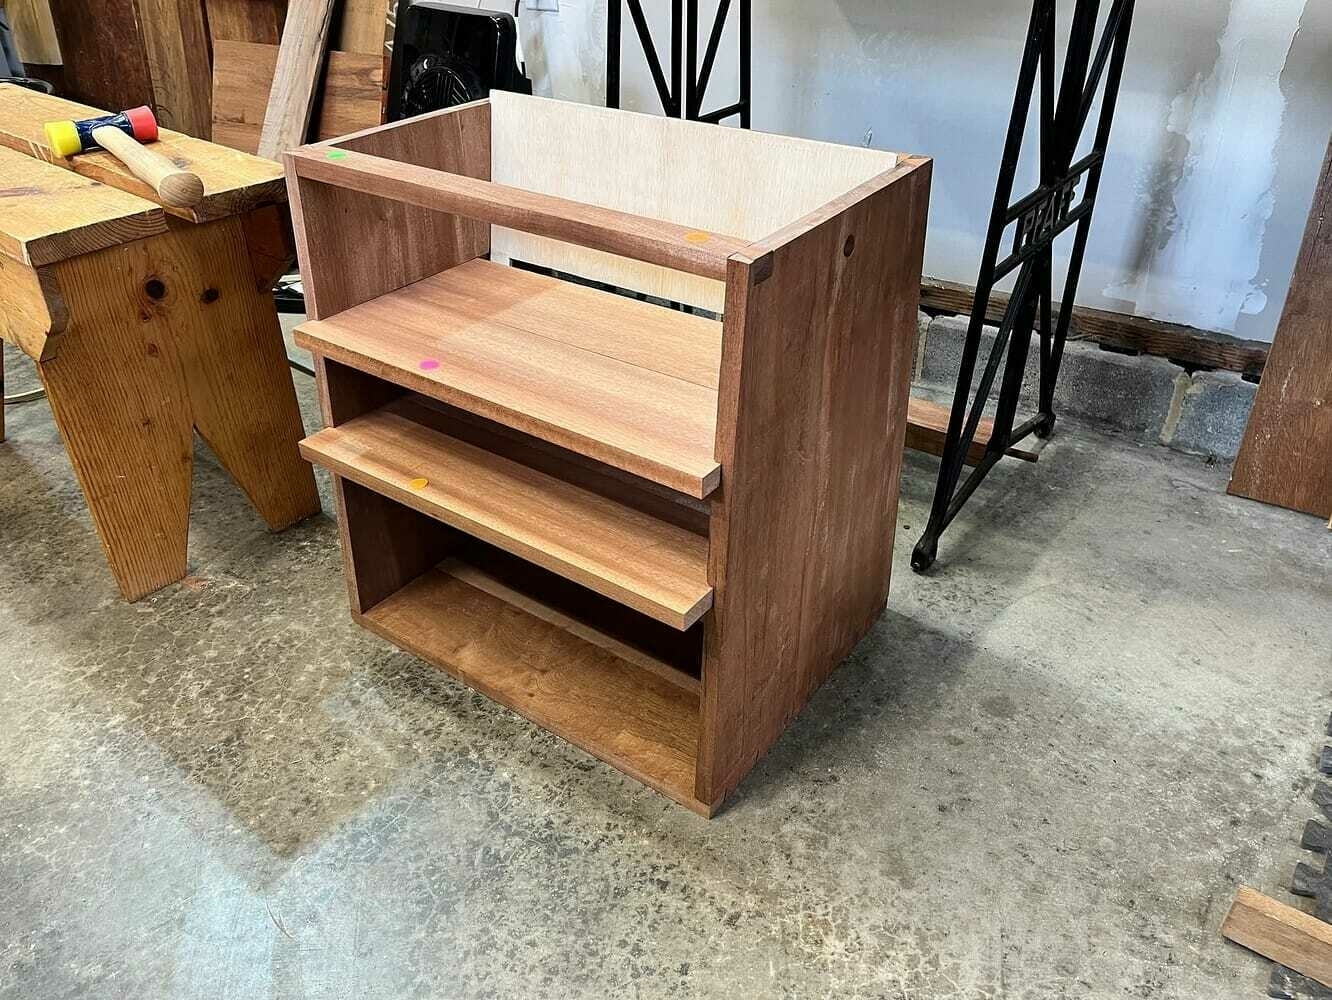
Dry-fit cabinet showing overhang of shelfs to cut off.

Here’s a view of the back to see those offcuts in place.
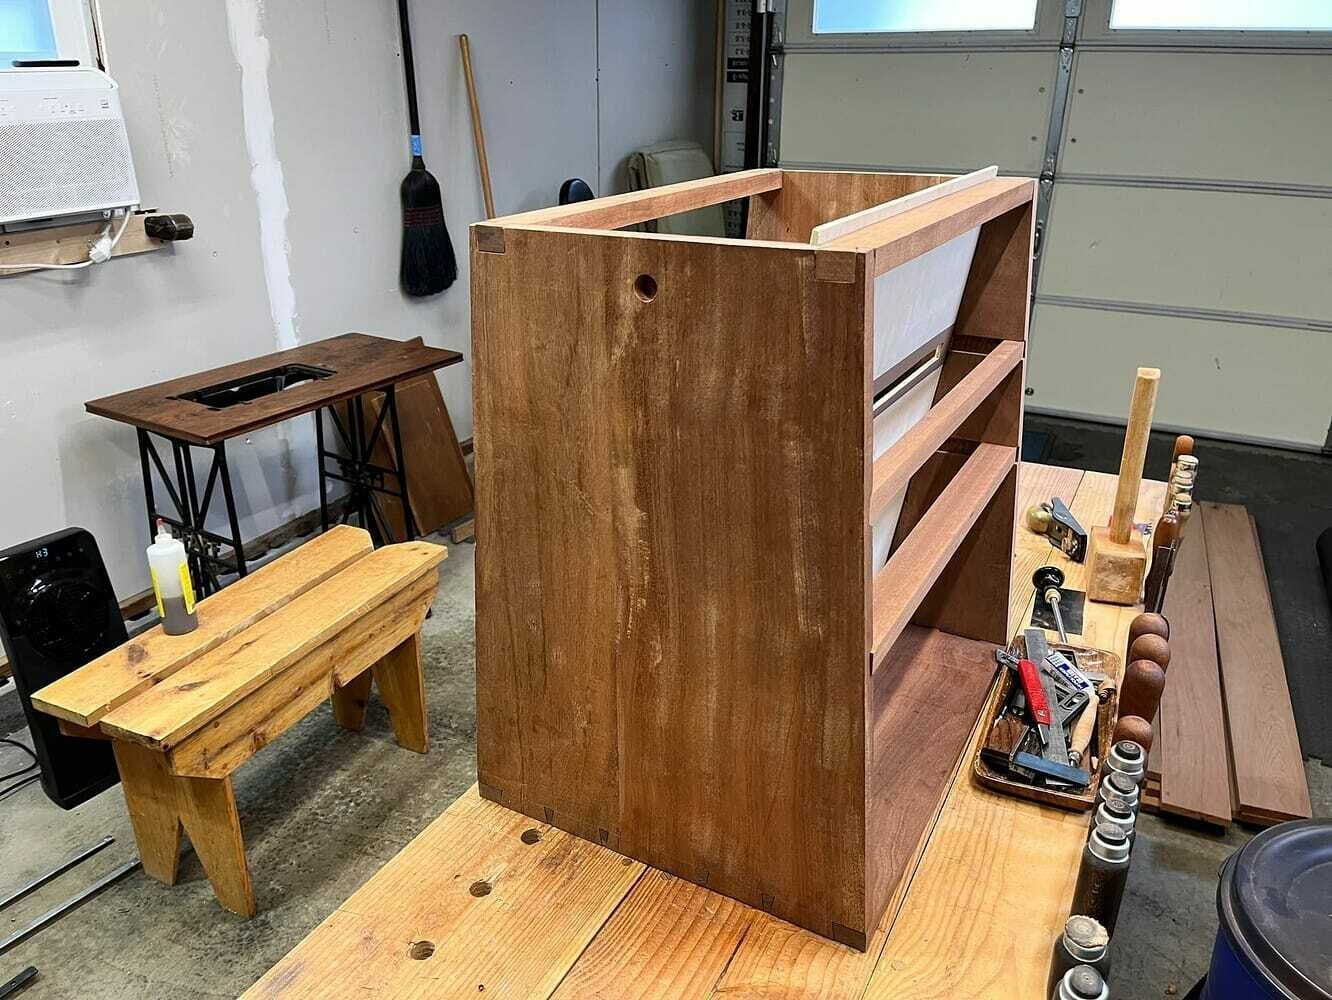
Back of dry-fit cabinet showing offcut bars to hold cable ties.

I decided to use 1/4 plywood for the back angled panel — used mainly to hide cables. So I needed to make holes to pass the cables through. The first attempt at my plywood back failed. I hand chiseled out openings to run cables through. It came out nice, but after I completed it, I tripped after removing it and it snapped in half. Oof. So my second iteration was done using the only power tool in the project: I used a cordless drill and a Forstner bit to cut out six holes to run cables. This was a better solution, overall.
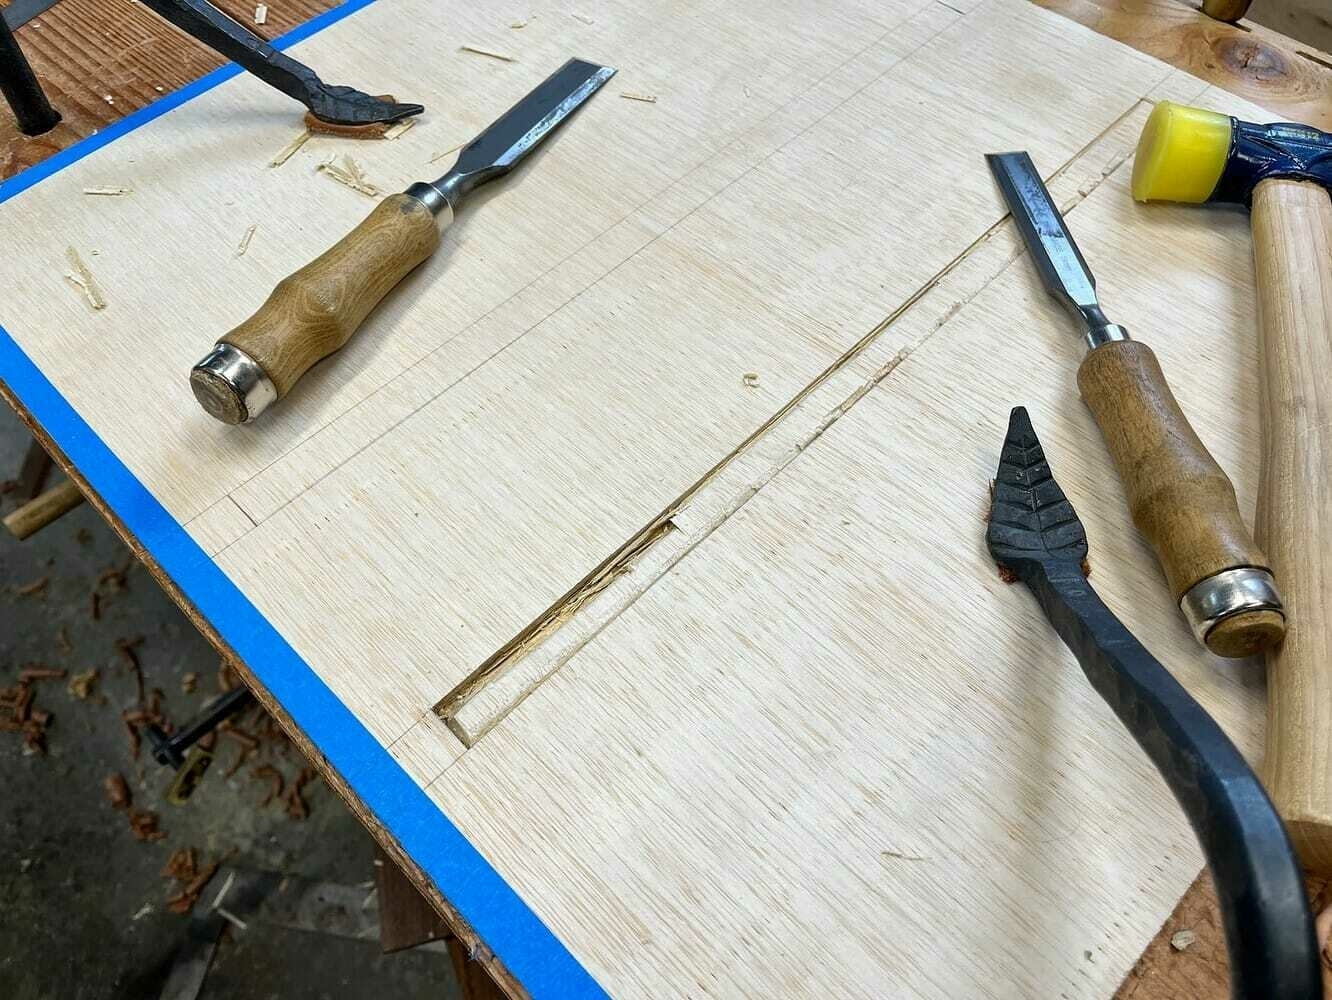
Chiseling out holes in plywood panel, which ultimately failed.

Putting it together

I drilled holes in the top of the cabinet so I could attach walnut dowels to hold the top in place, using the existing openings in the cast iron frame to keep each dowel locked in.
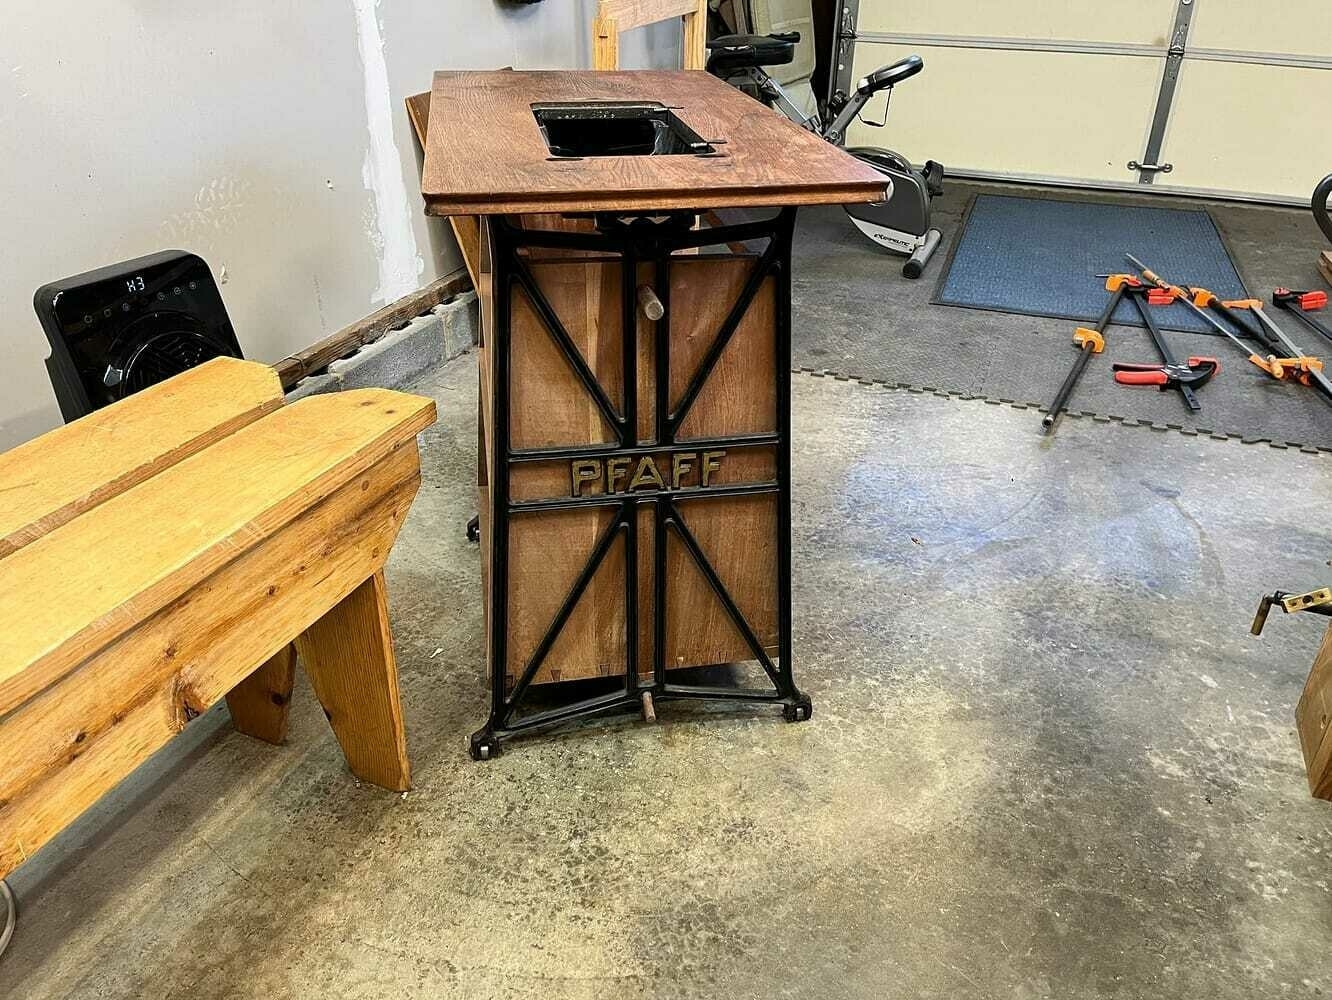
Side view of cabinet showing dowels holding it in place in the iron frame.

Here’s the dry fit. The medallion on the top shelf you can see below on the top shelf was mounted to the cast iron sewing machine; I was able to delicately remove it and place it here.
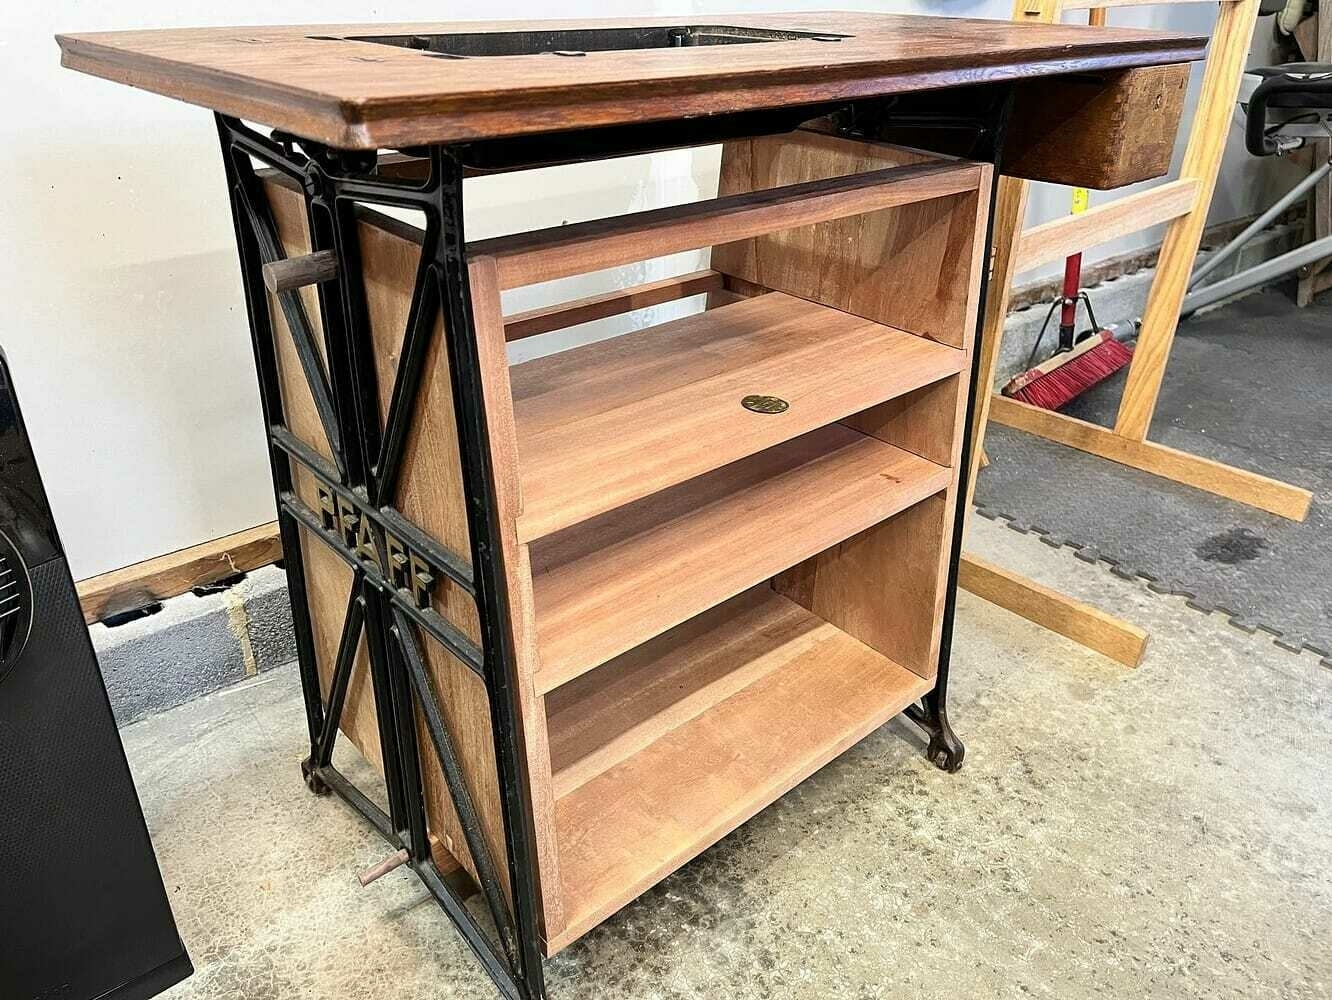
The full dry fit cabinet, showing medallion from sewing machine placed on top shelf.

A close-up of the medallion, just because I think it’s cool. We lived in Kaiserslautern, Germany, for seven years (where we picked up this sewing machine table at a flea market), so this is a touch of something special for us to see this mounted here. We’ve been lugging this table around for about two decades, but never had space for it. I was about to give it away, when this project idea came into mind. I’m happy that I found a way to turn it into useful furniture.
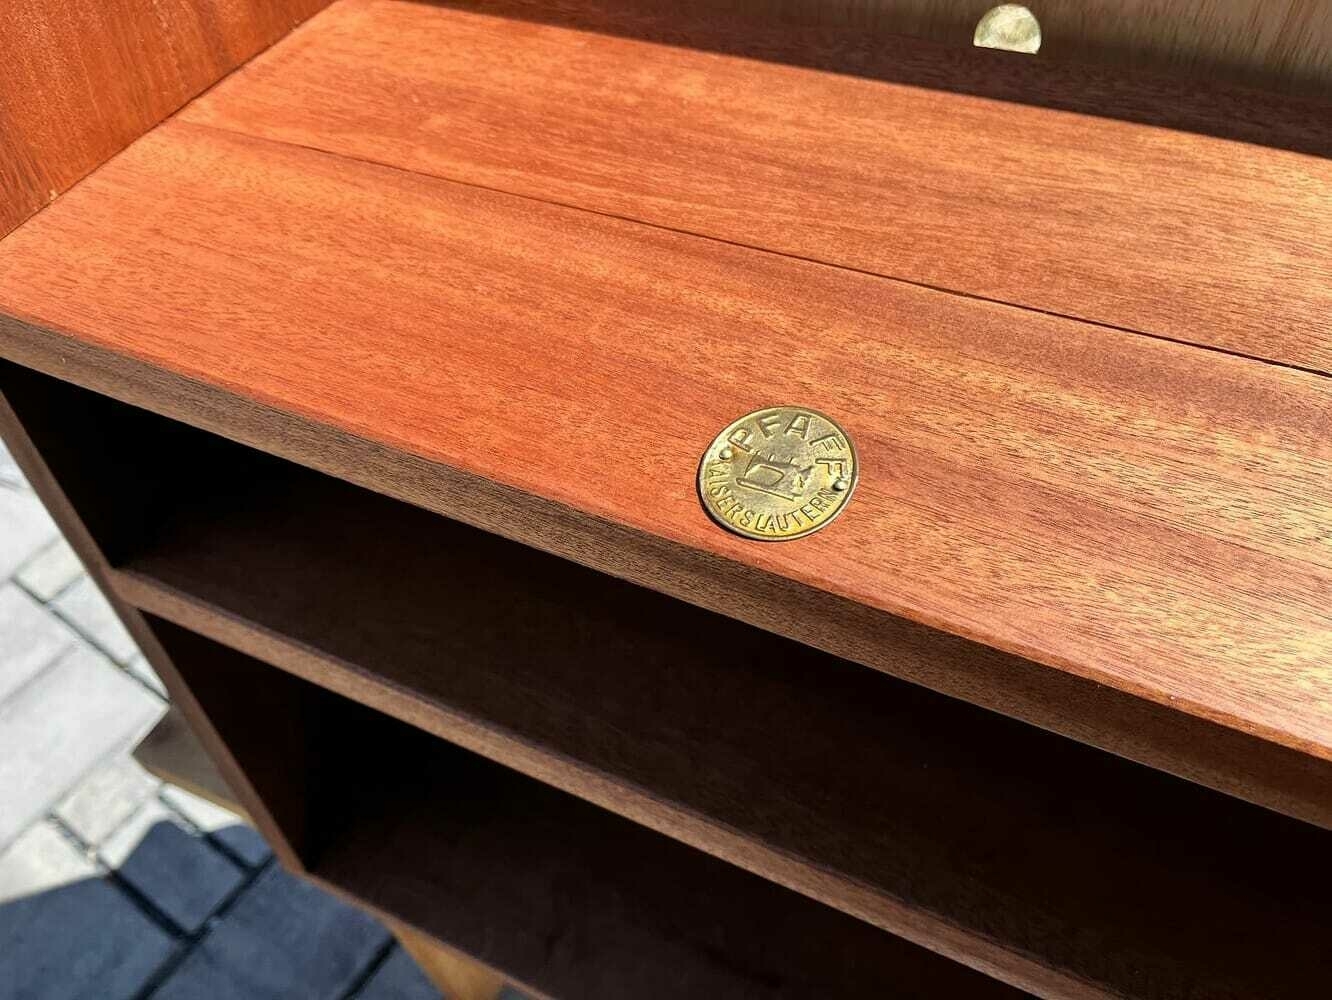
Close-up of medallion on top shelf.

I finished the cabinet with Osmo top-oil, because I’m lazy with finishing and like that I can just rub it on, it looks nice, and it dries fast.
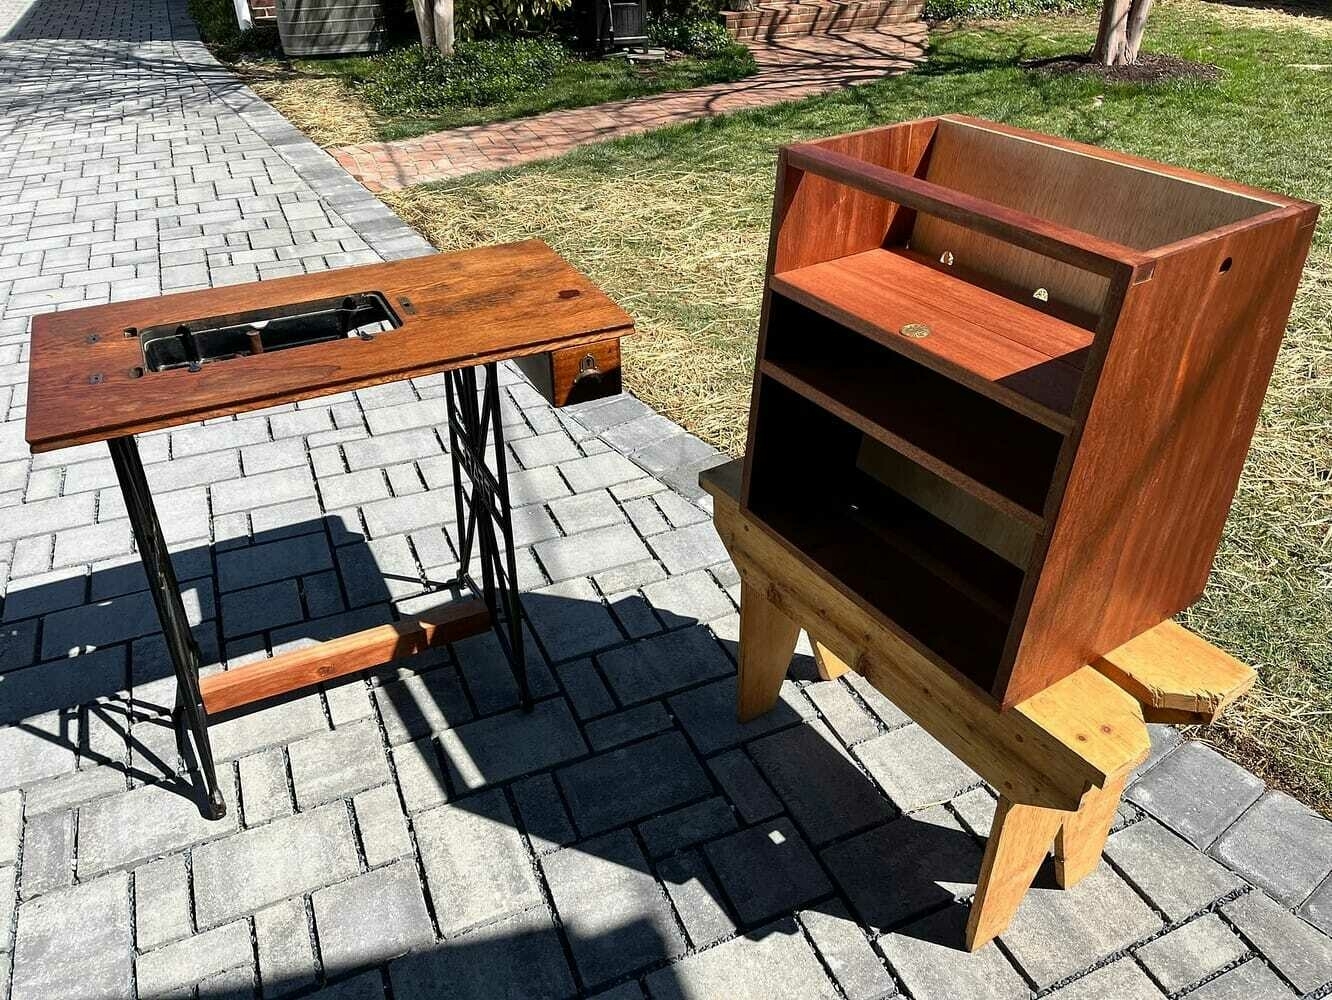
Completed cabinet with finish applied.

The back of the cabinet, showing the slide-in 1/4 panel with holes for cables. I left this panel unglued so I can easily slide it in and out. This was a critical decision, as I aligned the holes so they were hidden behind the shelves, and a few of the cables I had to fit through were too fat to get past the shelves, so this made it easy to move it around to get cabling set up. The holes are also good to promote airflow, I figure, as well as the open top. I also may someday need to add more holes, so now that’s easy to do.
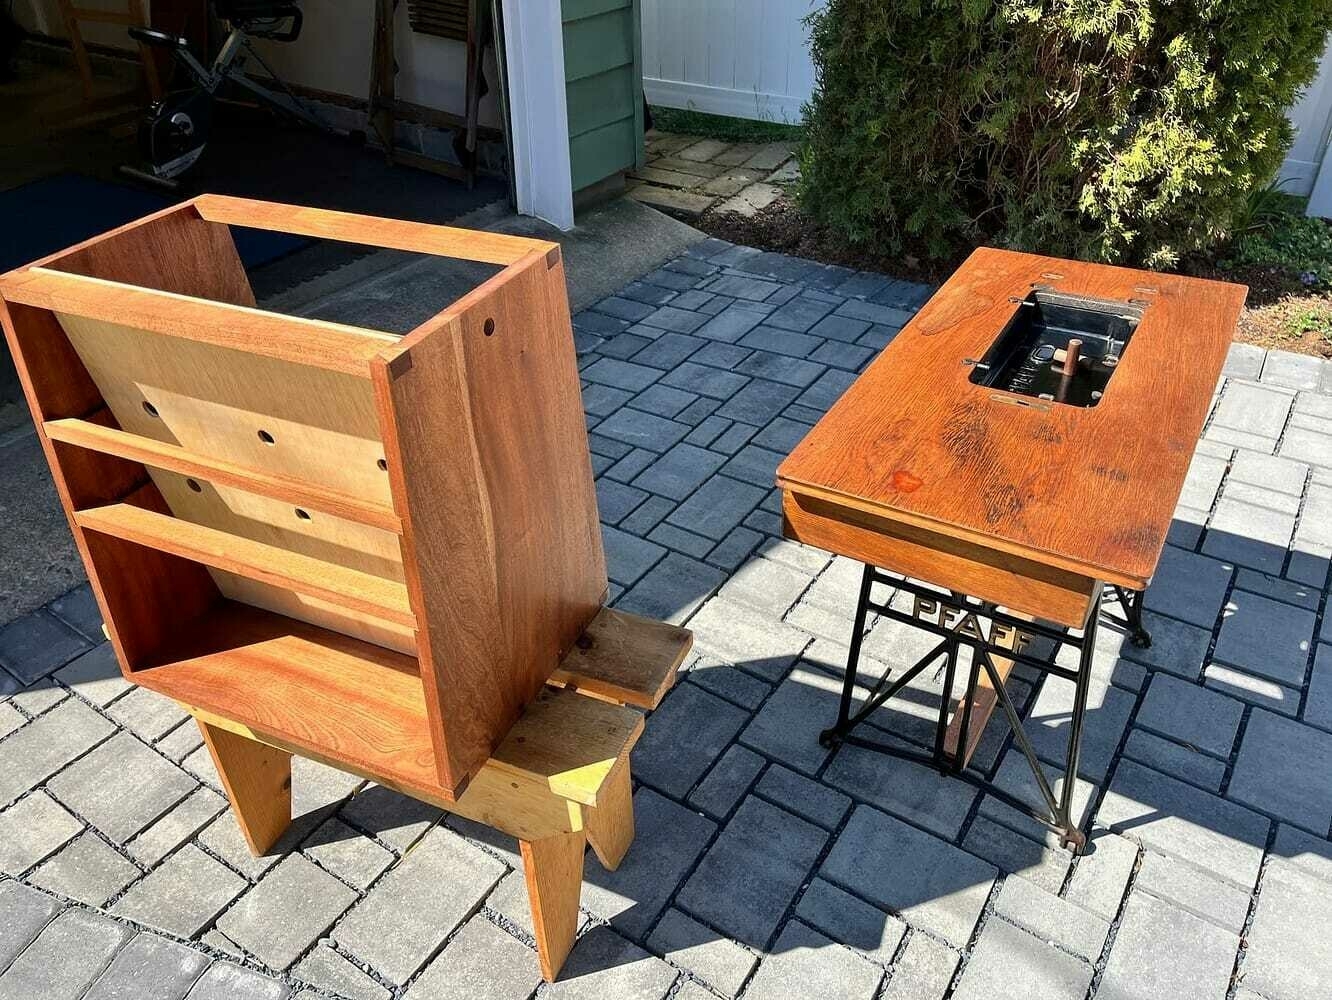
A view of the back of the cabinet, showing the angled plywood panel with cable holes.

Finished build

Here’s what it looked like in place, without anything in it.
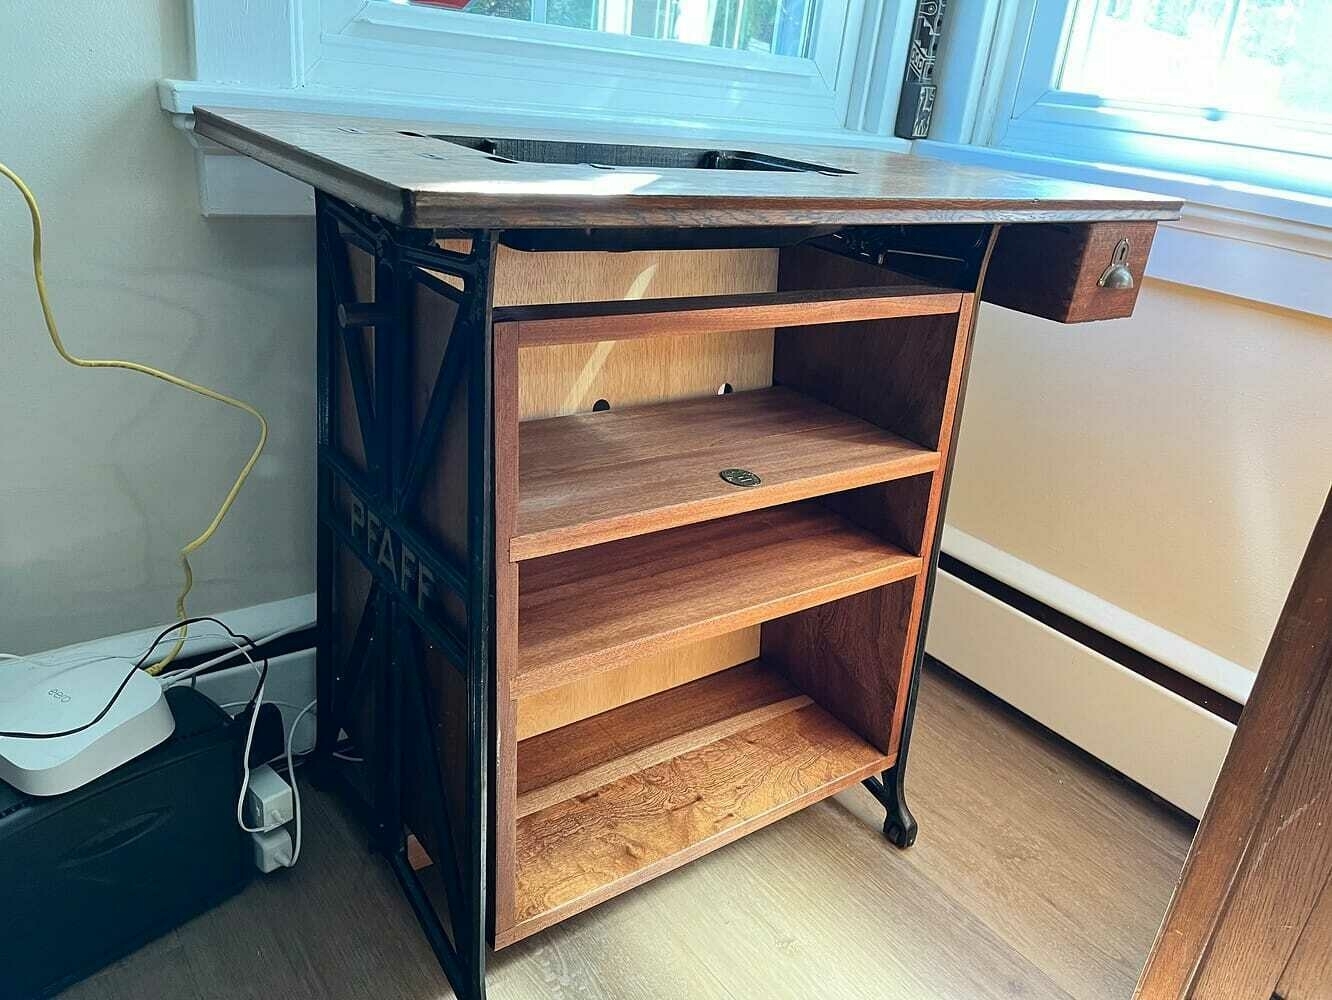
the completed cabinet in place, with nothing on it.

And here is the back that goes against a wall, with all the cabling hooked up. It ain’t pretty, but I don’t have to look at any of this, it’s all nicely hidden behind the panel.
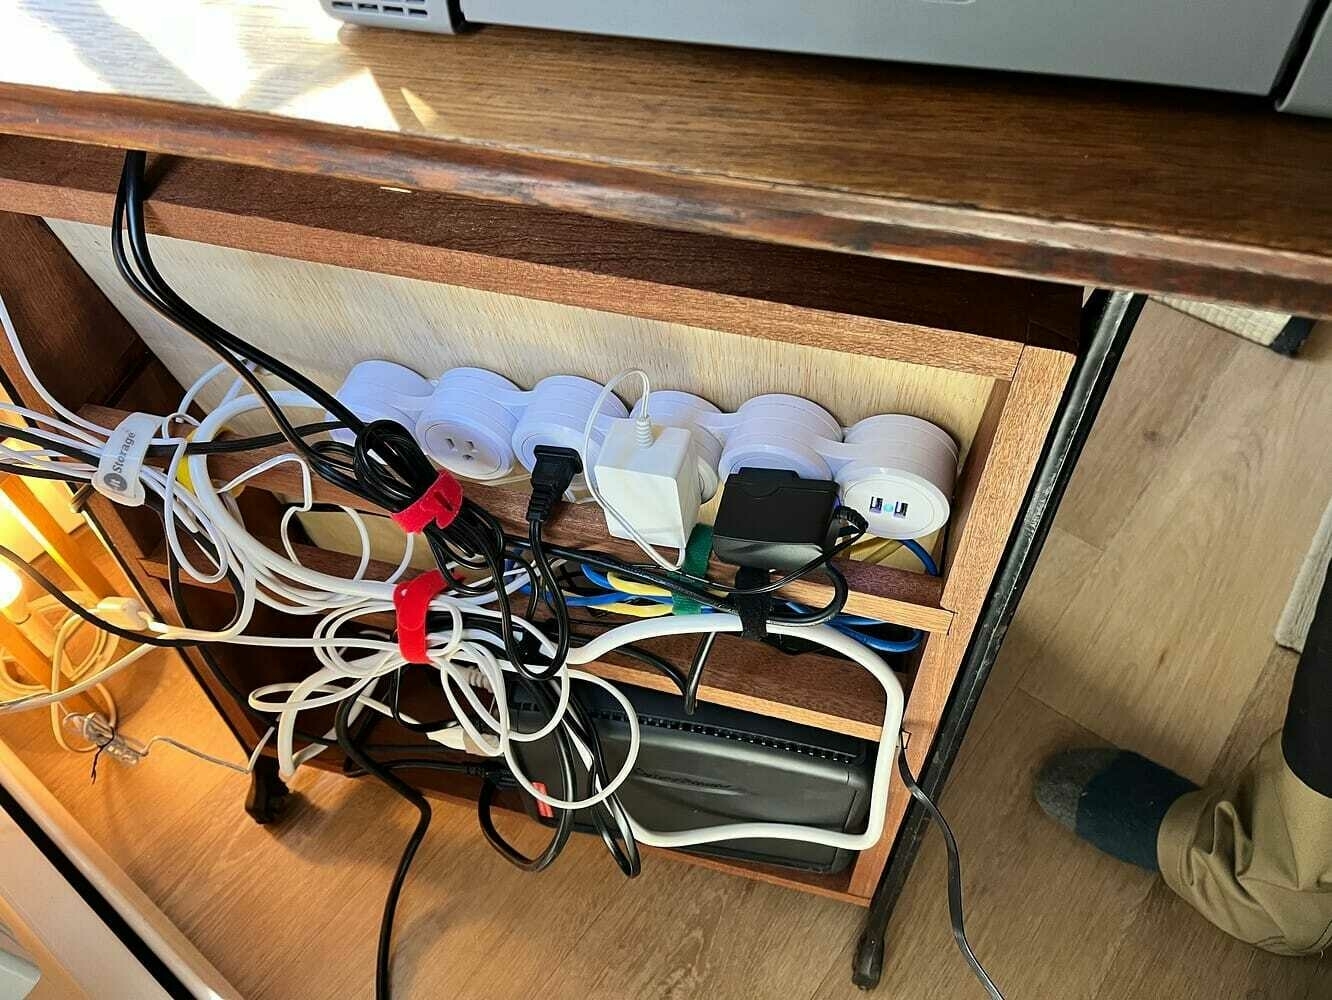
The cabinet back after getting all the equipment set up; there are tons of cables.

And here is the finished piece in place and in use with all the gear hooked up and running. There are only two visible cables: (1) the power plugged into the wall that goes to the big UPS and a black ethernet cable that runs to my desktop computer so I can be hardwired. The ONT for my new fiber network enters the house and is mounted on the wall directly behind the sewing machine table. The cast iron well where the sewing machine was mounted on the top of the table is covered by the printer, but it’s holding a hidden Anker 5-port USB hub with the cables poking out behind the printer for charging various things. The shredder and a corner light behind the shredder on the floor, along with a HomePod on the desktop, are also all connected up here behind the table without any visible cables. I’m pleased with how it turned out.
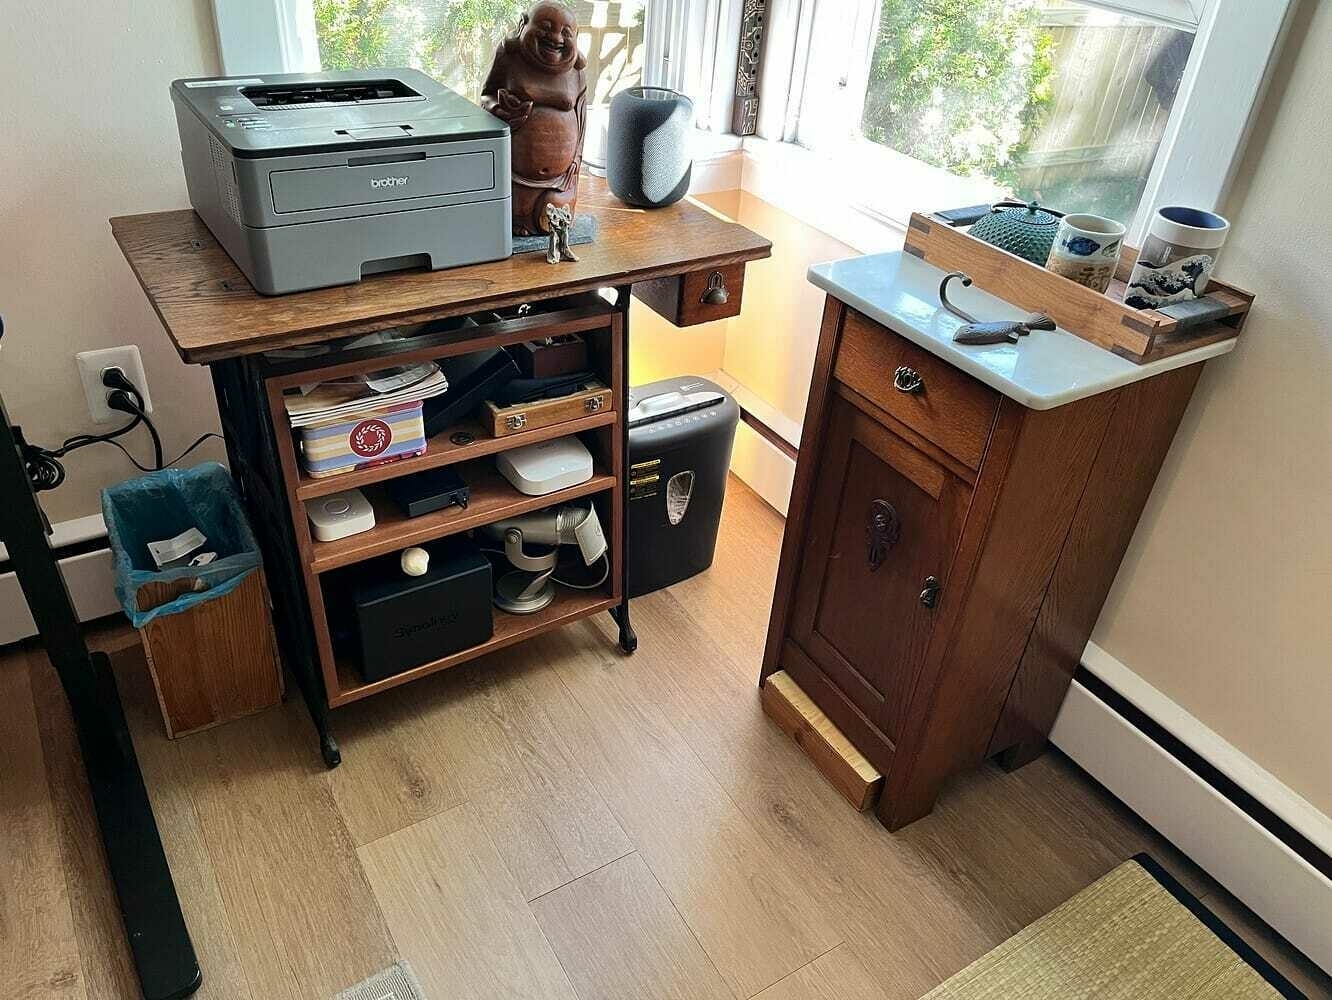
Completed project with all the gear in place.

Wenge Pencil Box

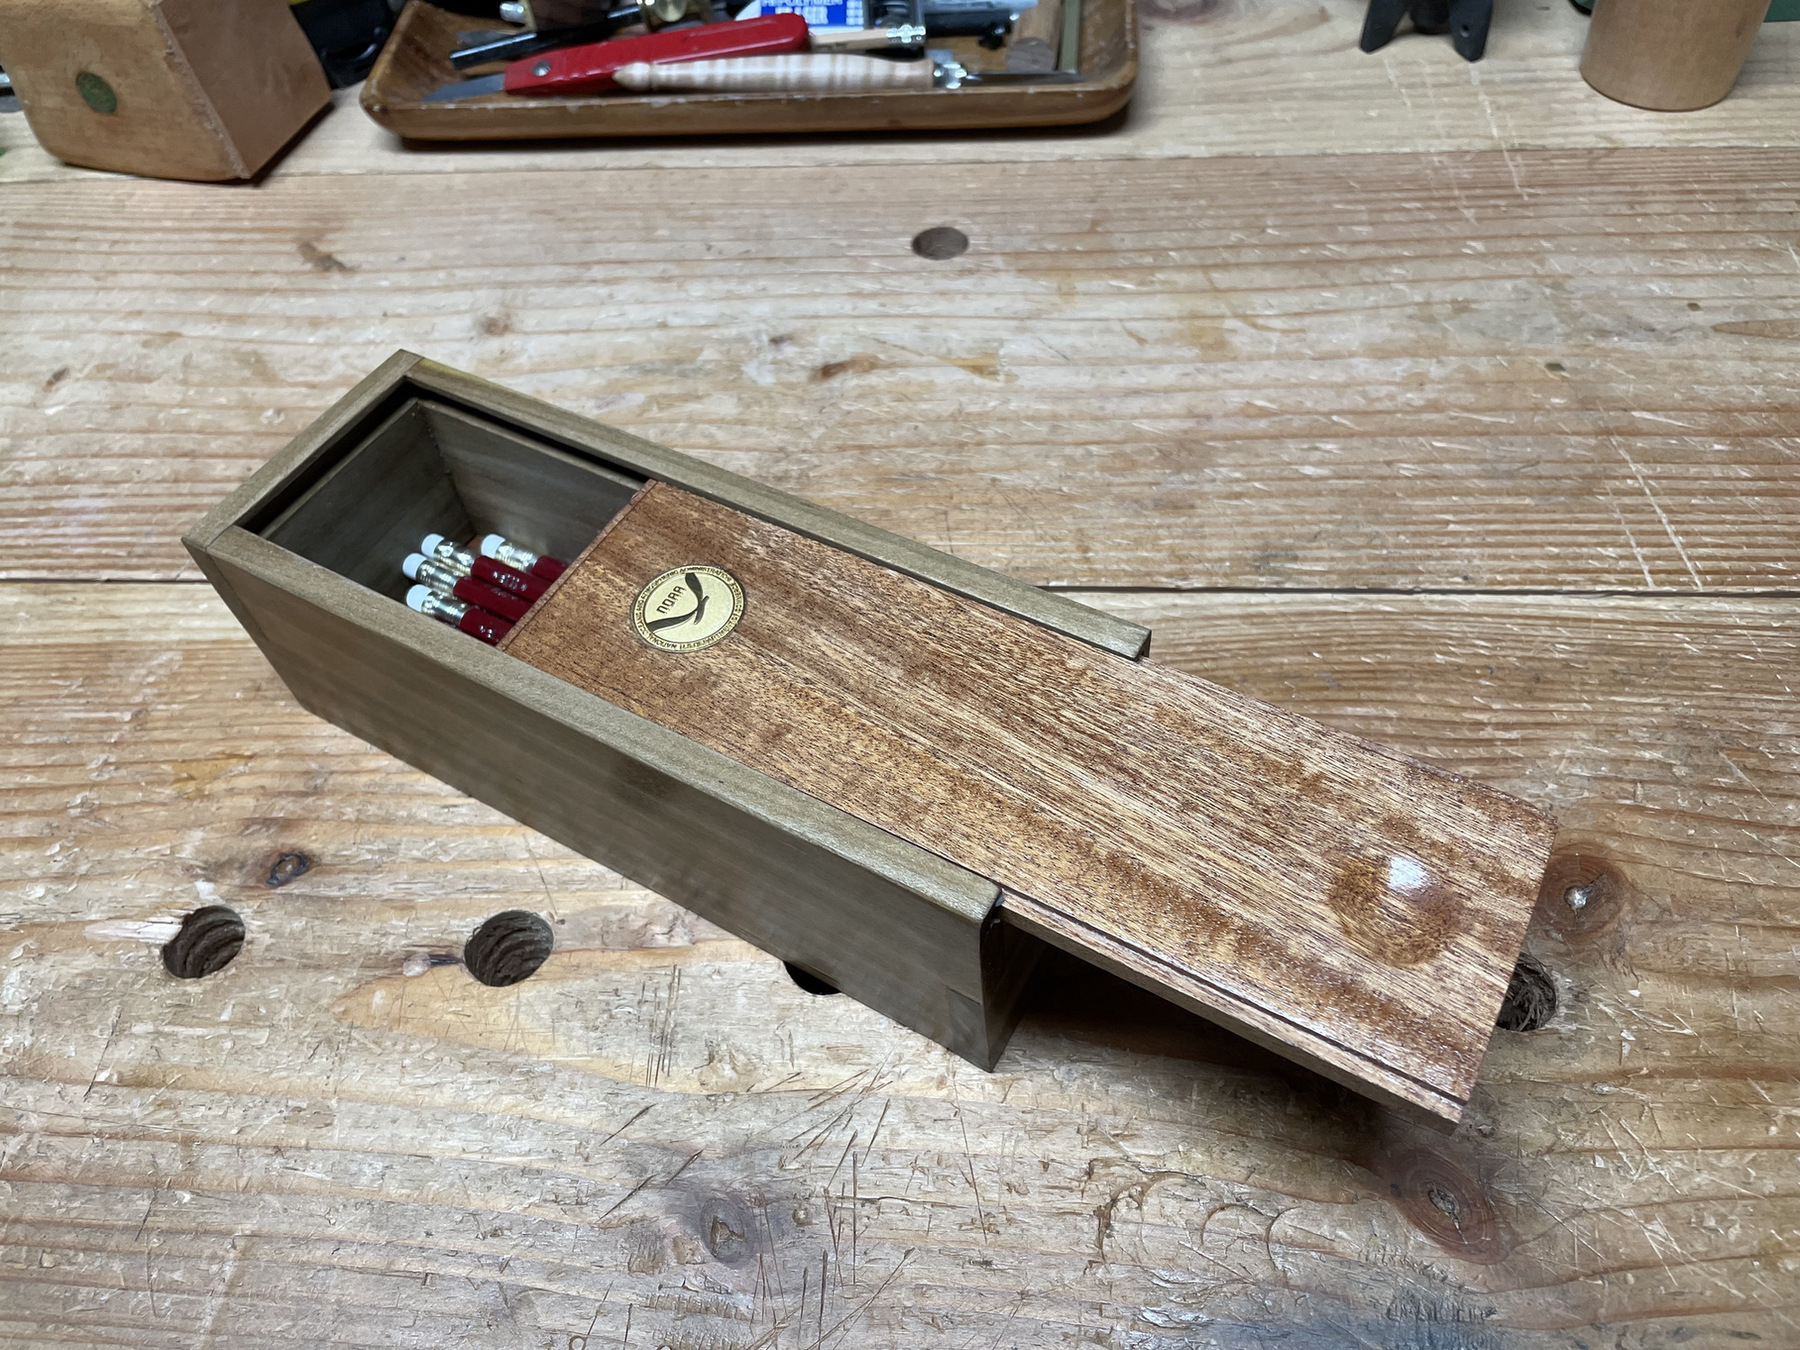
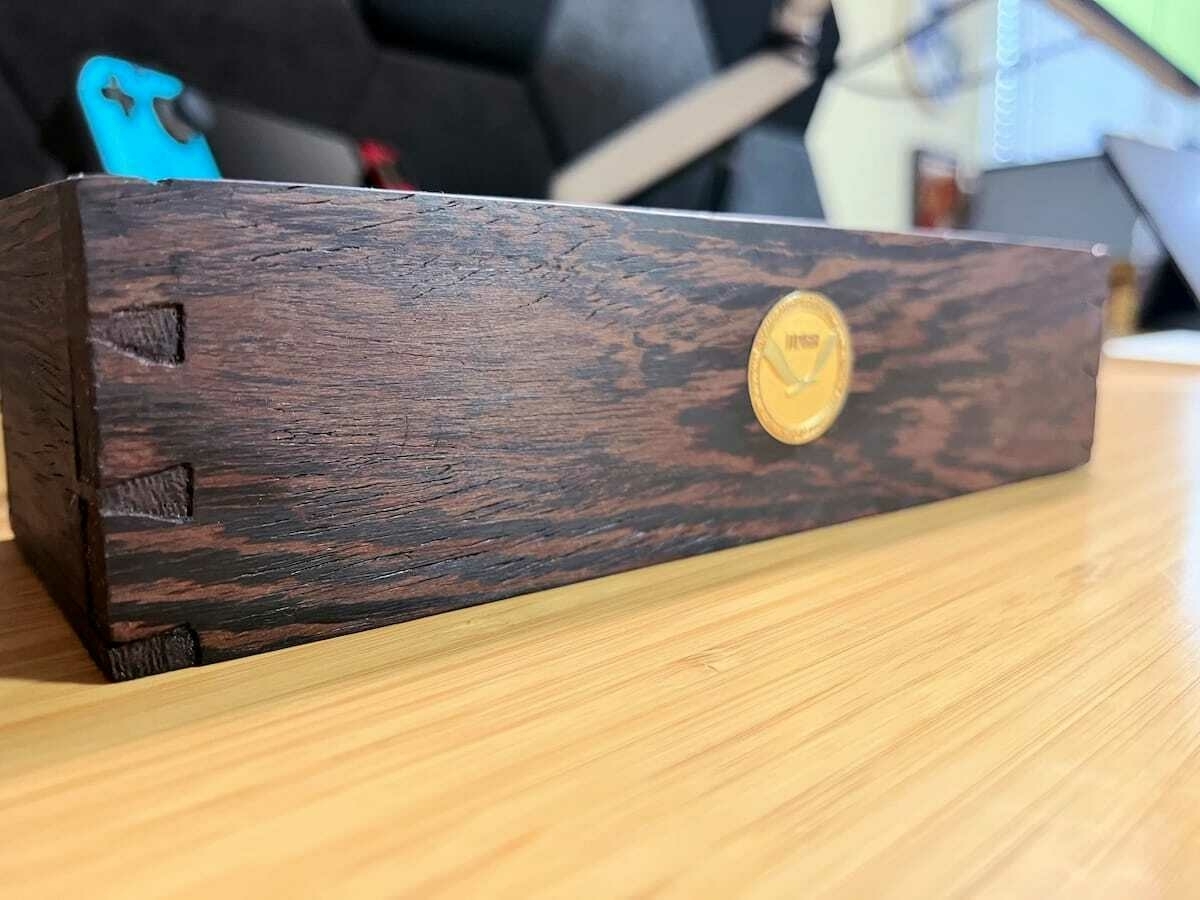
I finished up a gift pencil box for a friend. I have a bunch of lapel pins that I use for these projects. I cut off the back of the pin and then carve out a place to inset the pin into the box. Makes for a nice keepsake.

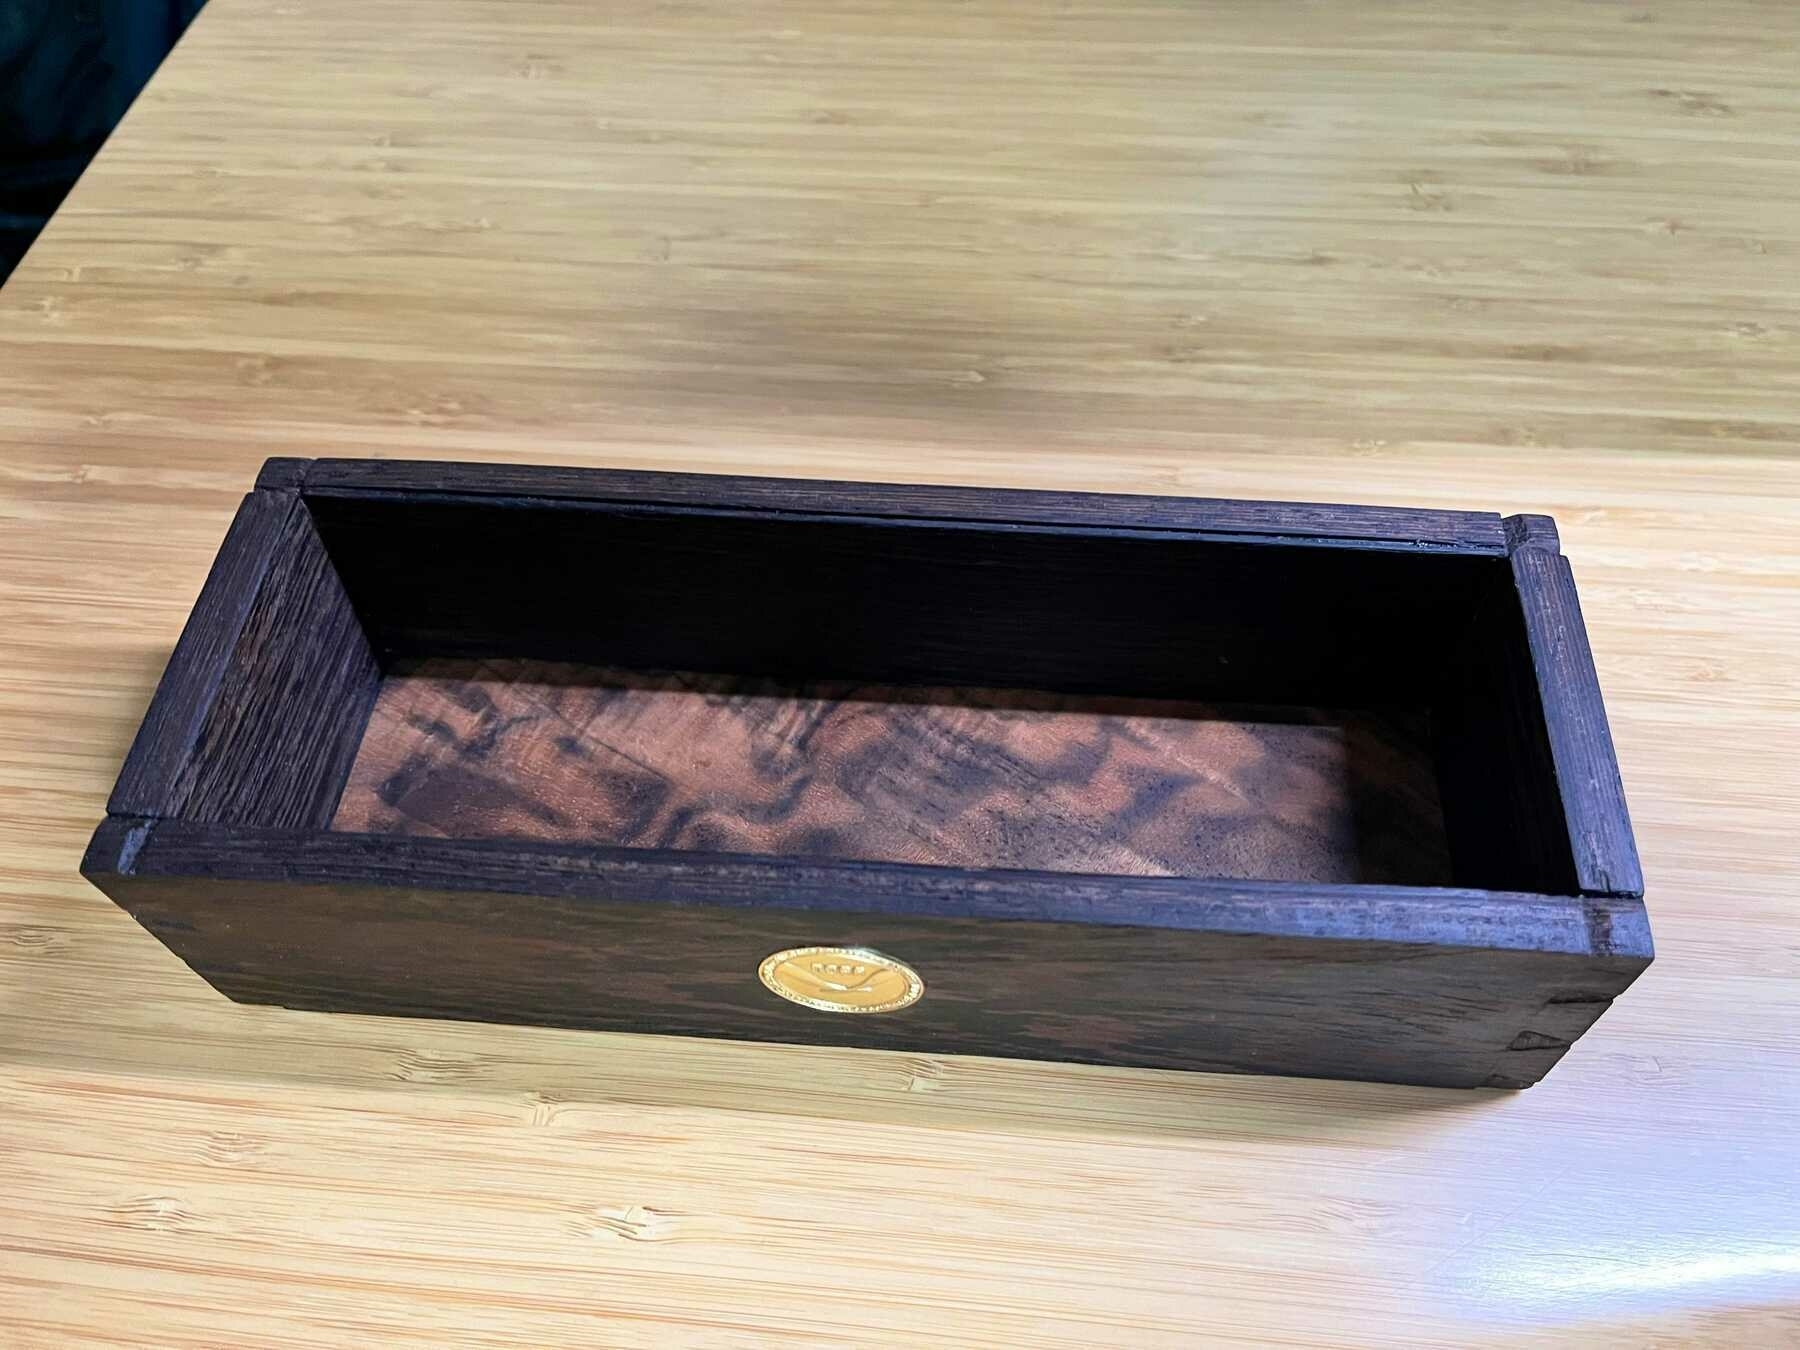
For this project, I used wenge for the sides and walnut for the bottom. I challenged myself to cut the smallest dovetails I’ve ever attempted and it was indeed a challenge. I almost scrapped this project to start over because I had so many problems. This is the completed box from the front:

wenge box front view

And from the top, showing the walnut bottom:

wenge box top view showing walnut bottom

I was originally going to make a sliding lid for this project, but that didn’t work out. I cut grooves for lid, but I cut them too close to the top of the box, so the top edge split the first time I tried to slide in a lid. So I improvised and shaved off the top grove to make it an open box. For the box top corners, I used a chisel to make little bevel edges so it looks like I planned it that way. I also had a heck of a time with the tiny dovetails. When I started this, I was thinking “I wonder how small I can go with dovetails?” Well, this is apparently as small as I can go with my experience level.

A few items of note for this project:

I used a Raamtang vise made many years ago. As I do many smaller projects, I find myself turning to this tabletop vise quite often. It’s a very useful appliance.

Raamtang Dutch tabletop vise

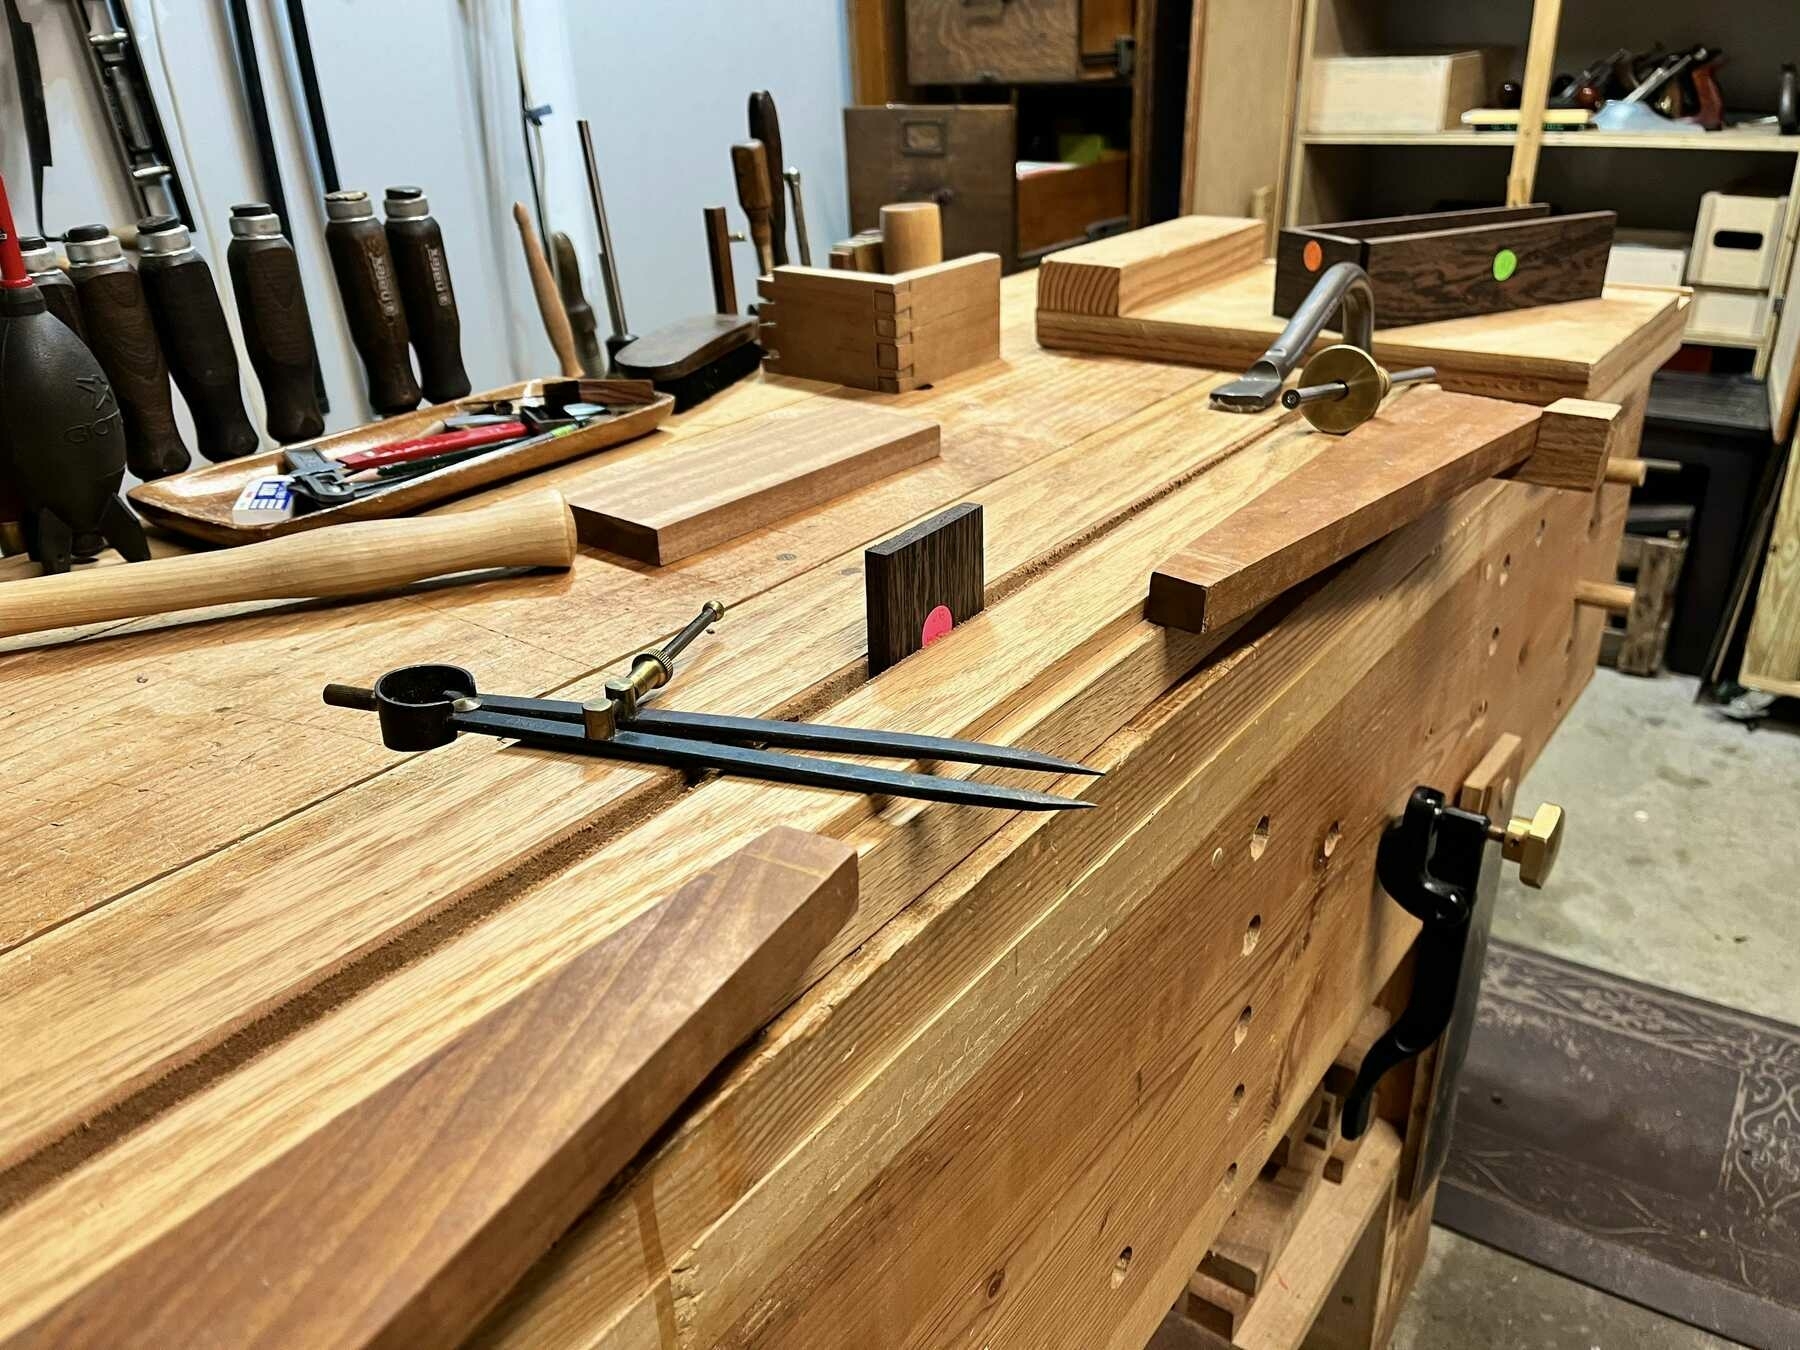
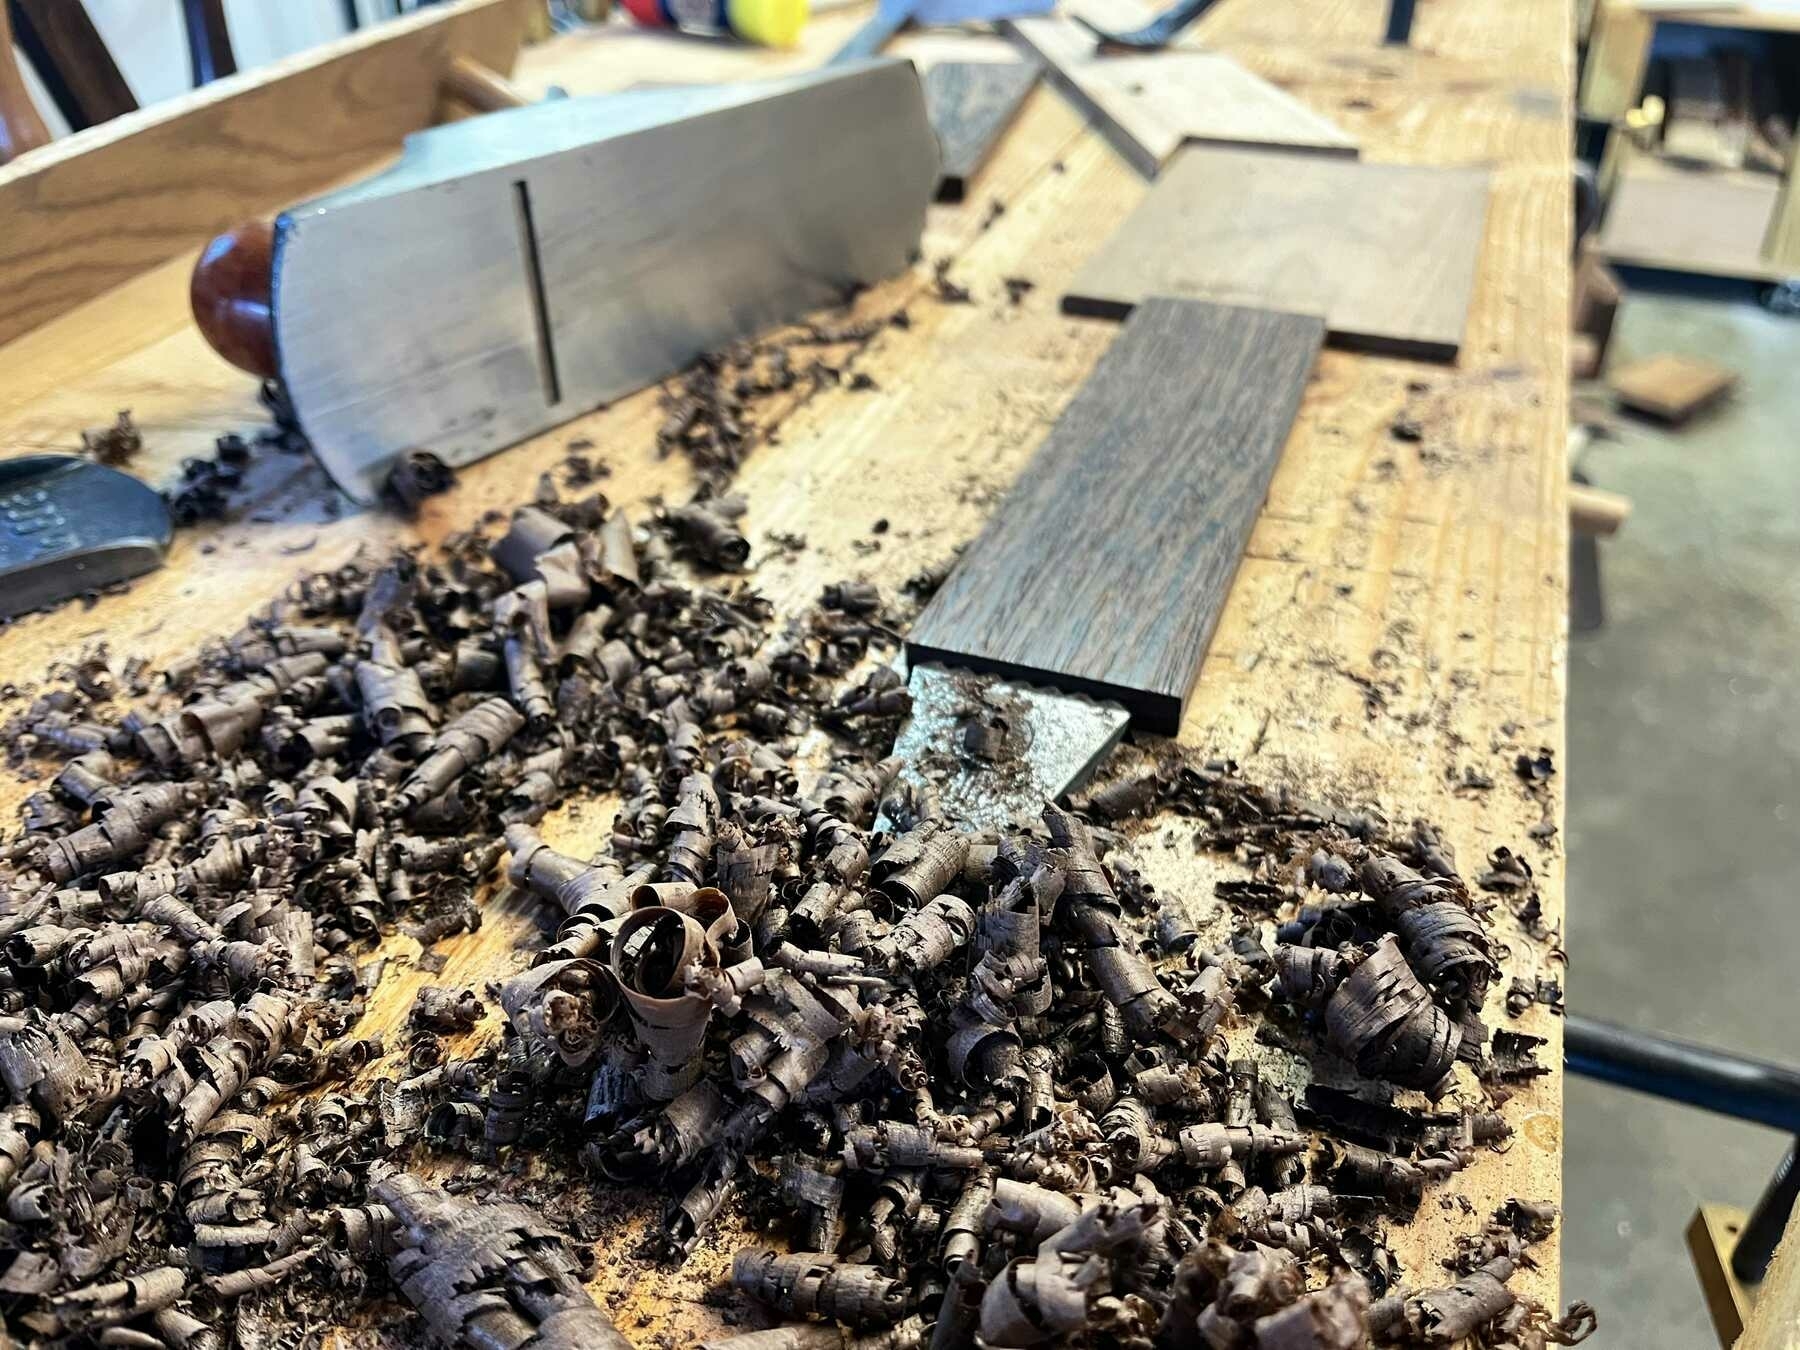
Planing the thin pieces took some creative work holding on my Nicholson bench.

work holding on my bench to plane small pieces

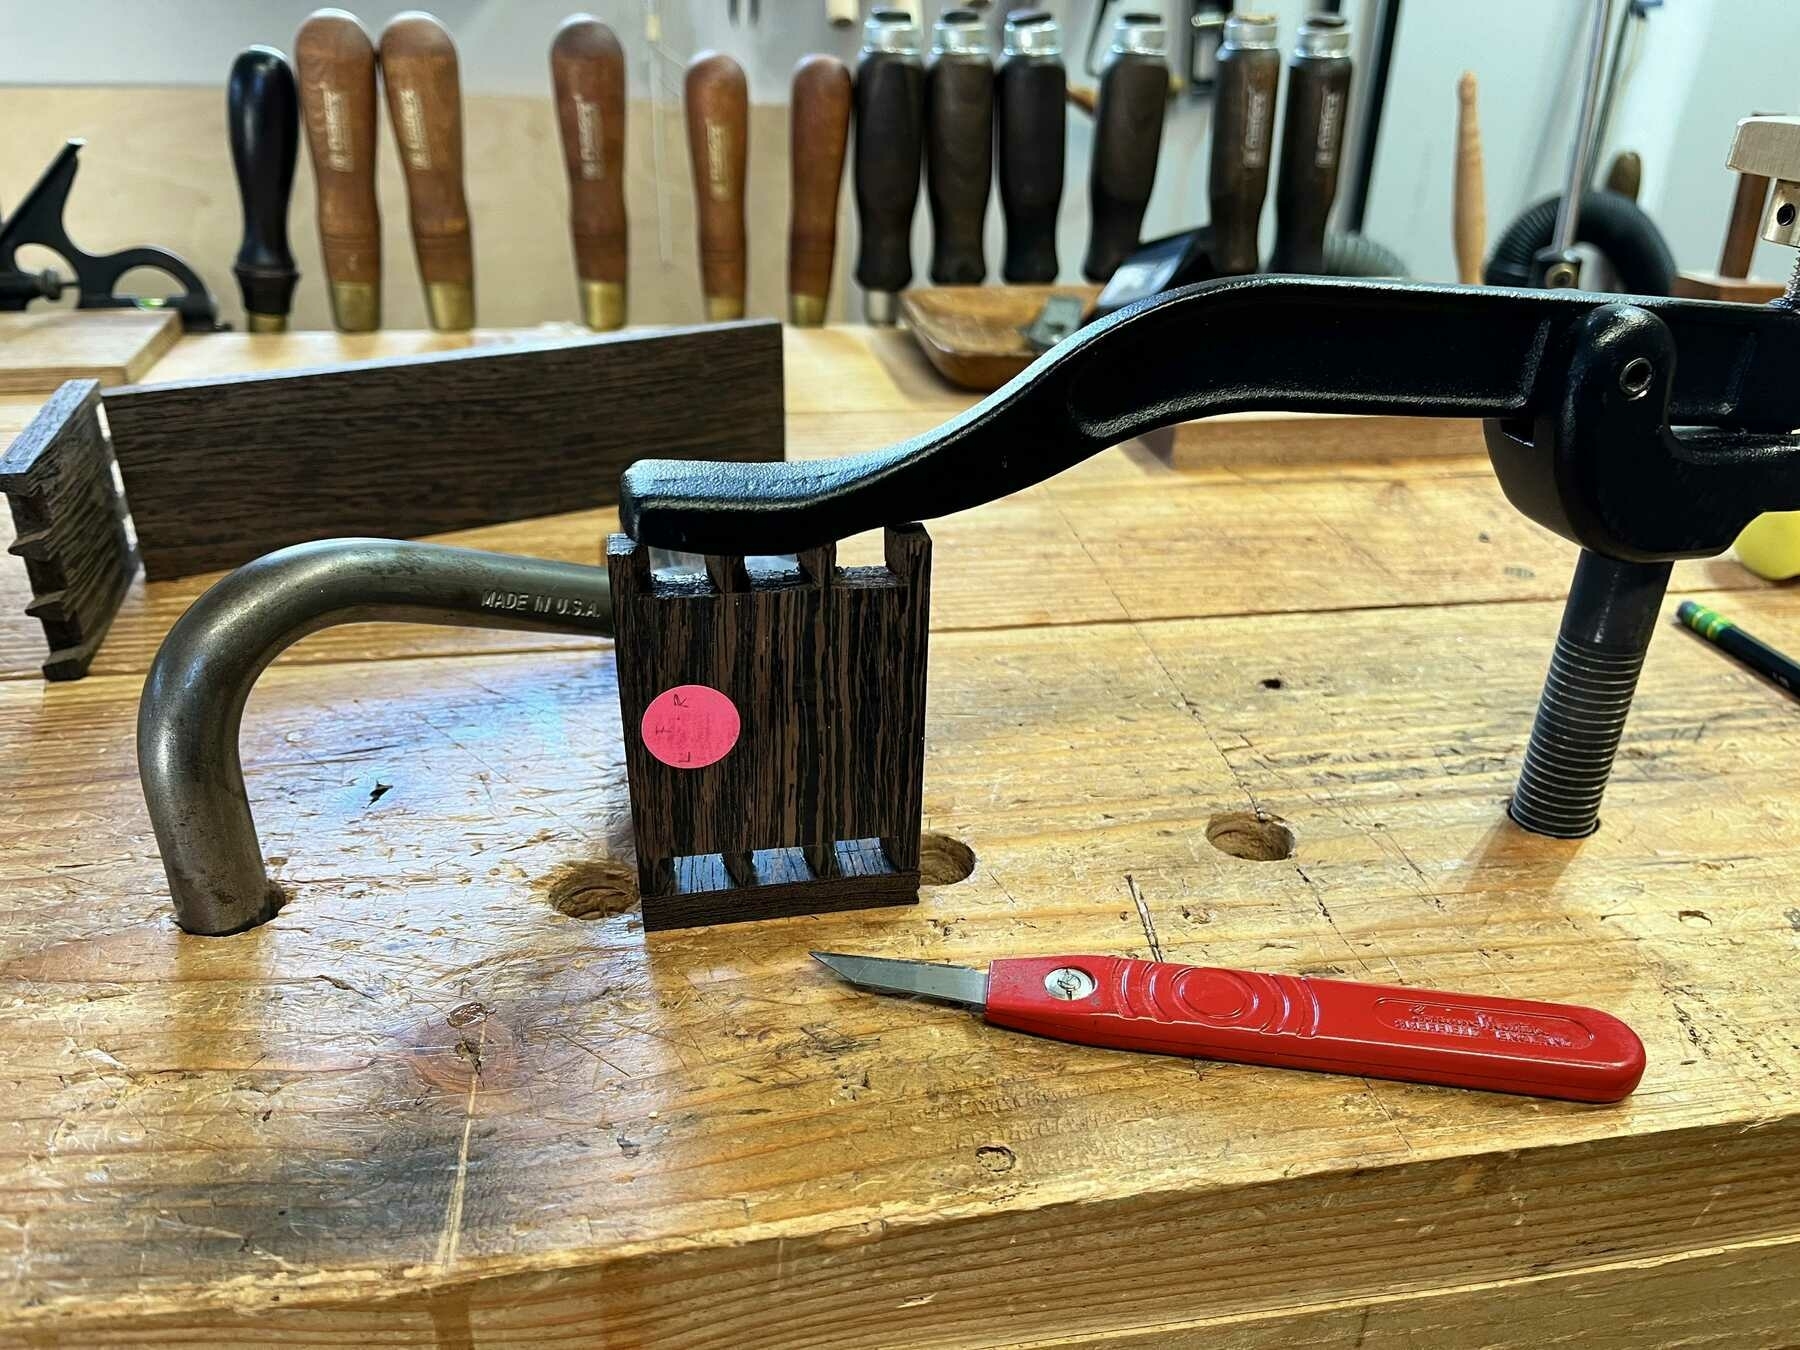
This is the setup I used to mark the tails. The hardest part about working with this wood: I could not see the lines, the wood is so dark.

marking the tails

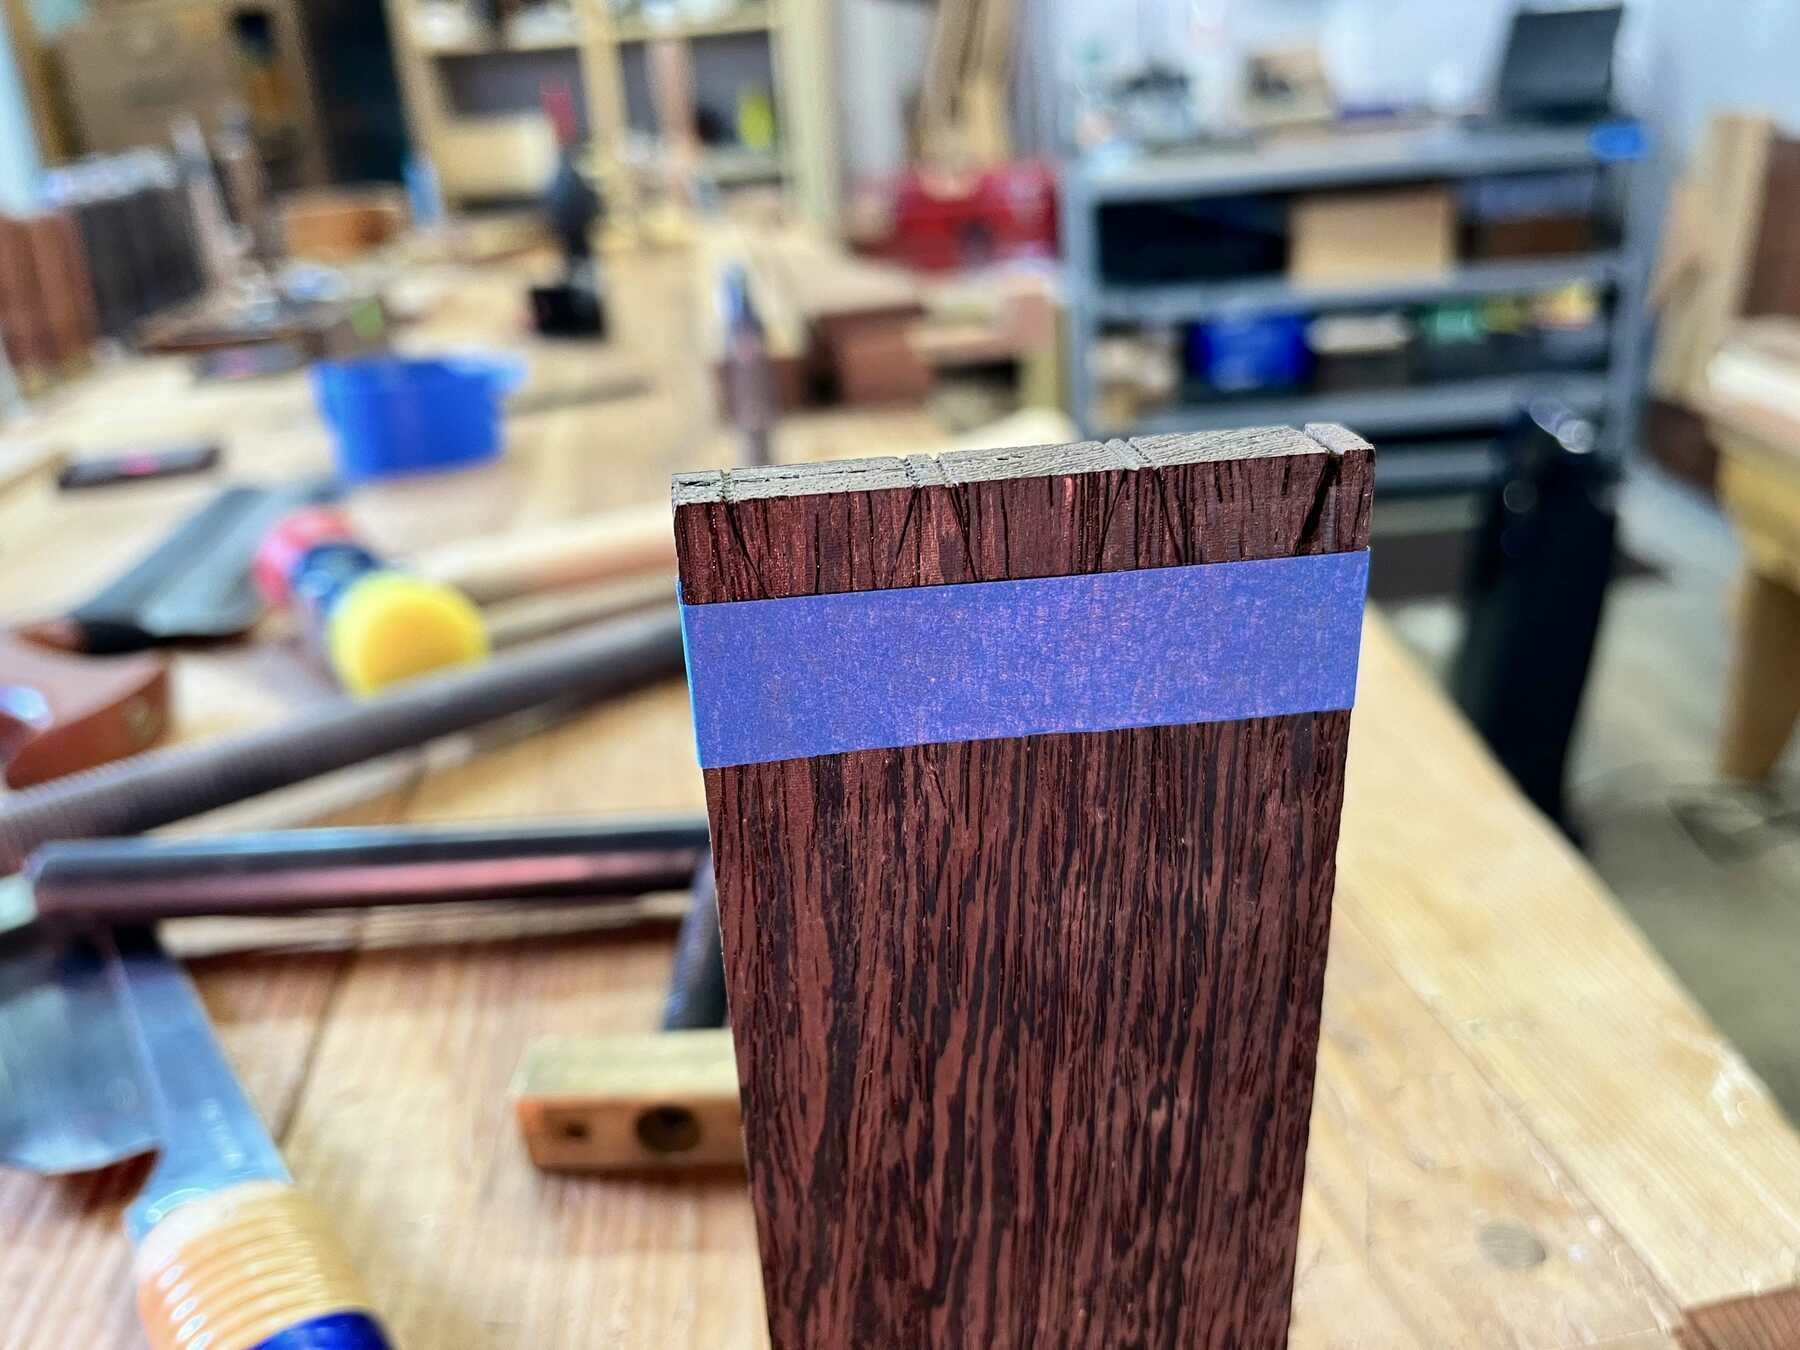
When I was cutting the dovetails to the line, I used blue tape to mark where to stop since I had so much trouble seeing my lines. I used a Dozuki saw to cut the dovetails and it worked very well. I think I prefer using this saw over my western dovetail saw.

blue tape showing stop line on tails

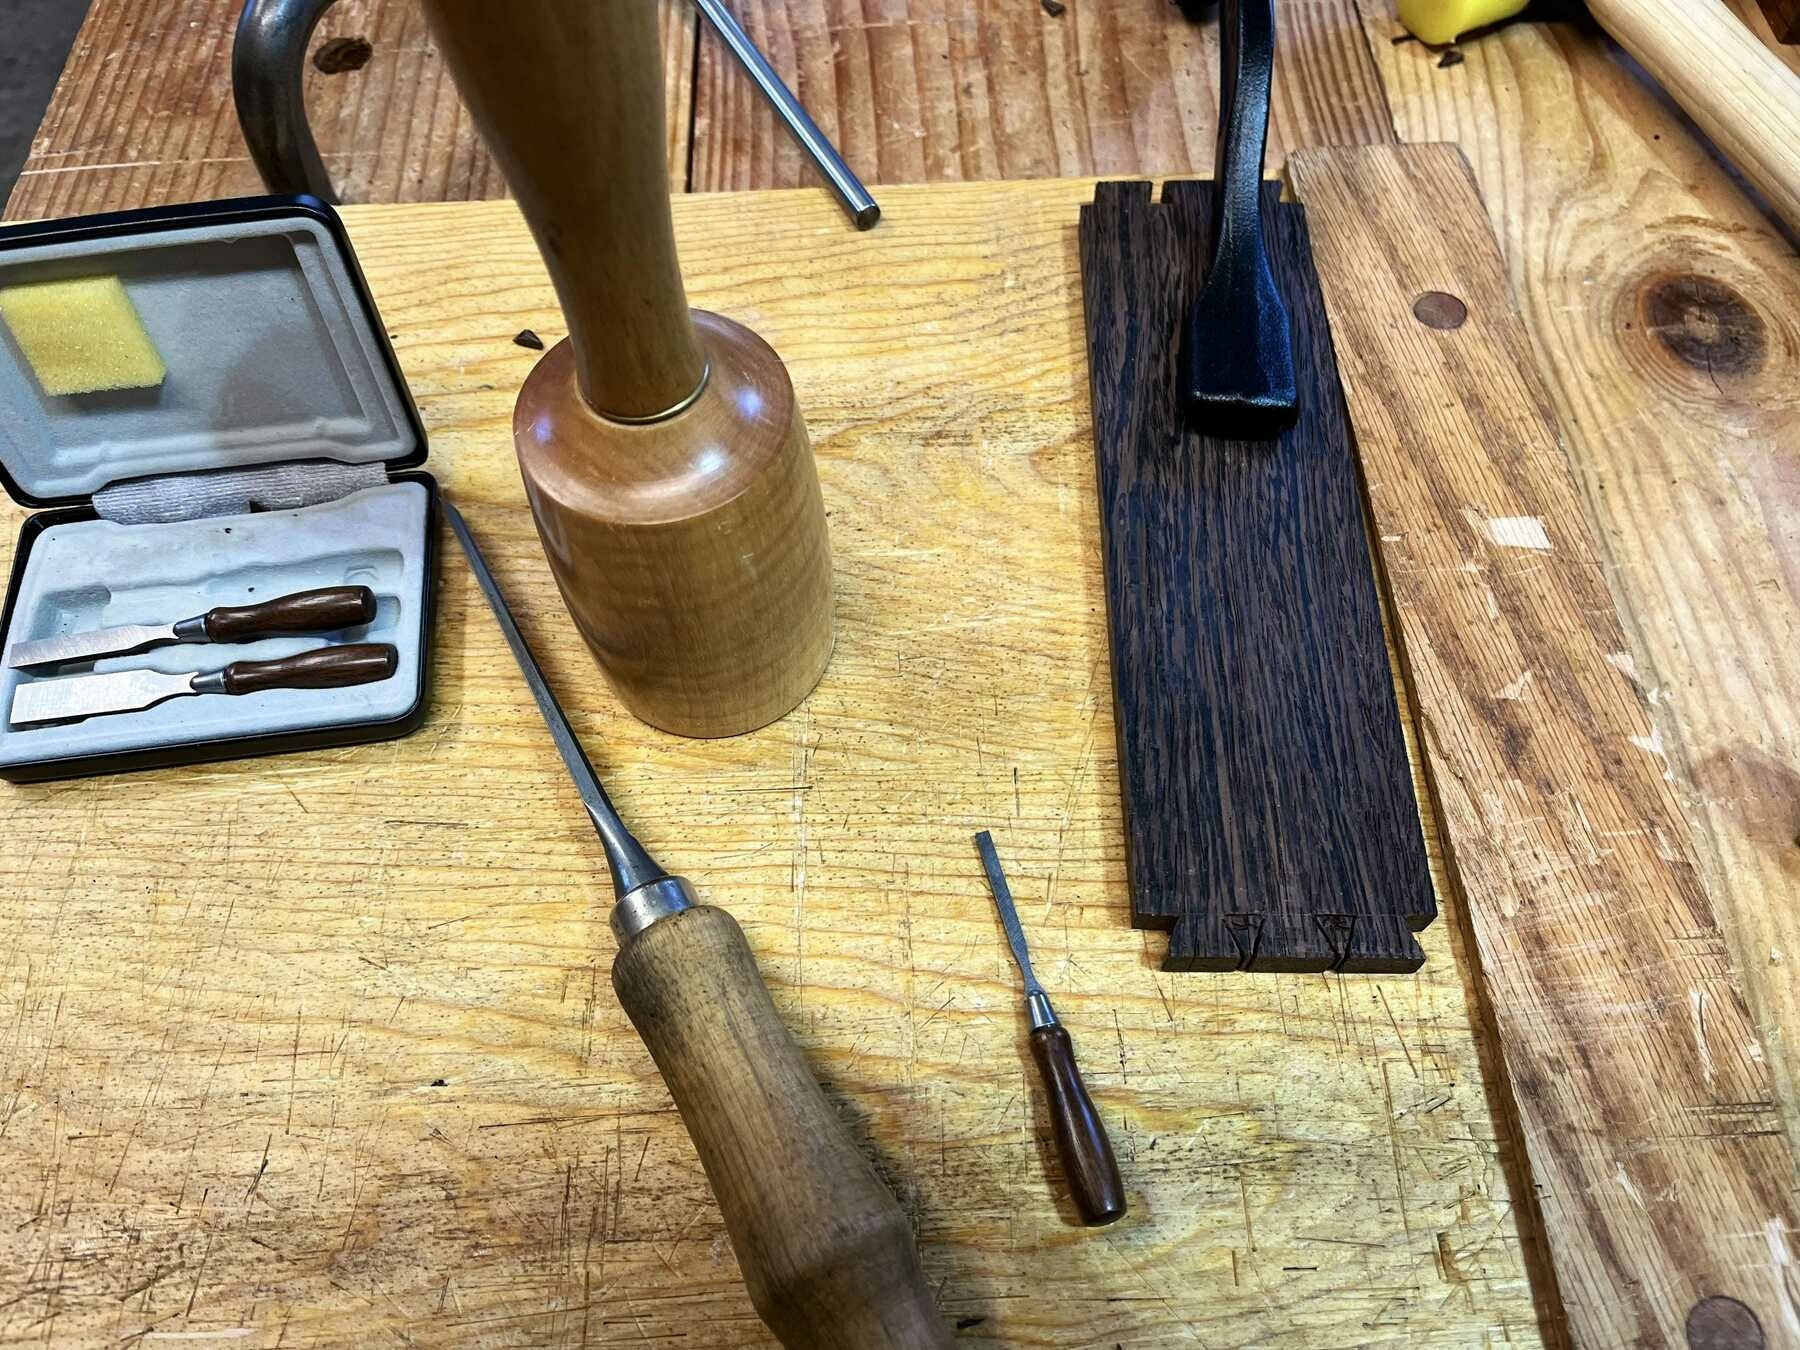
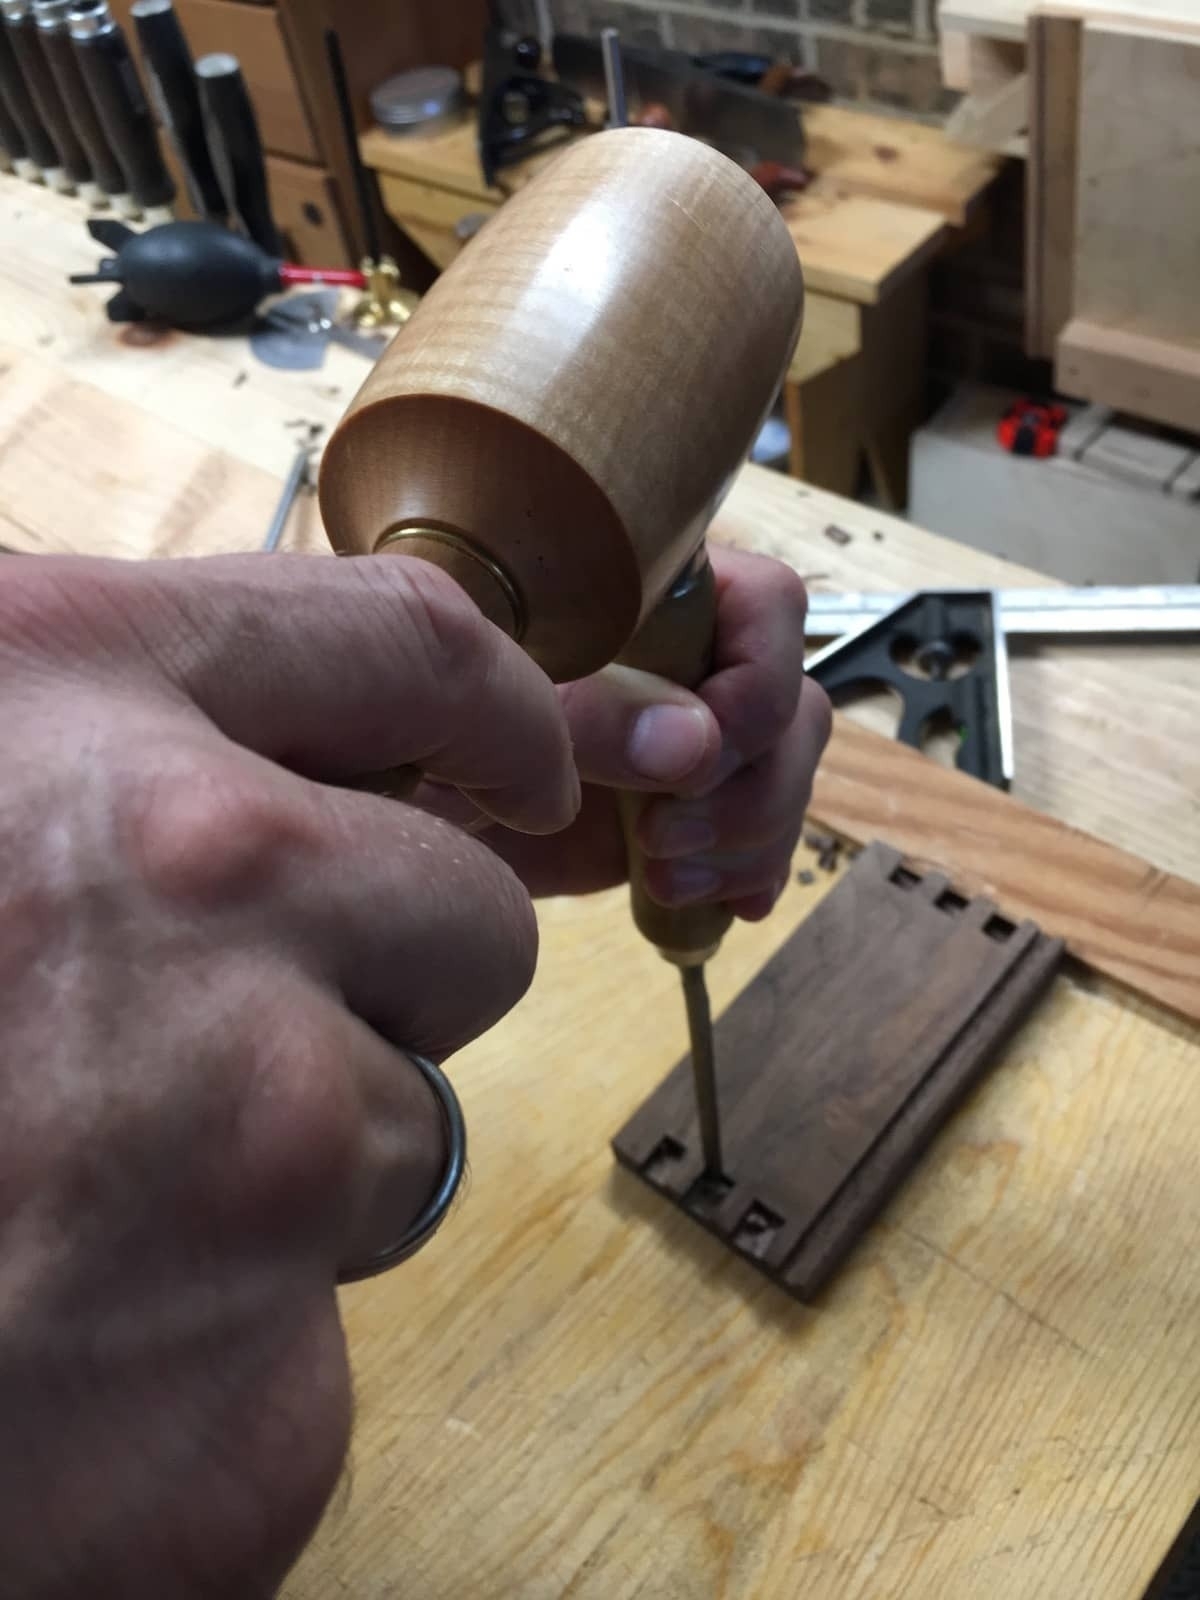
A few holidays ago, I got this set of very tiny little chisels because my wife thought they were cute. I’ve never had occasion to use them until now! I felt ridiculous, but I couldn’t otherwise get at some of the places with my smallest regular-sized chisel.

tiny chisel used to chop out pins

Fun project, but looking forward to the large bookshelf I’ll be building next.

Pencil Box

This is another going-away gift for a work colleague who left for another job. I’m incorporating a lapel pin in the project from my place of work, as I’ve found that cutting off the back pin part and insetting the small metal logo looks really nice. The box is poplar with a bubinga top and bottom. The gift is for someone who appreciates quality pencils, so this project was a great fit. The instructions for this box come from Renaissance Woodworking. This is a great, easy-to-do project. The pencils I bought for the box are Mitsubushi 9850. As an aside, I’ve found Mitsubishi 9800 pencils to be perfect for woodworking because the graphite is strong and makes dark lines.

Pencil box

Studley Mallet

A short article in the September/October 2021 issue of Popular Woodworking called attention to retired pattern maker Bill Martley’s project to reproduce the bronze head of the classic Studley Mallet, named after Henry O. Studley (1838-1925) that many woodworkers know from his famous and mind-blowing tool chest.

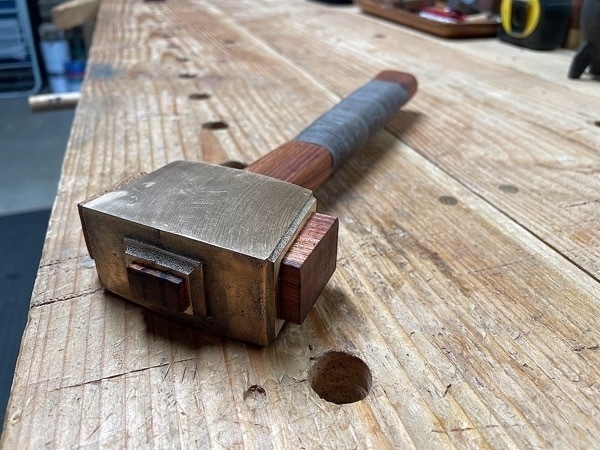
A member of my woodworking group spotted this article and suggested we embark on a group build. The bronze casting for the mallet cost $69 with shipping included. What an amazing opportunity and bargain! I received my bronze mallet head in the mail a couple of weeks ago and here’s the mallet I made with it using bubinga, bocote wedges, and a handle with inset waxed cord. I just love how this came out and I’m so grateful that Martley made this possible.

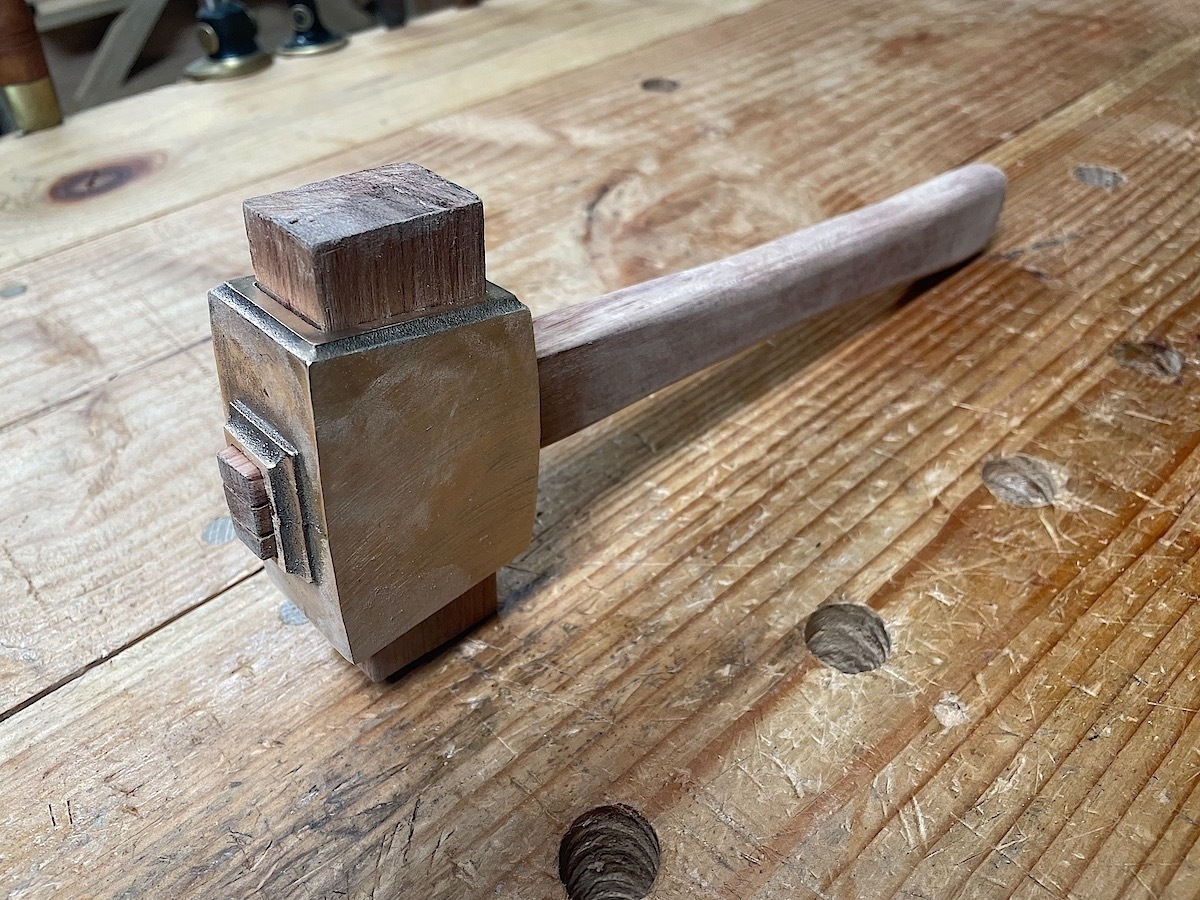
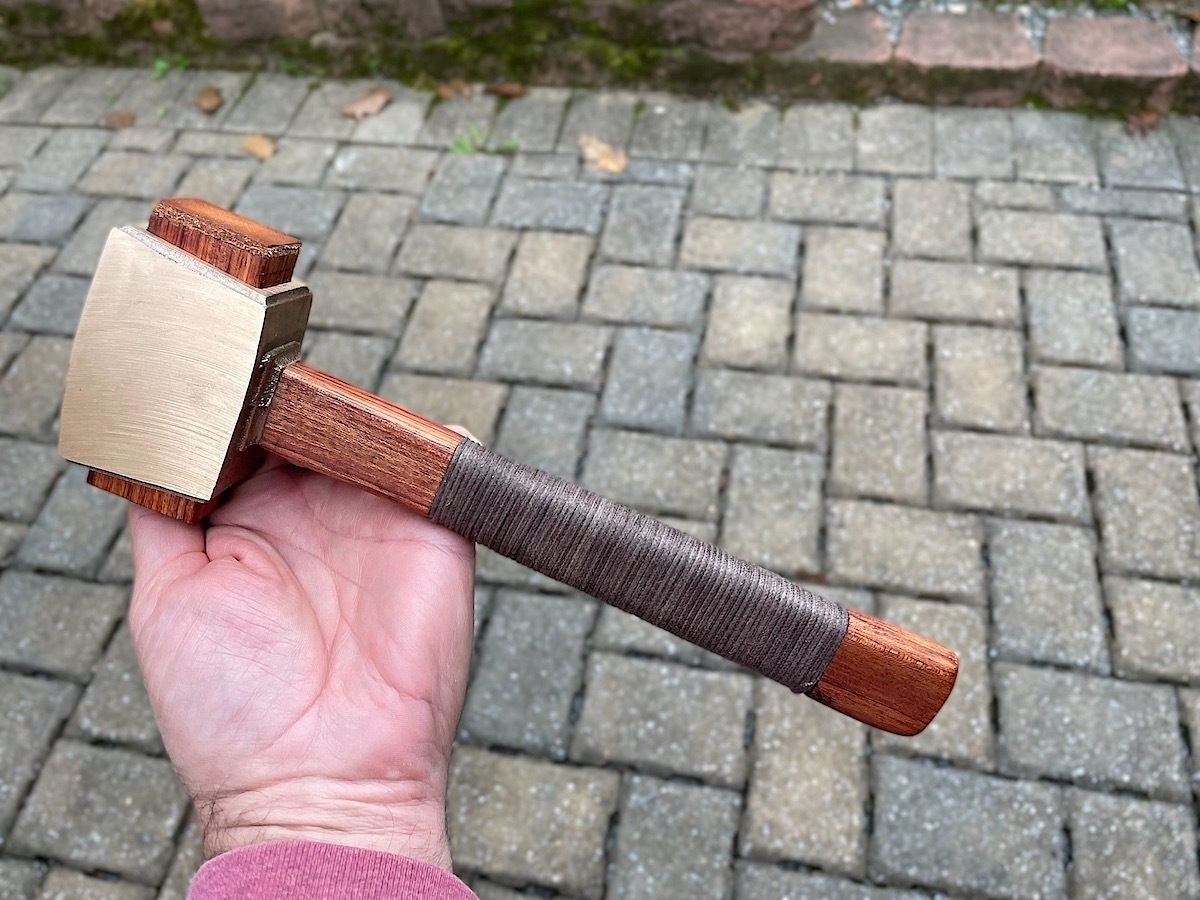
Here’s the mallet I made with the casting:

Studley malletimg16

And I’ll briefly document the steps I took to make it.

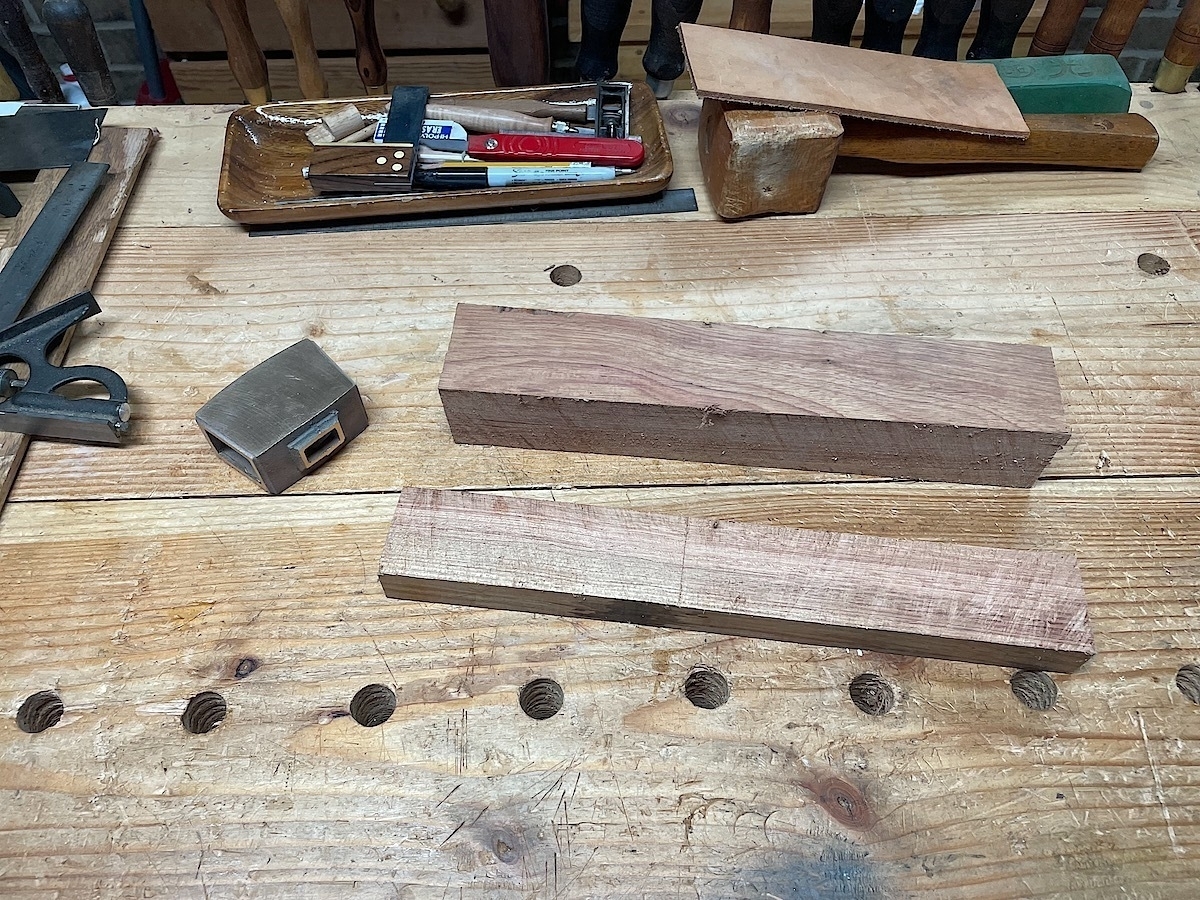
First off, here’s the bronze casting as it arrived in the mail, along with the wood I selected to make the infill and handle. I went with bubinga.

Studley malletimg1

Here’s the infill block sized to fit through the hole in the bronze head.

Studley malletimg2

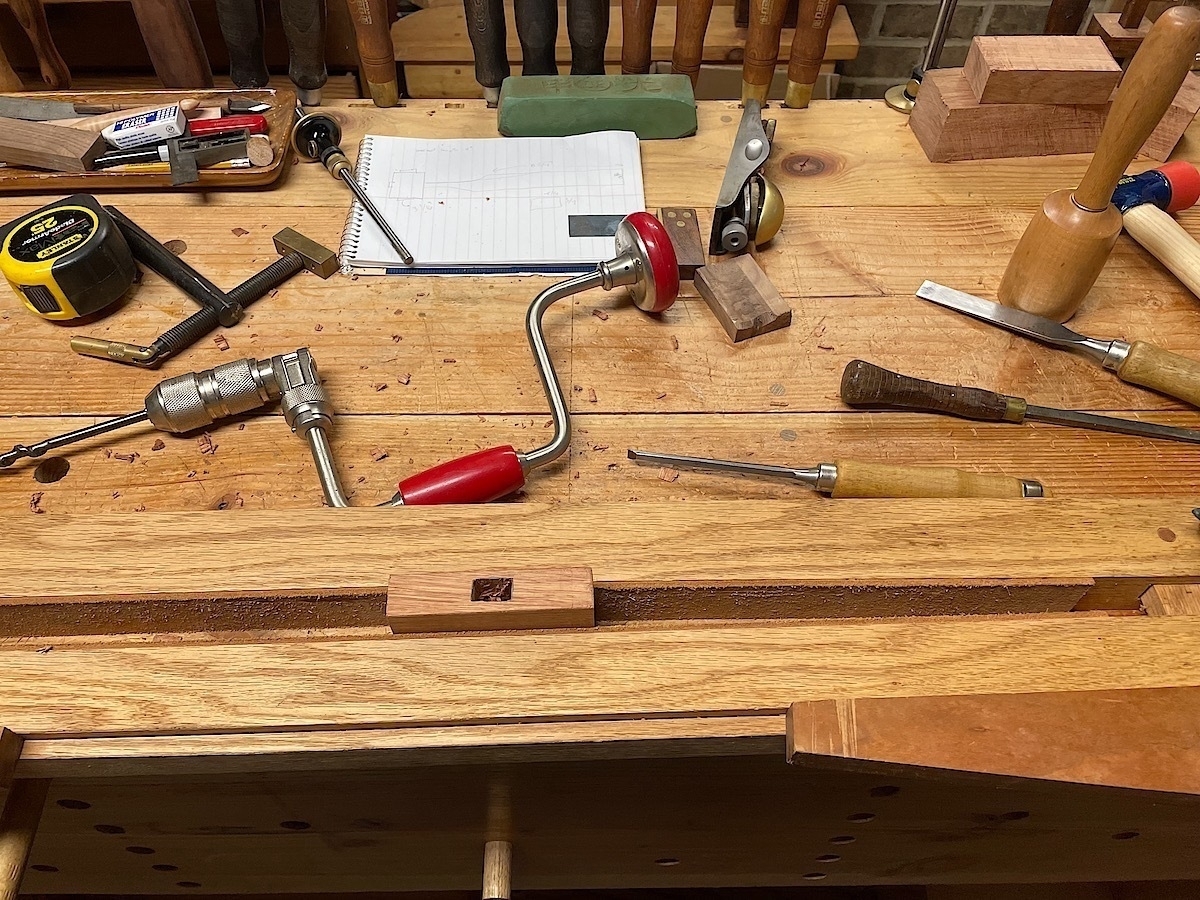
Next I chop out the through-mortise to match up with the hole where the handle will fit.

Studley malletimg3

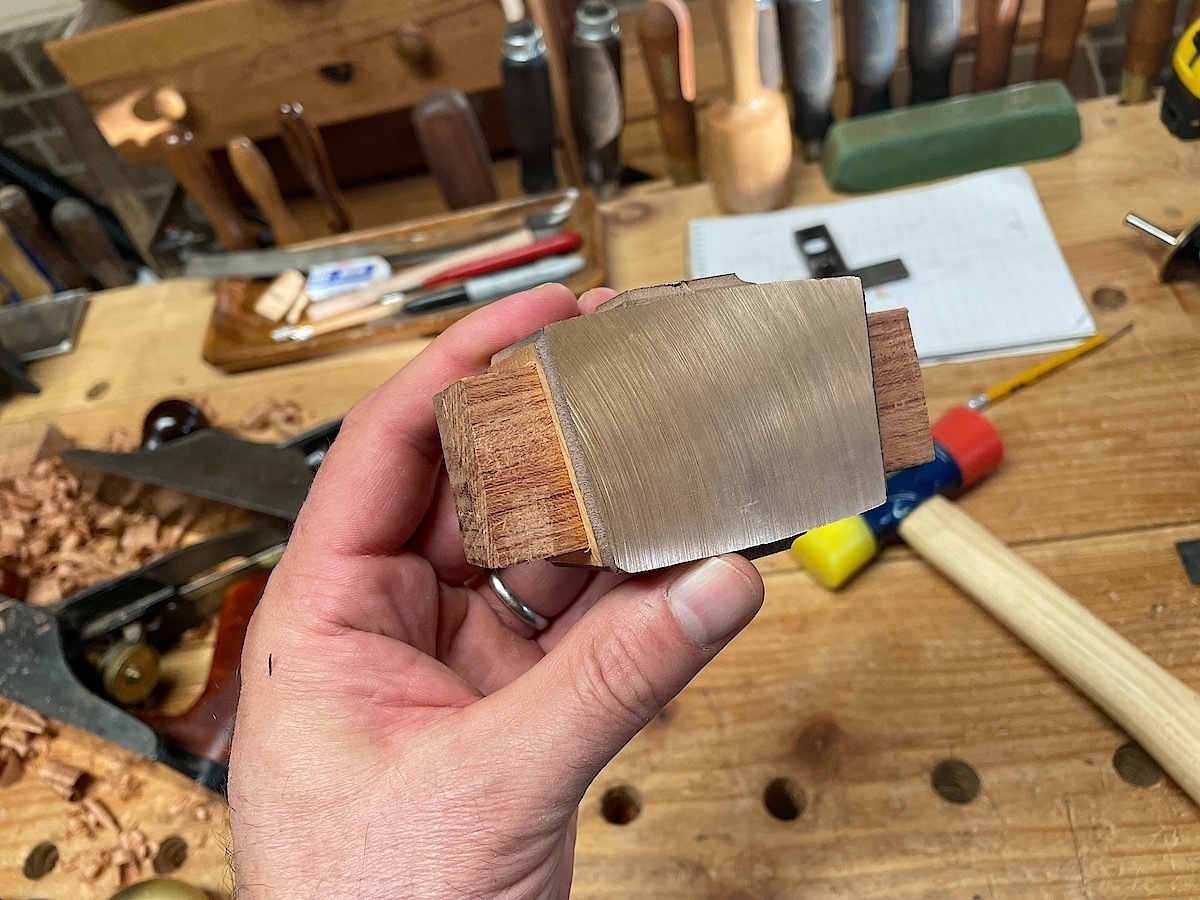
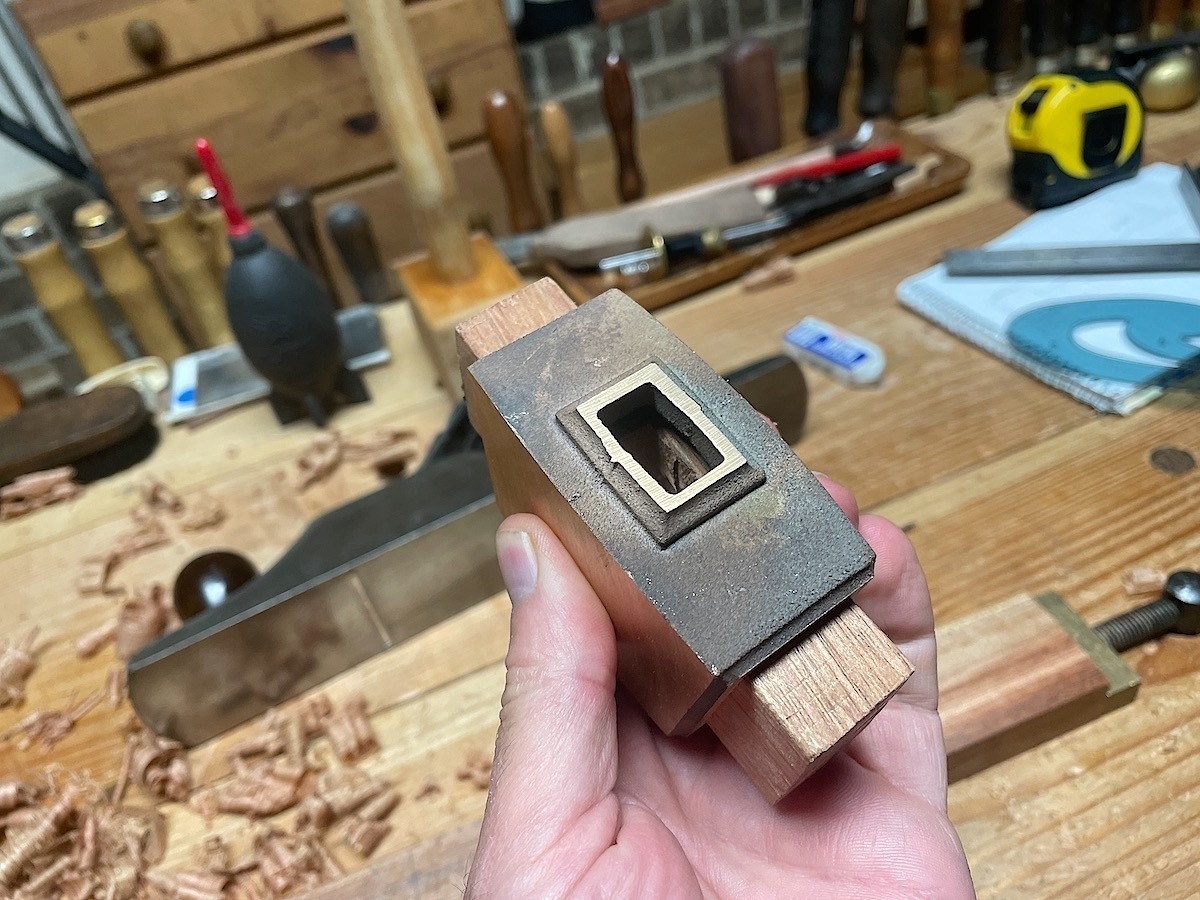
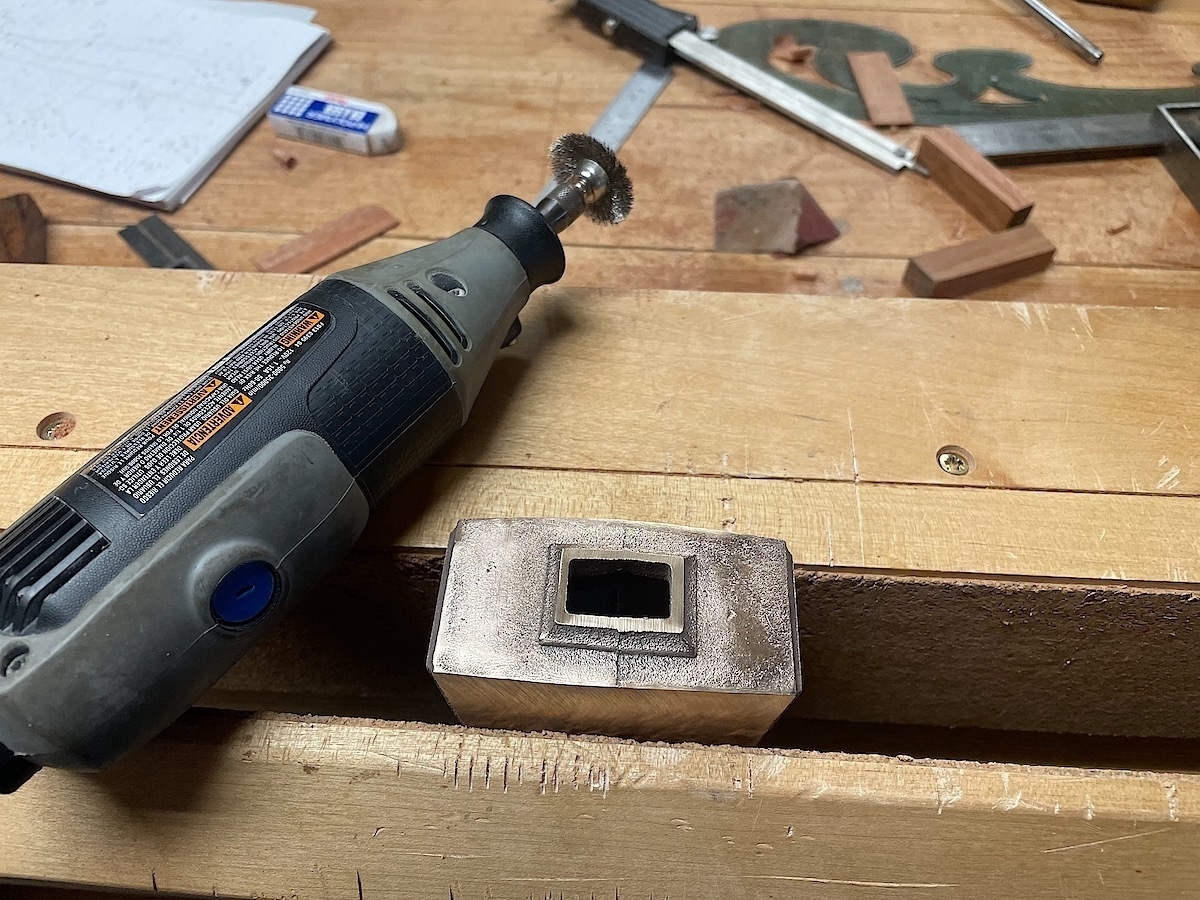
Here’s a view of the wooden insert with the mortise completed, mostly to show what the top and bottom of the casting looked like before I polished it up.

Studley malletimg4

Now I began to shape handle, drawing out what I wanted in pencil.

Studley malletimg5

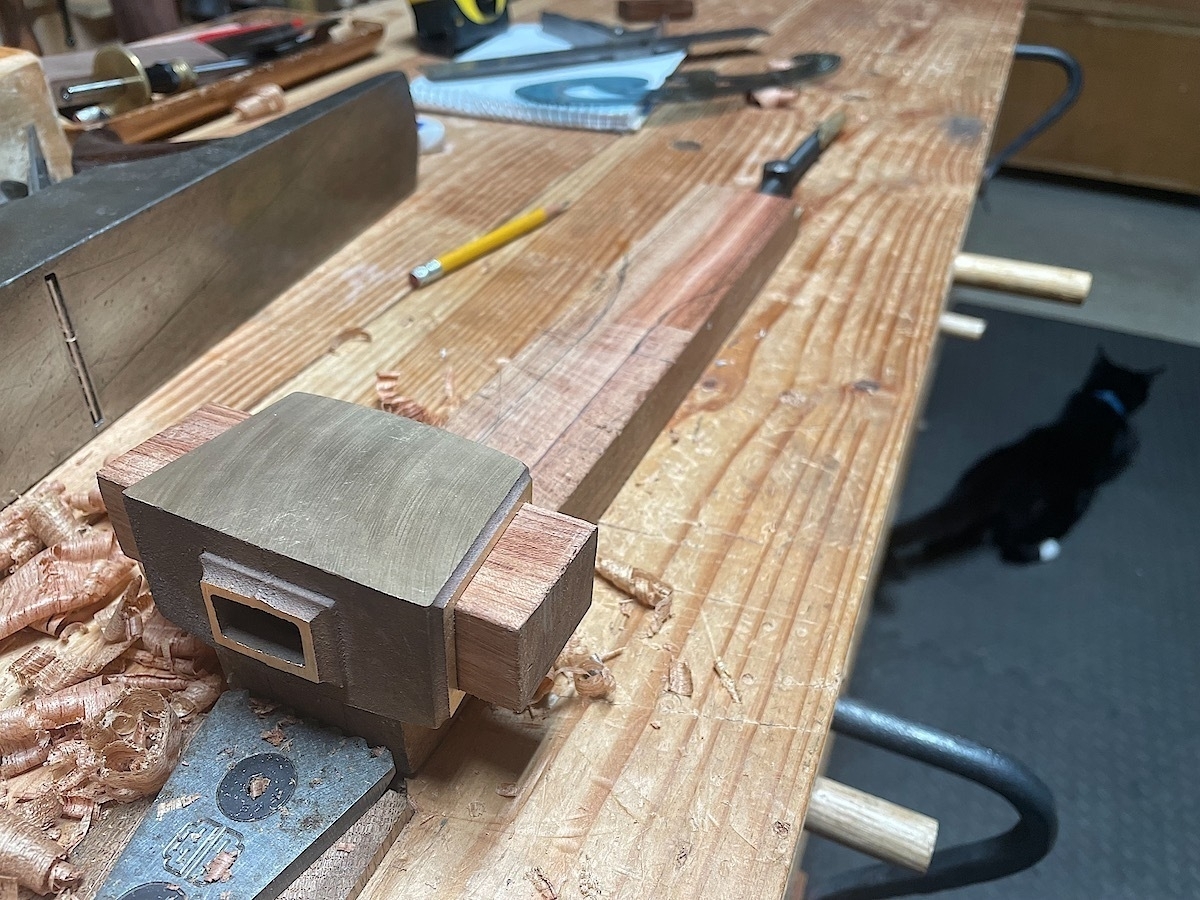
Here’s a view of the handle, where I’ve cut out the slot to fit into the bronze casting. I used my large tenon saw for this. I squared it all up with chisels.

Studley malletimg6

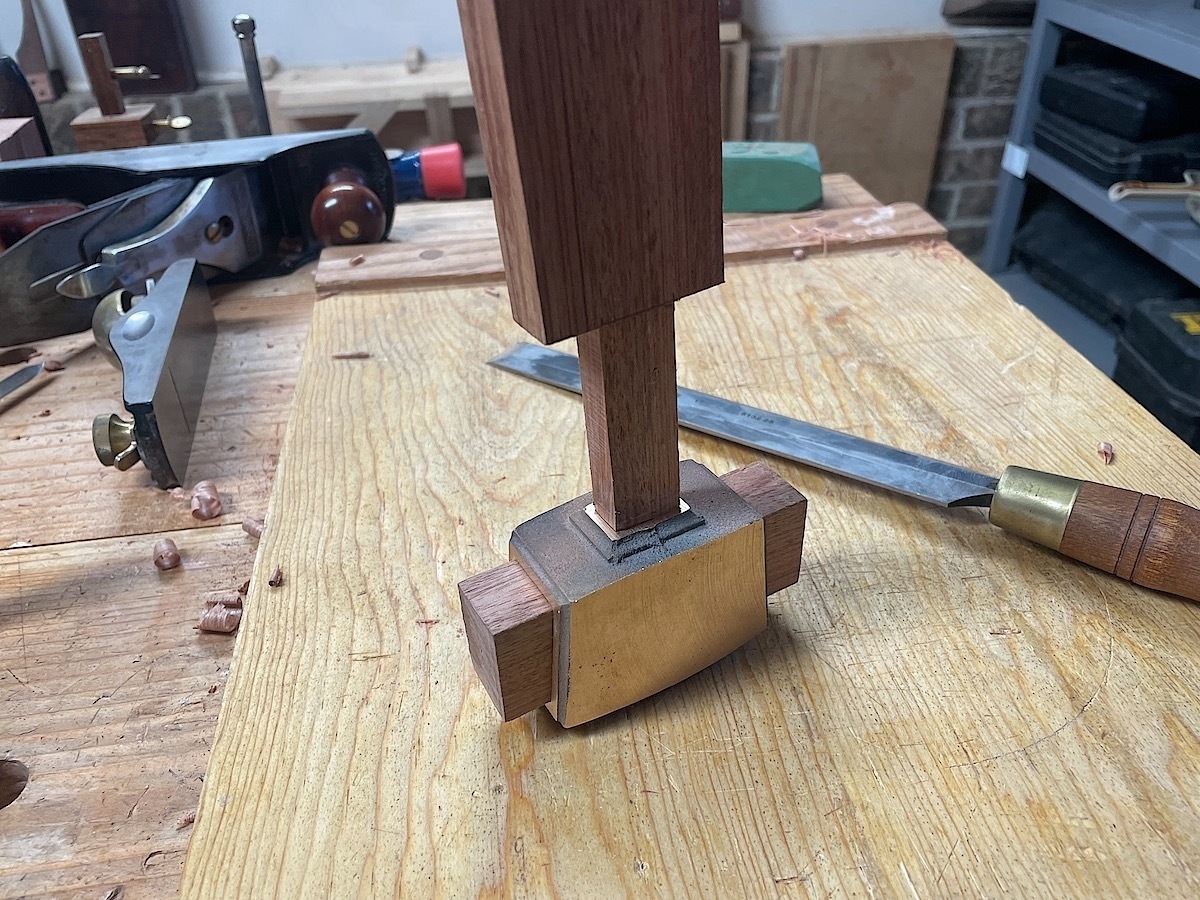
Here it is all rough fit together. Looking like a mallet now.

Studley malletimg7

Next, I shined it all up using a Dremel. Wow, what a difference. I left it rough, because I liked the look of it.

Studley malletimg8

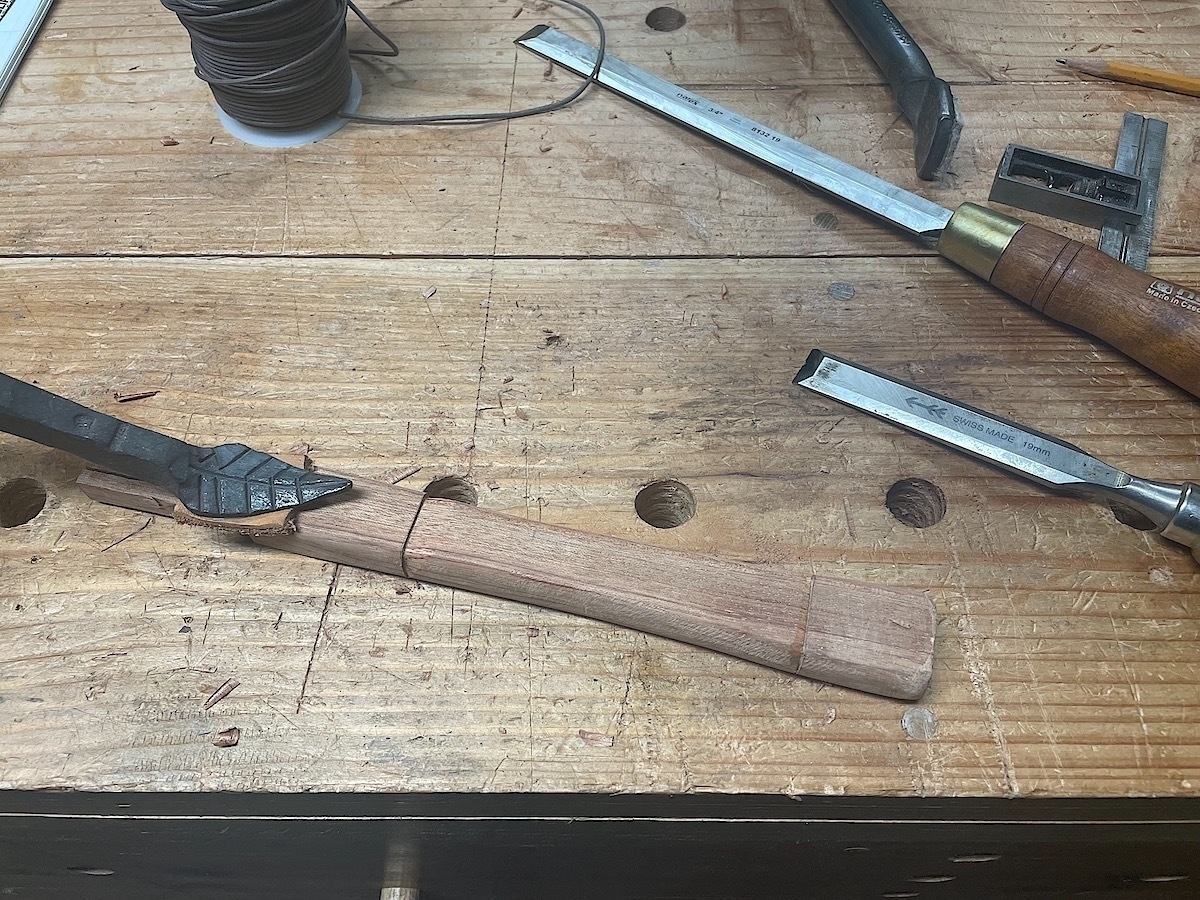
Now, onto the handle. I cut it out roughly with saw work, then filed down with my beloved Auriou rasps.

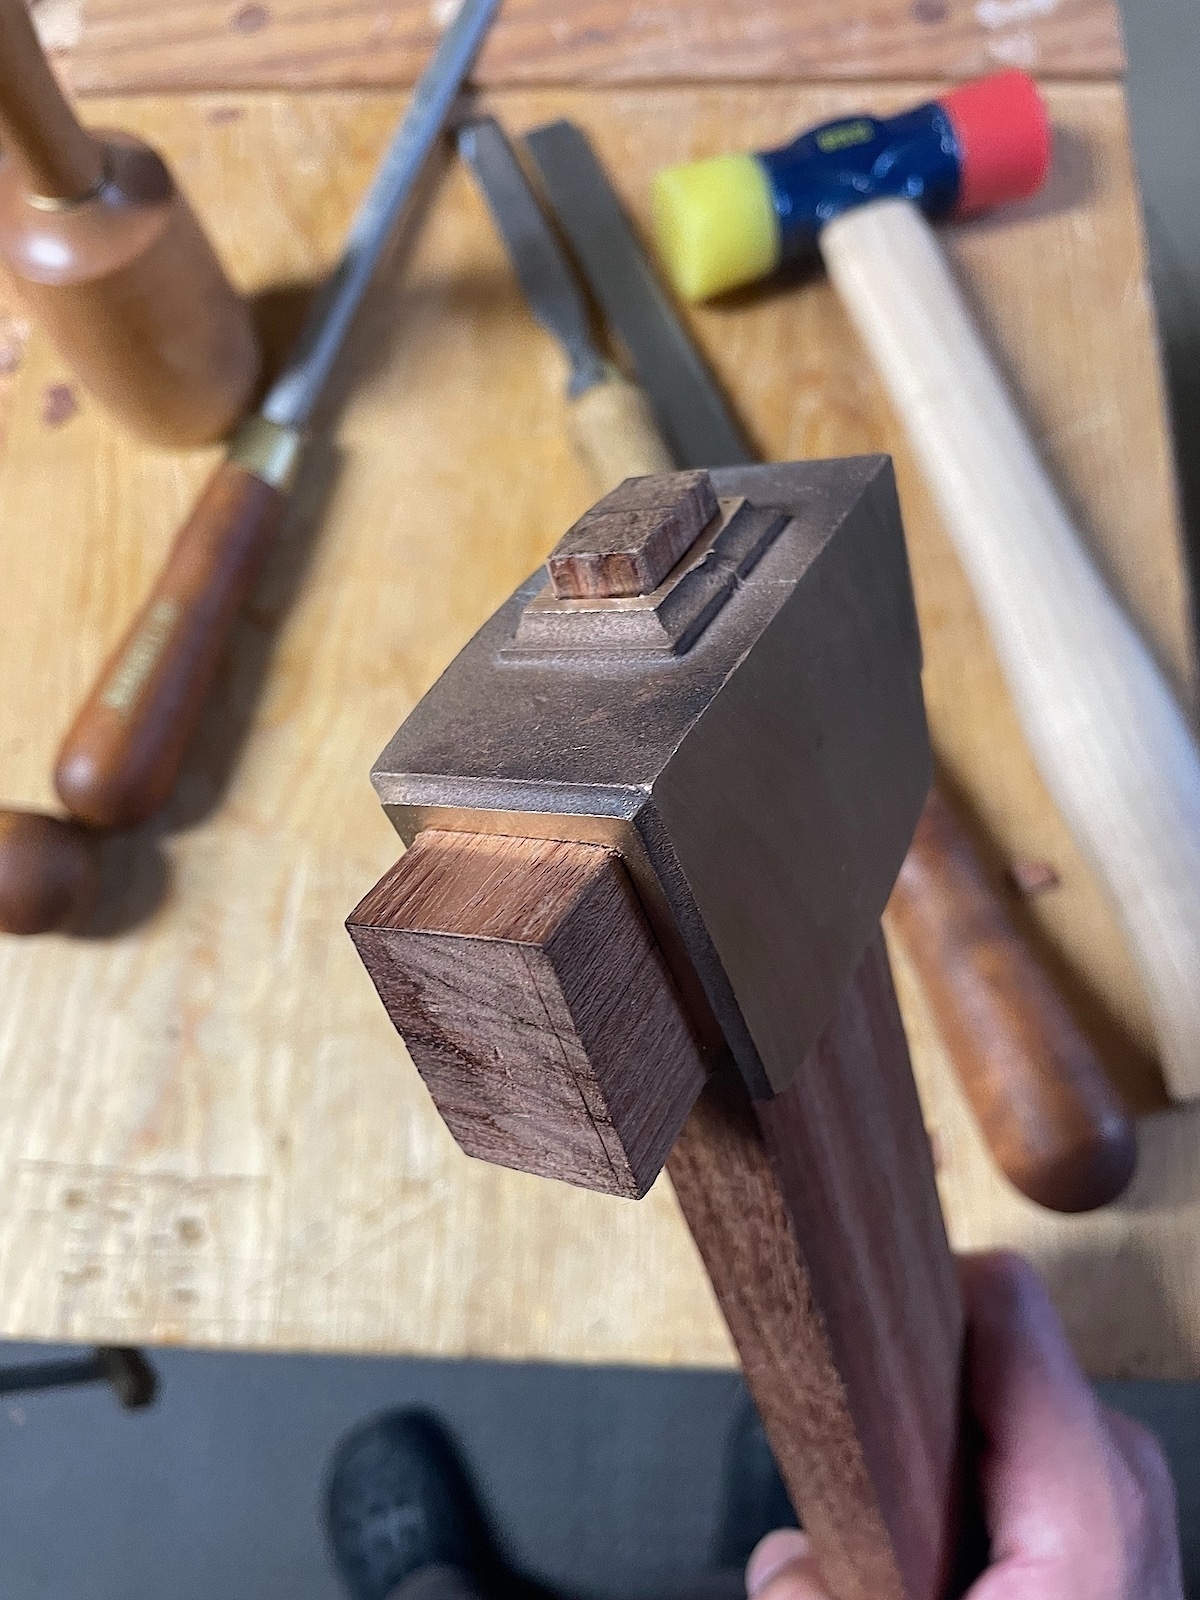
Here’s the handle, showing the cuts for the wedged tenons that’ll go in the top to splay the wood out and hold it firm. The infill wood has not yet been cut to length.

Studley malletimg10

Next, I decided to go with a wax cord wrap for the handle. I wanted it to sit flush, so I chiseled out the beginning and the end so it slopes inward from each side, so when I wrap the cord it’ll gently slope upward. This will form a nice place to hold it.

Studley malletimg11

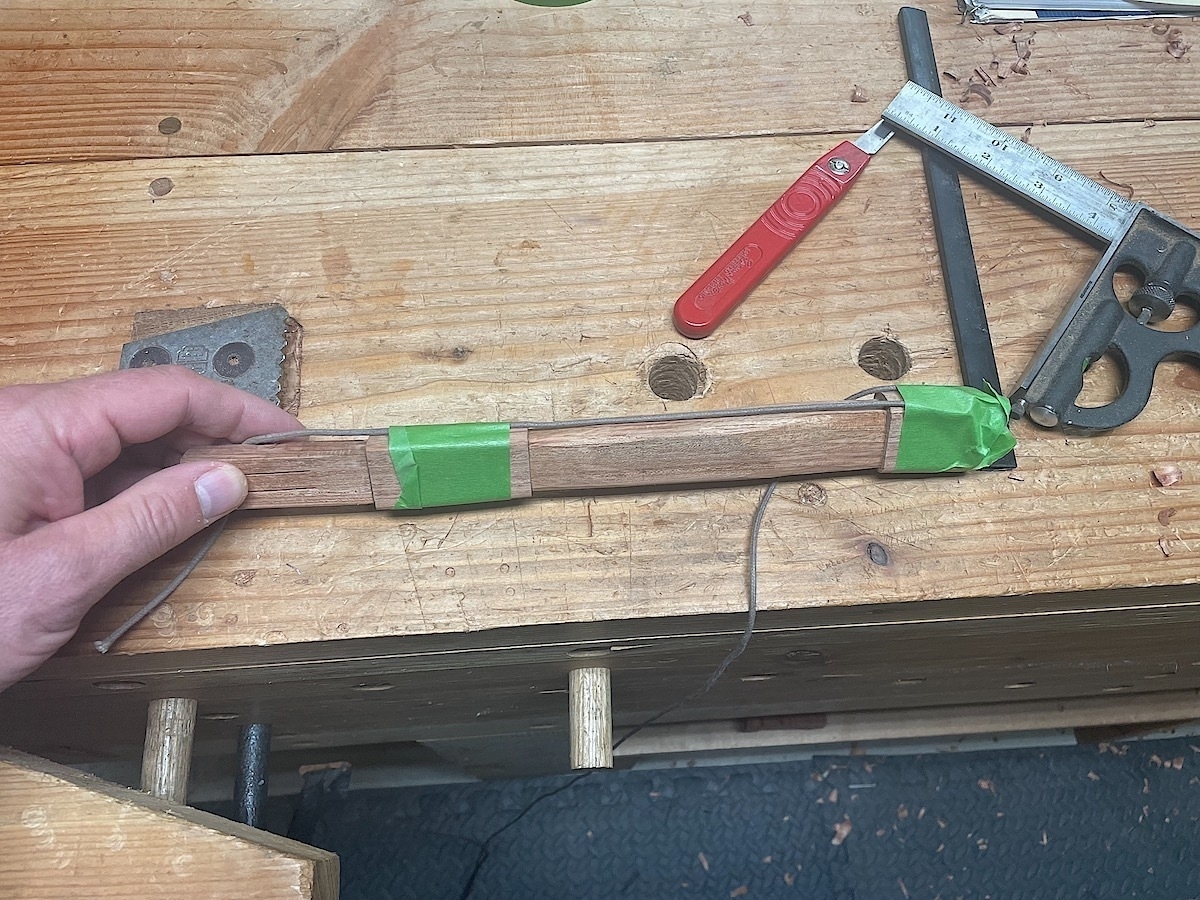
This image shows the beginning of the cord wrap, using tape to hold the ends in place. I wrapped the cord so tight, my hands cramped up.

Studley malletimg12

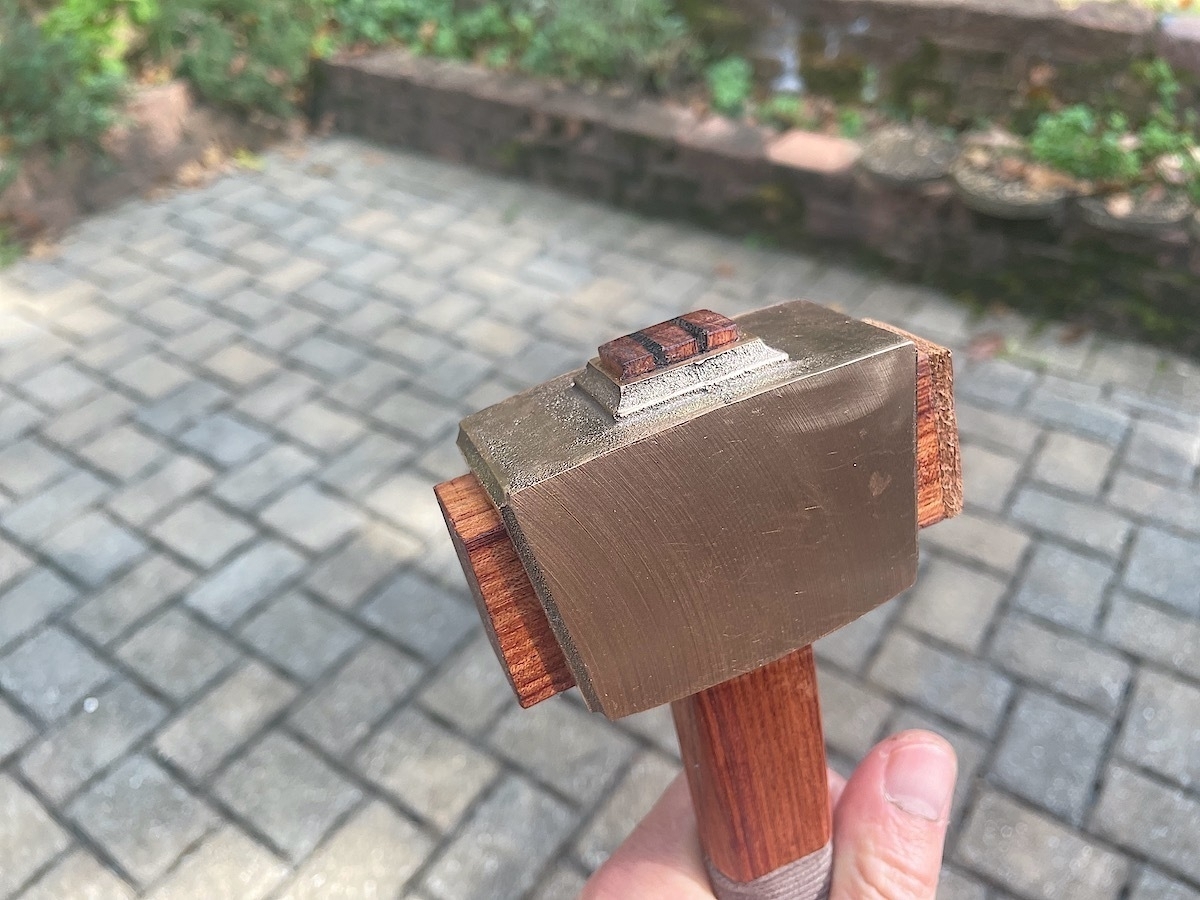
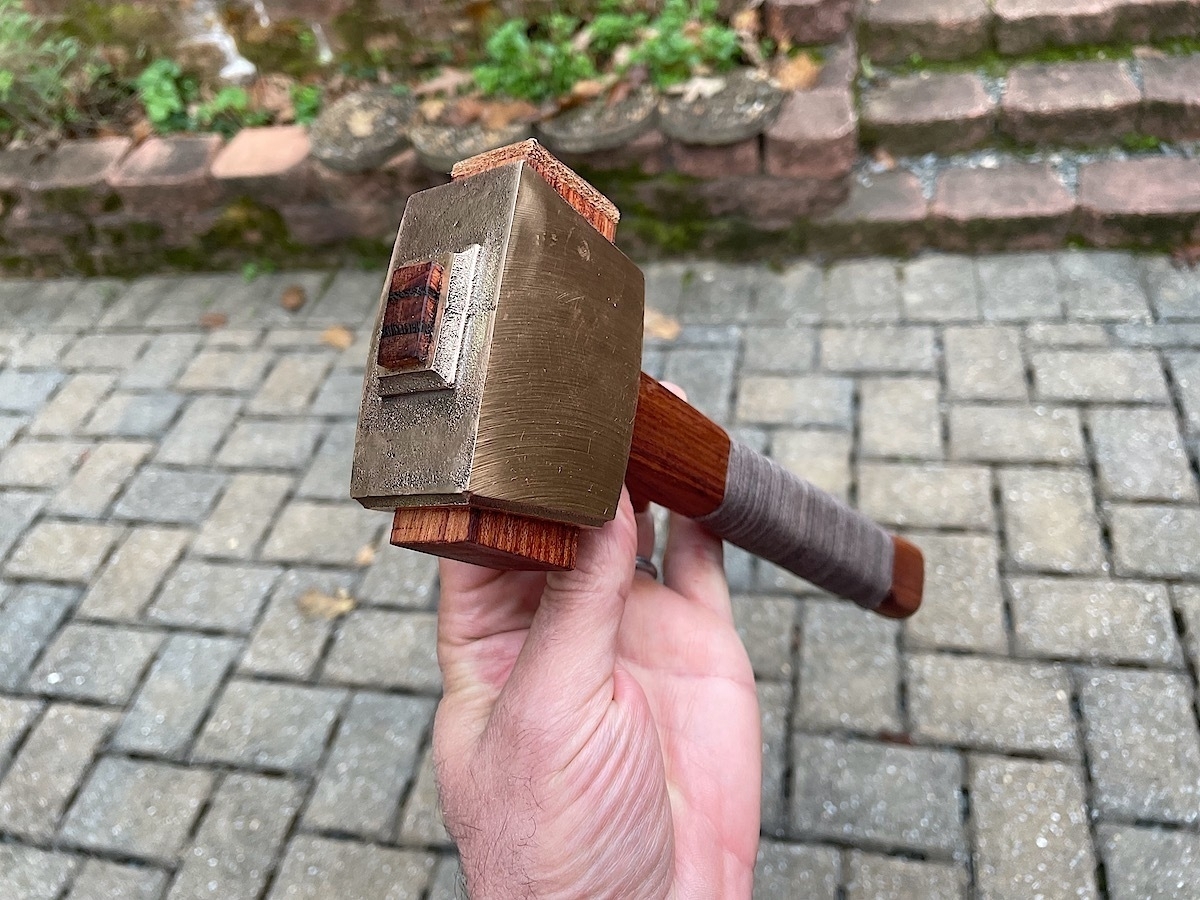
And here a few glamour shots of the completed mallet, which I finished with boiled linseed oil. Oh, and I forgot to mention, I’ve added the wedges here. The two top wedges are tiny slices of bocote, which I think contrasts nicely with the bubinga. It was a fun project, and now I have a small mallet with a lot of mass. It’ll be a useful shop tool that I hope will still be in use by someone long after I’m gone.

Studley malletimg13 Studley malletimg14 Studley malletimg15

Japanese Joinery Square Build

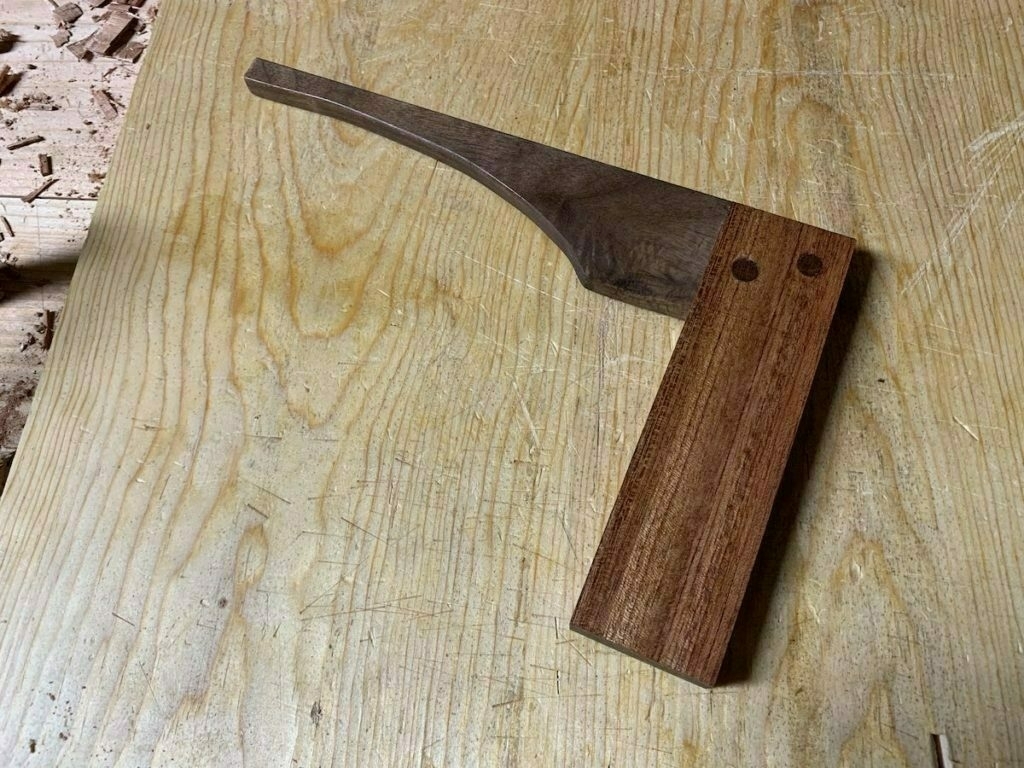
Here was a challenging project from a few years back that I neglected to post. It involves some difficult joinery.

It looks great from the side.
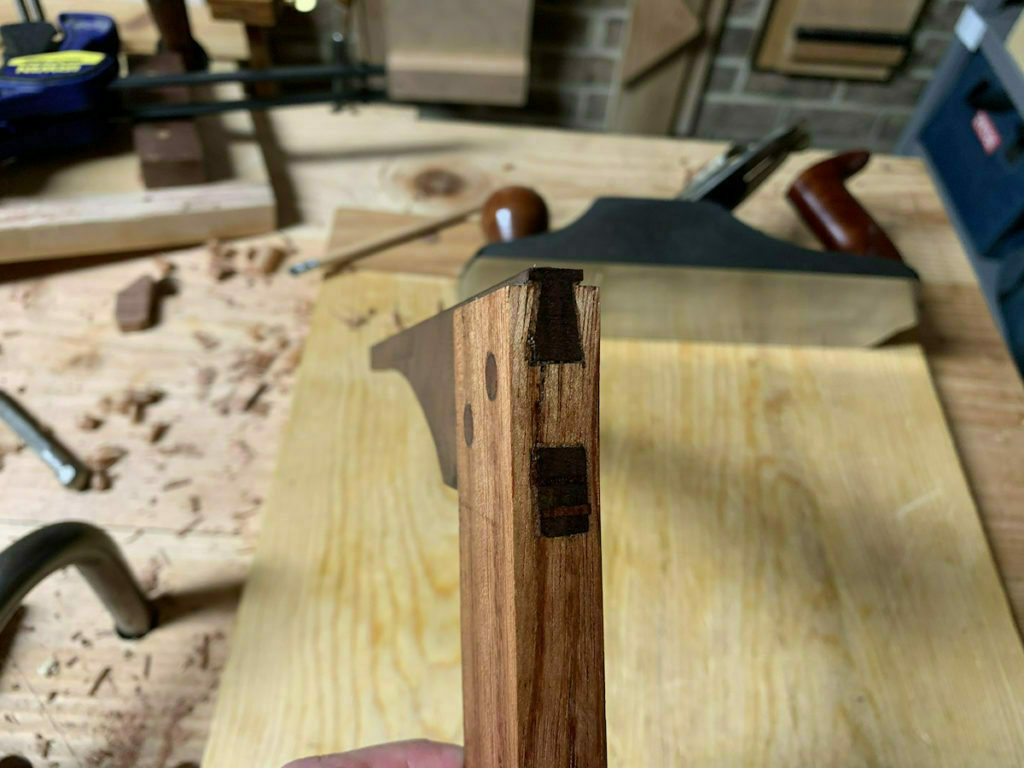
But the joinery in the back is not so nice. It's functional as a square, though, so I'll take it.
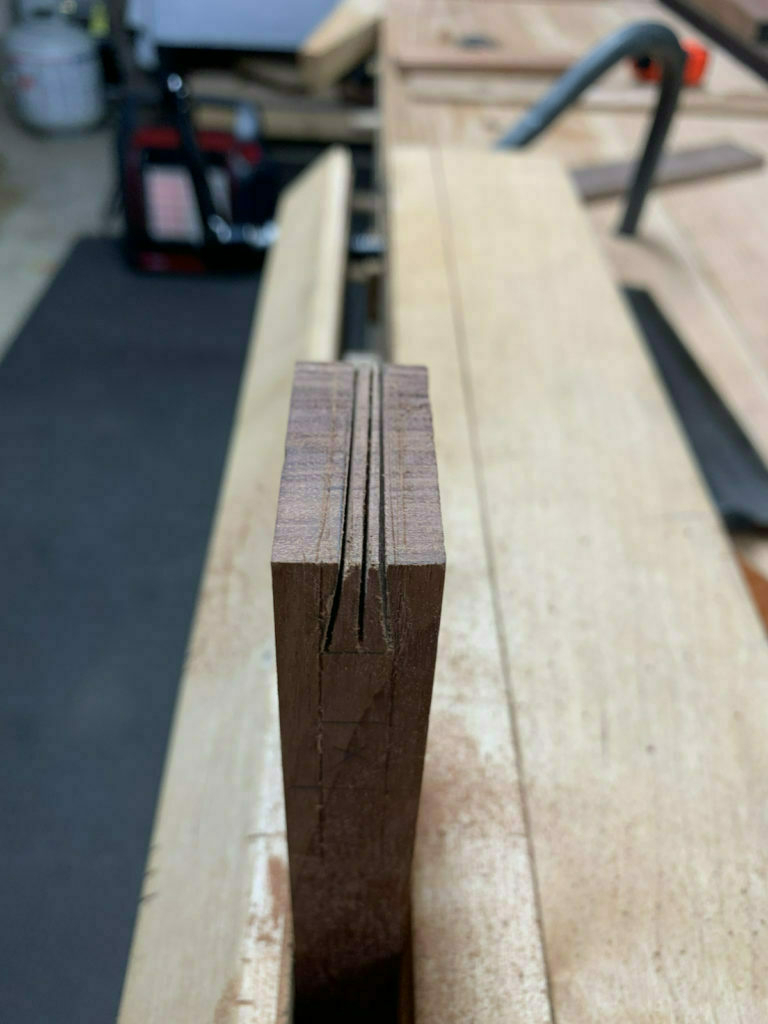
The project was mostly an exercise in chisel work to clear out the wood.
The arm of the square showing the joinery. The curved handle was cut with a bow saw and smoothed out, no big deal.
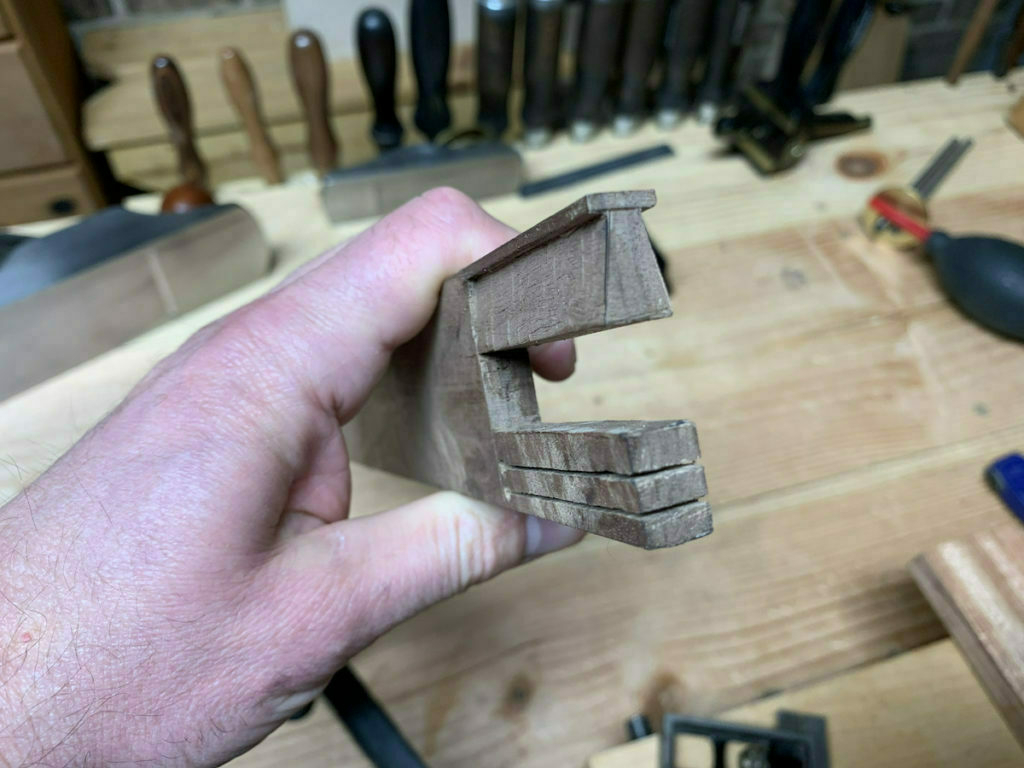
The handle after cutting out the mortise and dovetail, with the completed arm in the background.

Sloyd Bench Hooks

I made some handy bench hooks based upon the teachings of Sloyd (which I don't know much about, but discovered is quite an interesting thing). Actually, learning about Sloyd may be the most interesting thing about this project. Anyways, these bench hooks are really useful to hold wood of different lengths on the bench for, say, cutting dadoes, or to hold up long pieces level when crosscutting on the hook I use for sawing, or for holding wood for paring. 

slab of hard maple
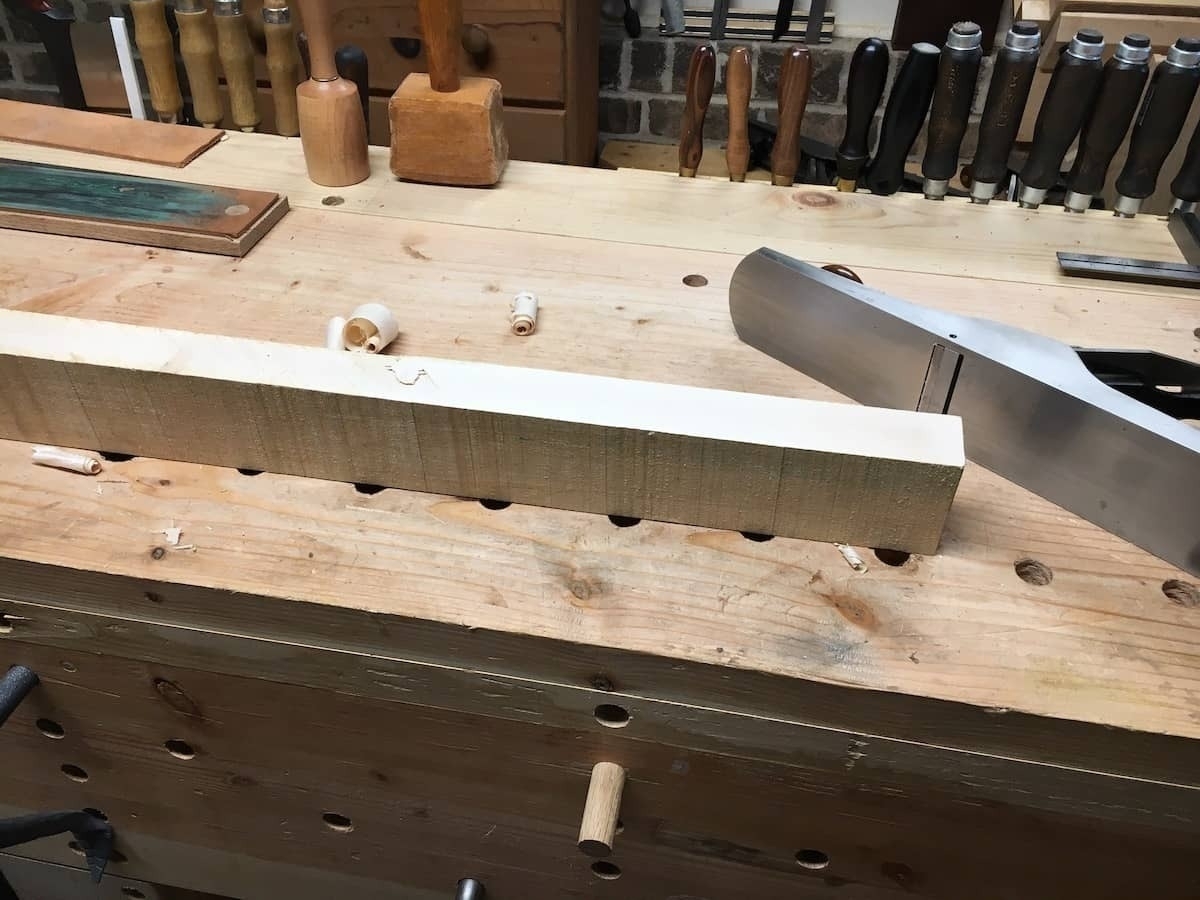
I started out with a scrap of hard maple. Bad choice. This made a quick project into a several day project, because the wood was like granite. 
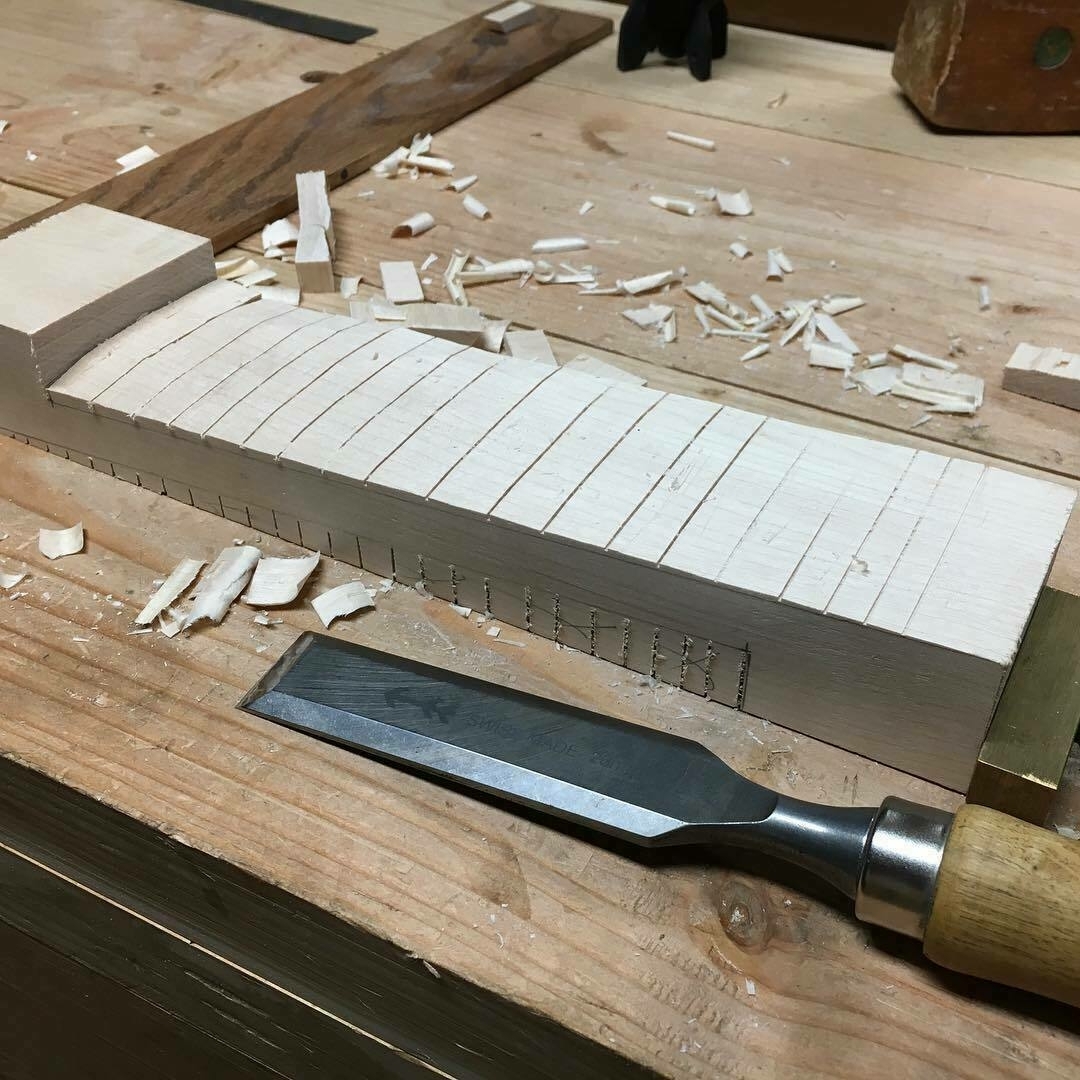
I cut out 12" blocks and surfaced all the edges with a hand plane. Then measured 2" from each end, marking the center points, then drew a line from that point to the far corner as seen here. Once I had the layout, I sawed in a bunch of relief cuts with a carcass saw.
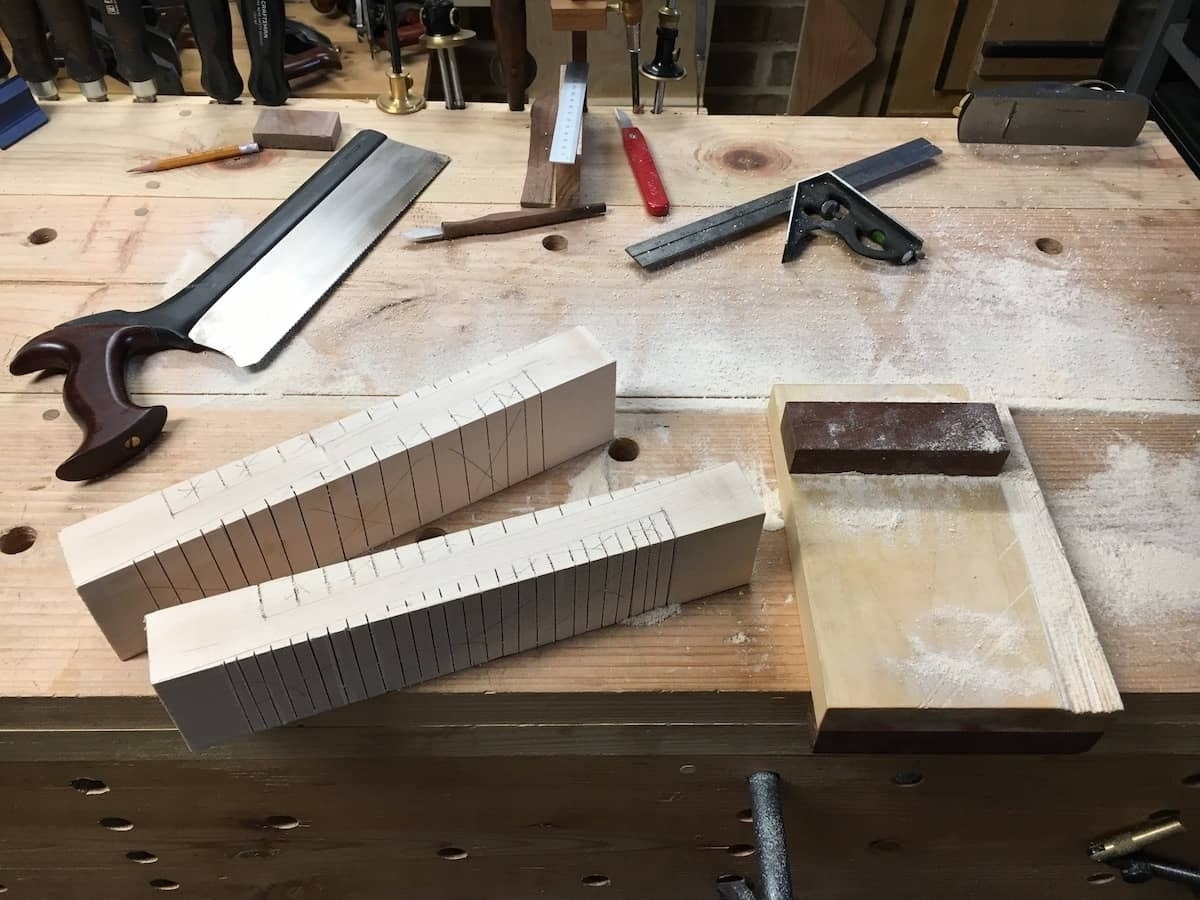
two sloyd hooks in rough form
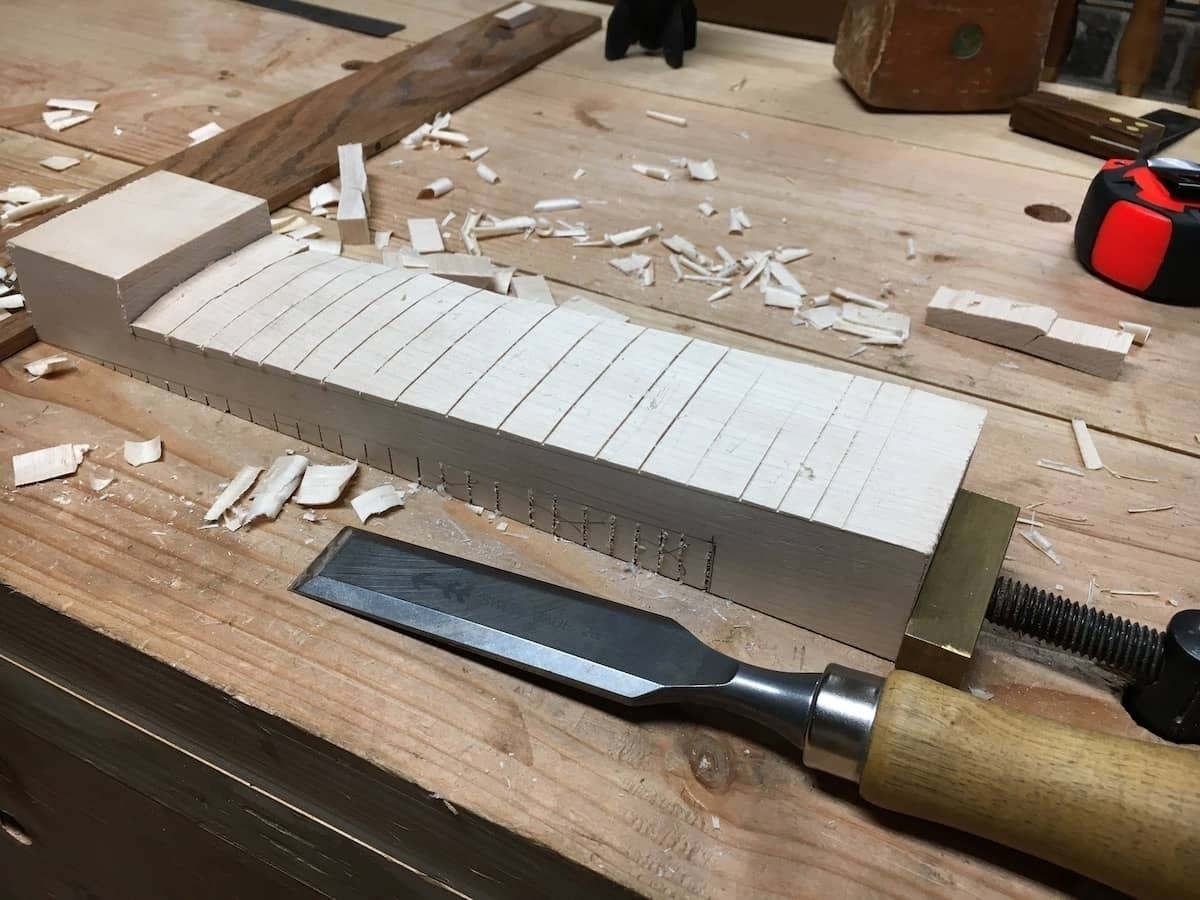
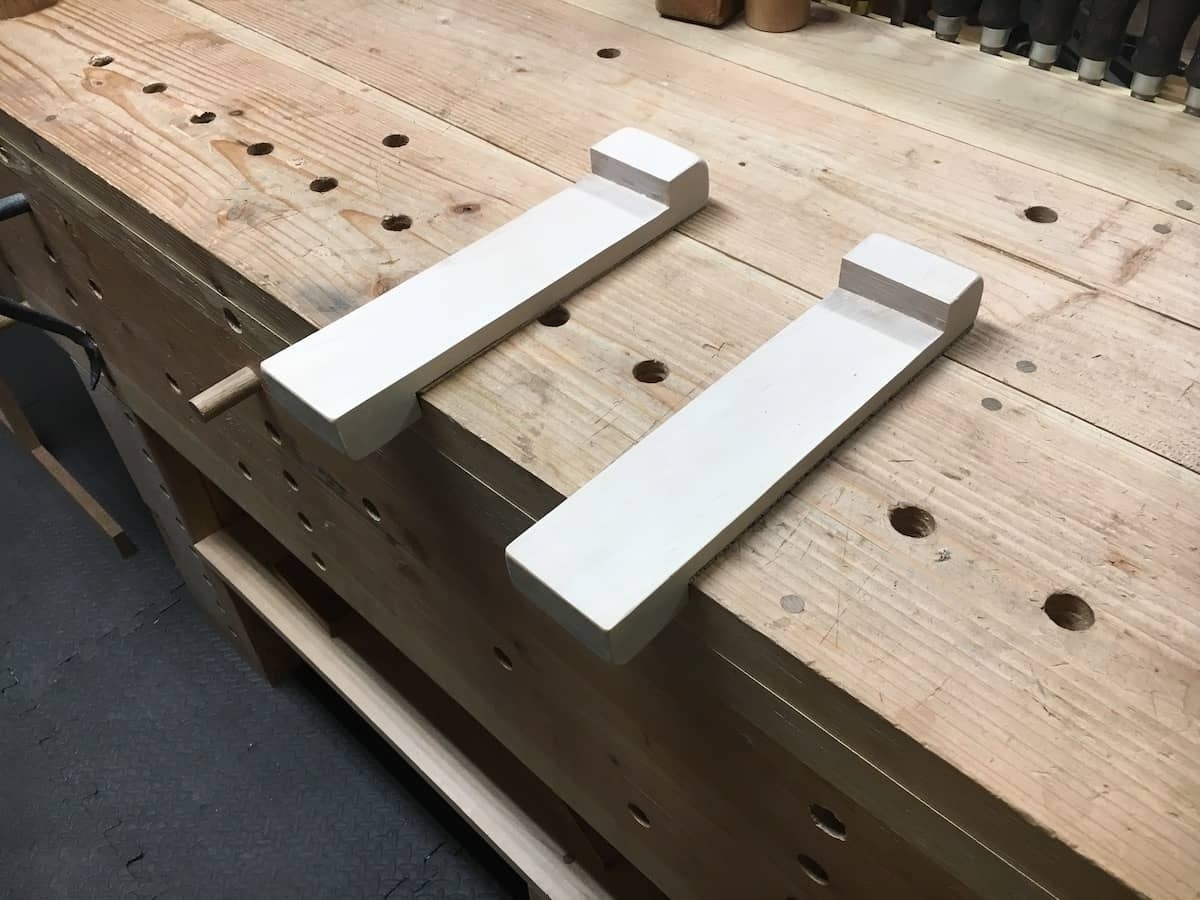
Here's a shot of the two hooks, with the surfaces ready to be chiseled out.
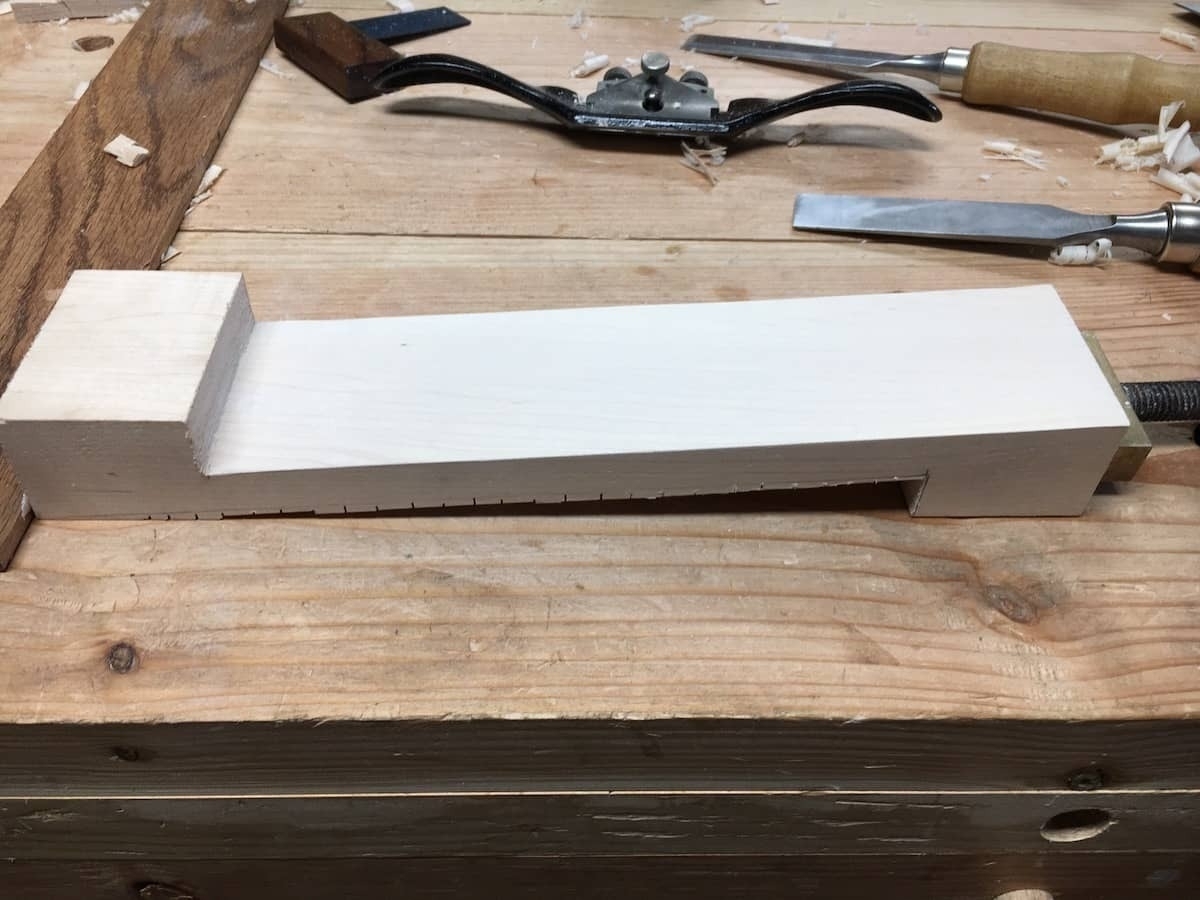
Finished surface of one sloyd hook
Here is one finished surface. To get to this point, I chopped out the sawed parts with a bevel-down chisel, then pared down to my line with chisel and block plane. You can see the unfinished bottom surface here. This is a rinse, repeat operation for the other surfaces.
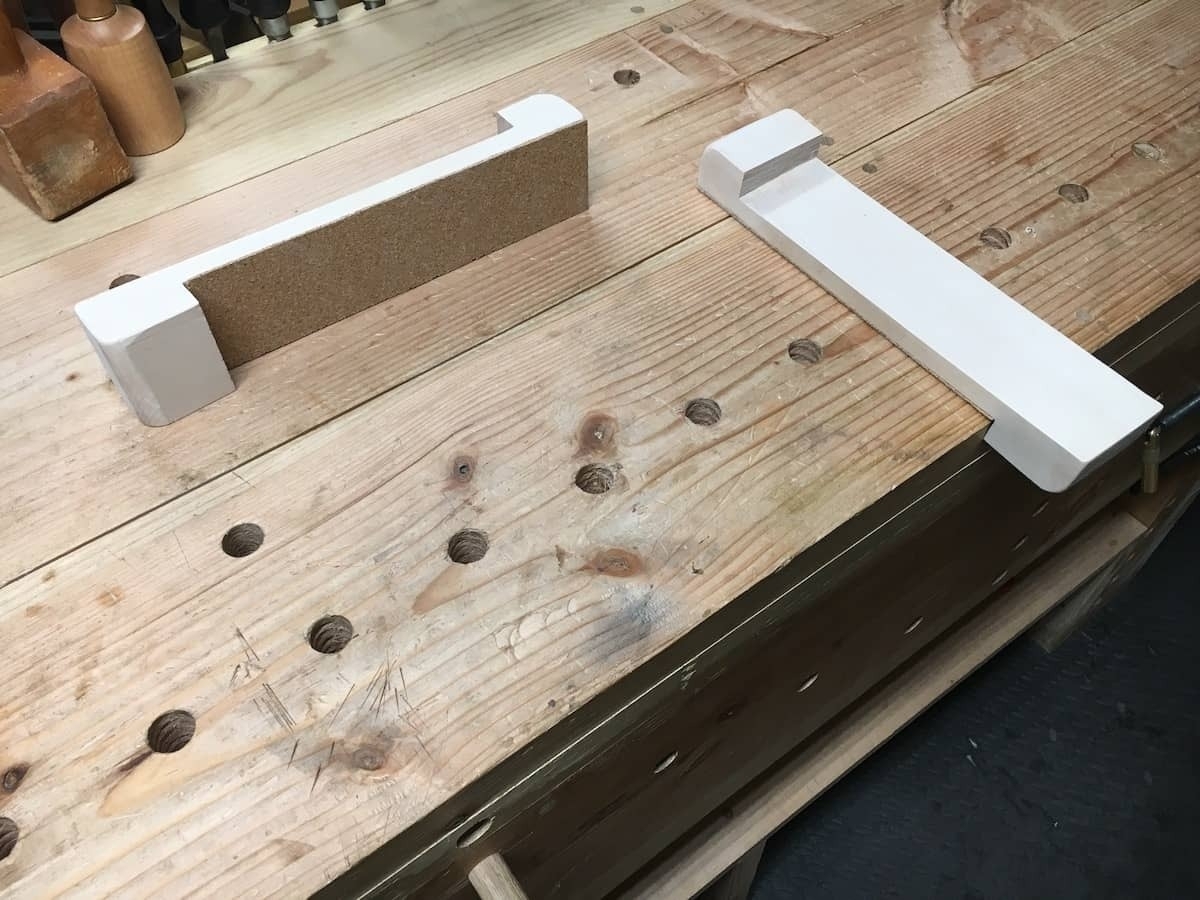
Finished bench hooks
To finish off the hooks, I rounded the corners with rasps, so it's easy to hold with the hand. I also used a card scraper to get the show surfaces as flat and smooth as possible.
The hooks seemed a bit slippery, so I lined the bottoms with cork (secured with hide glue). Now they're ready for use.

Fly Rod/Reel Case Build

All hardware in place

Over the past few months (July-September 2018), I created a display case to hold a fly rod and reel for the Potomac Valley Fly Fisher club, of which I'm a member. The fly rod/reel this case is designed to display is raffled off once a year. The person who wins the raffle gets to use it for one year. The prize comes with a small book to log fishing experiences. At the club's annual banquet, the person who used it for a year gives a short presentation of his or her experiences. 

To get me started on this rod/reel case, I was provided with some photos of a similar box from a fly club in Pennsylvania. That rod case has been in circulation since 1963! I like to think that the display case I made will also be in circulation for many decades to come.

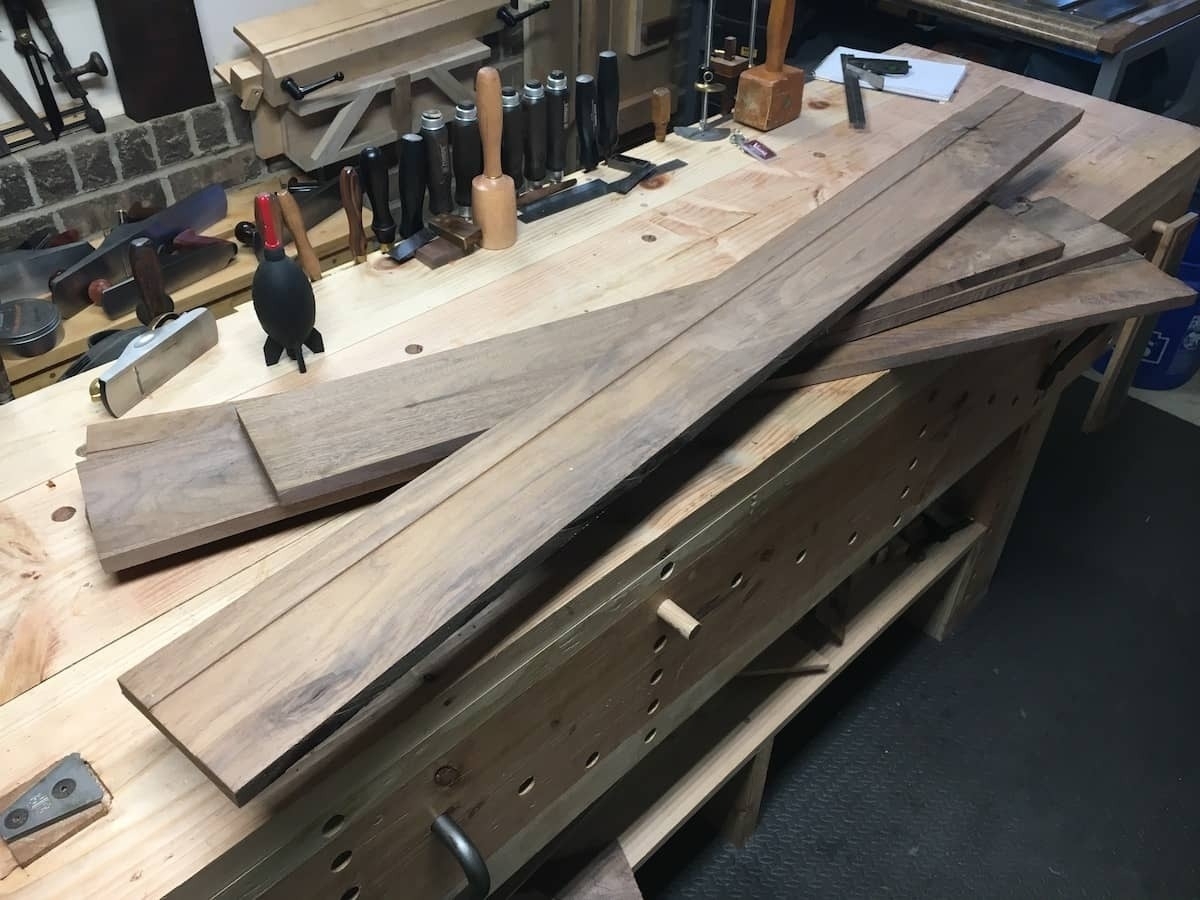
a stack of unfinished walnut
Before: I started out with a stack of tongue and groove walnut panels. These are offcuts and rejects donated by a neighbor used in an 80s project to panel a living room in walnut.
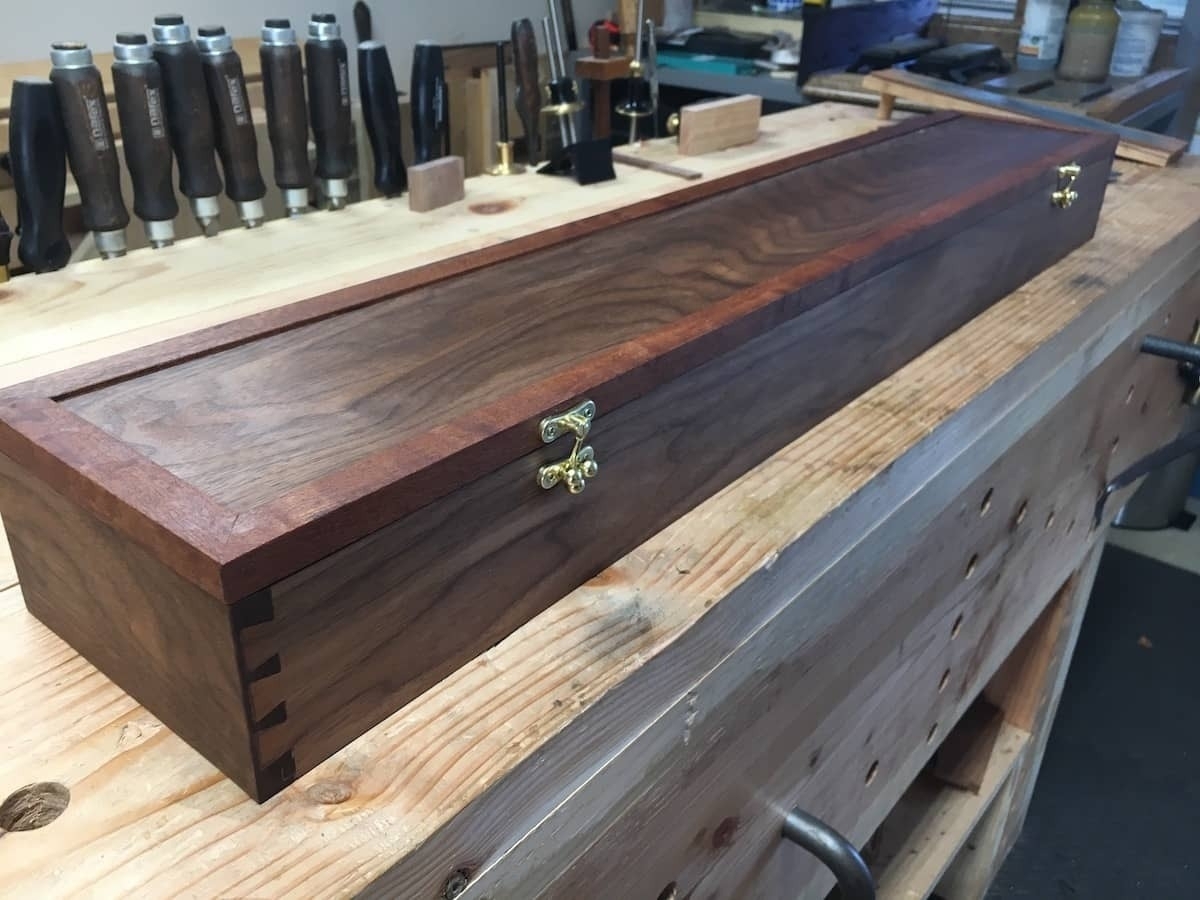
finished case
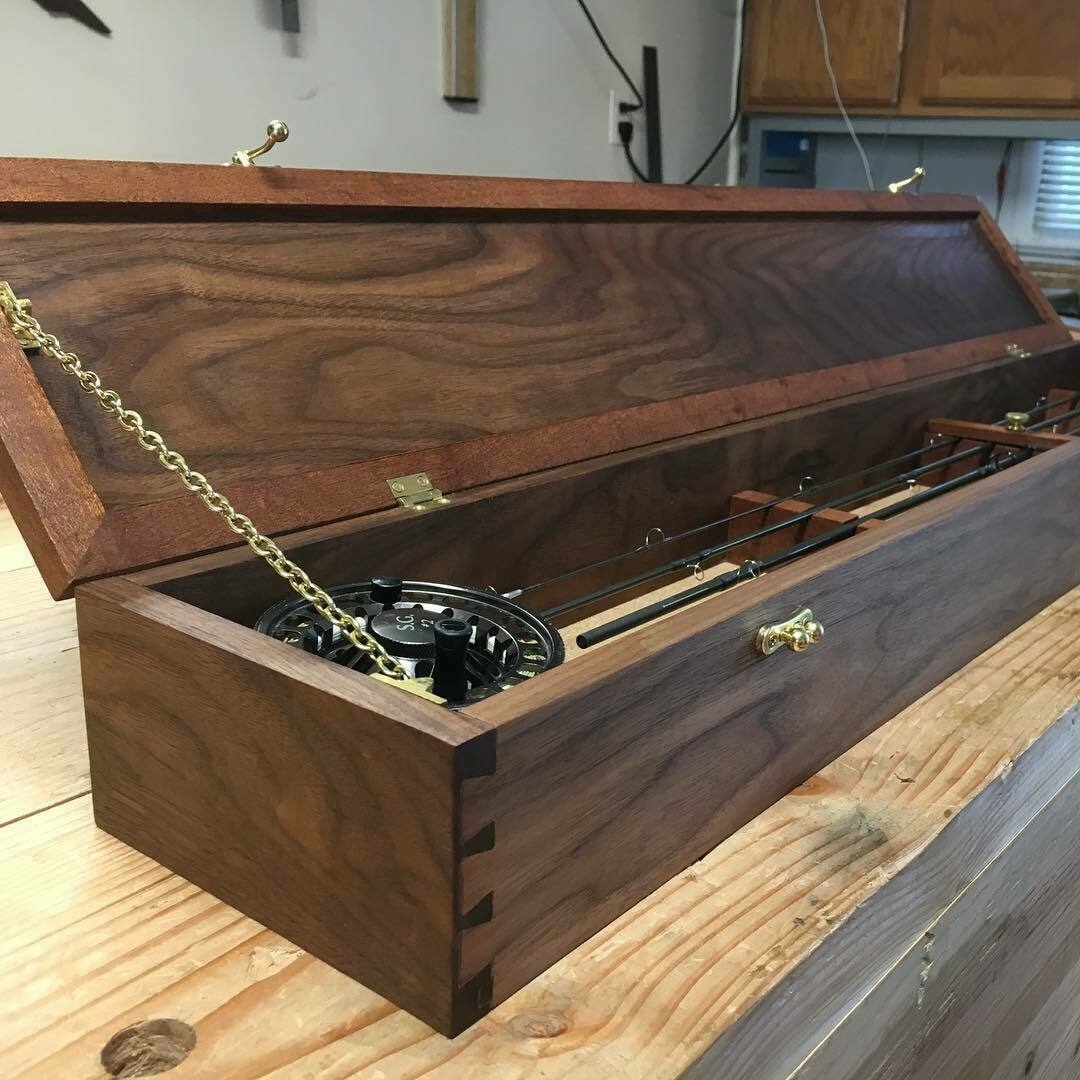
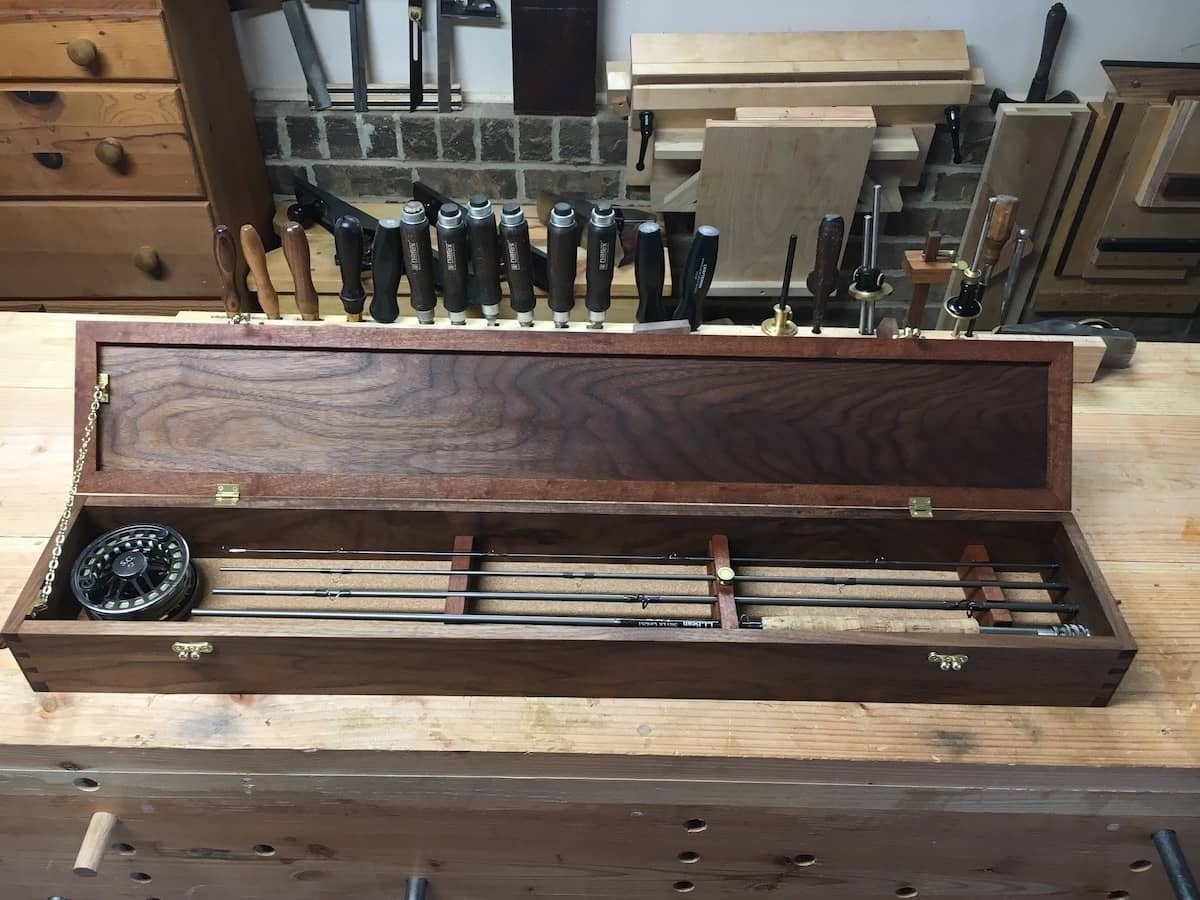
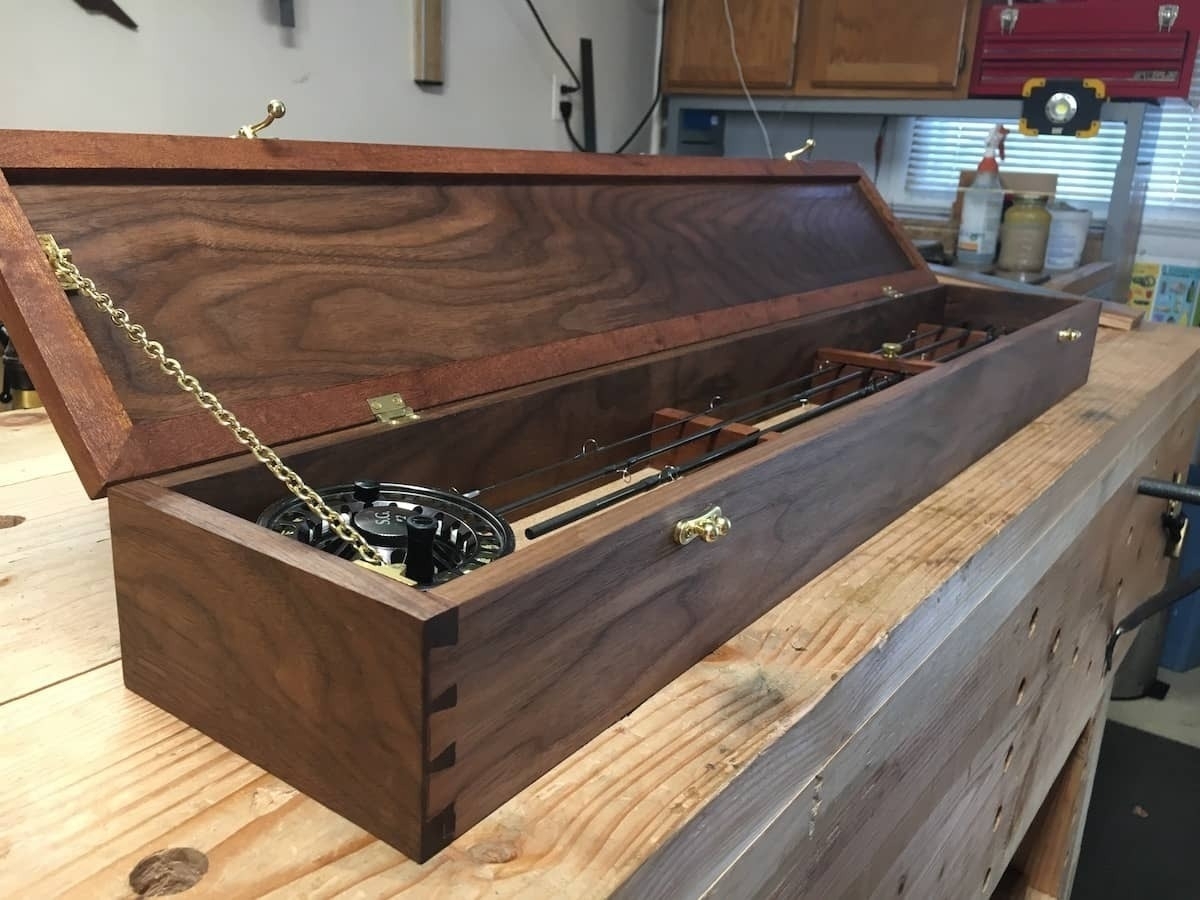
After: this is the completed case, showing the interior.
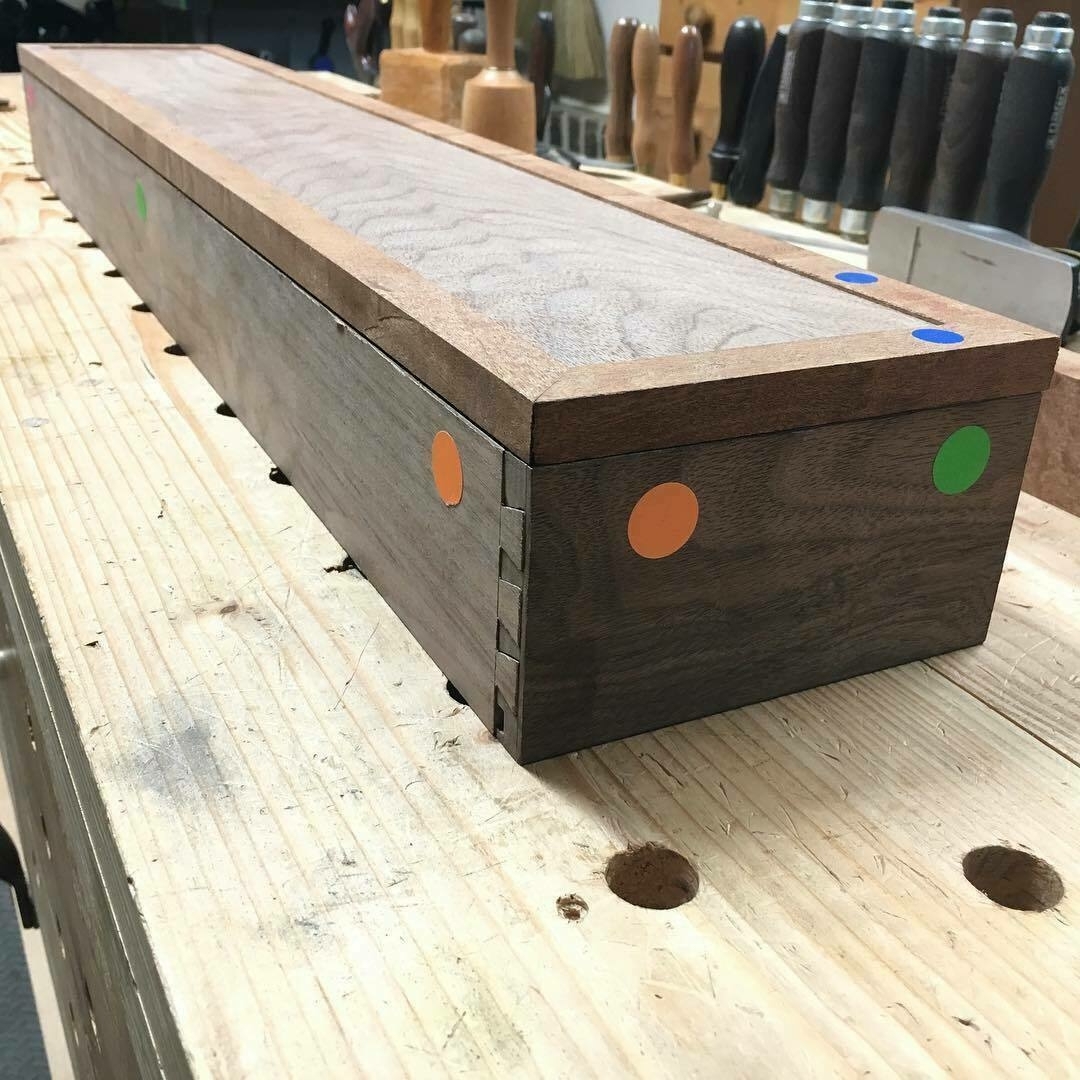
finished case - exterior
And here is the completed case, showing the interior.

The following is a log of how I made the case. What this doesn't show is how much trial-and-error was involved in the process. I spent a lot of time testing out different ways to hold the rod and reel in place, in particular. It also doesn't show how much help, guidance, and inspiration I received from fellow woodworking members from the Hand Tool School.

Stack of walnut boards ripped and planned.
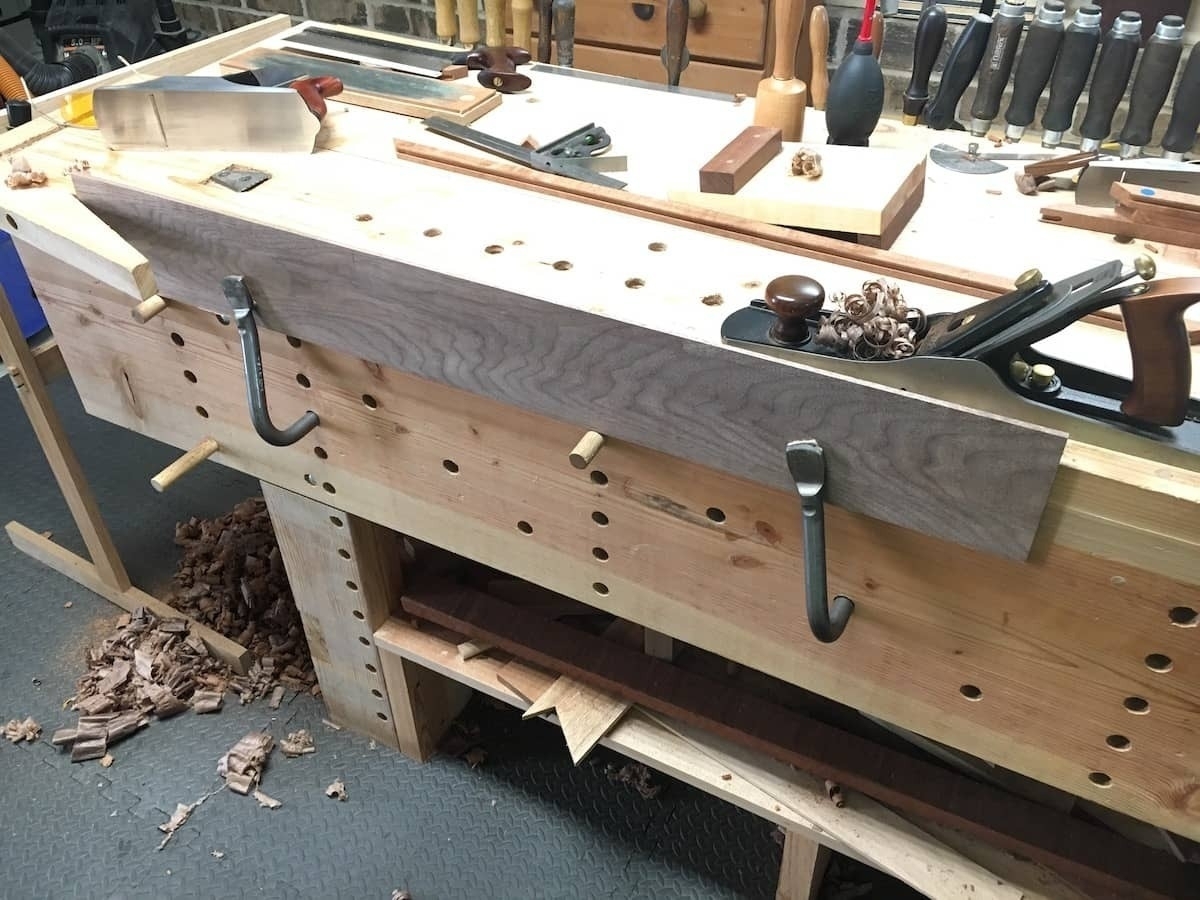
I used a 5tpi rip saw to cut the boards in half and to cut off the tongue and grooves. Then I used a #7 plane to get the panels to proper thickness.
Cutting boards to length with crosscut carcass saw.
I used a crosscut carcass saw to cut the boards to length.
cork liner on base panel
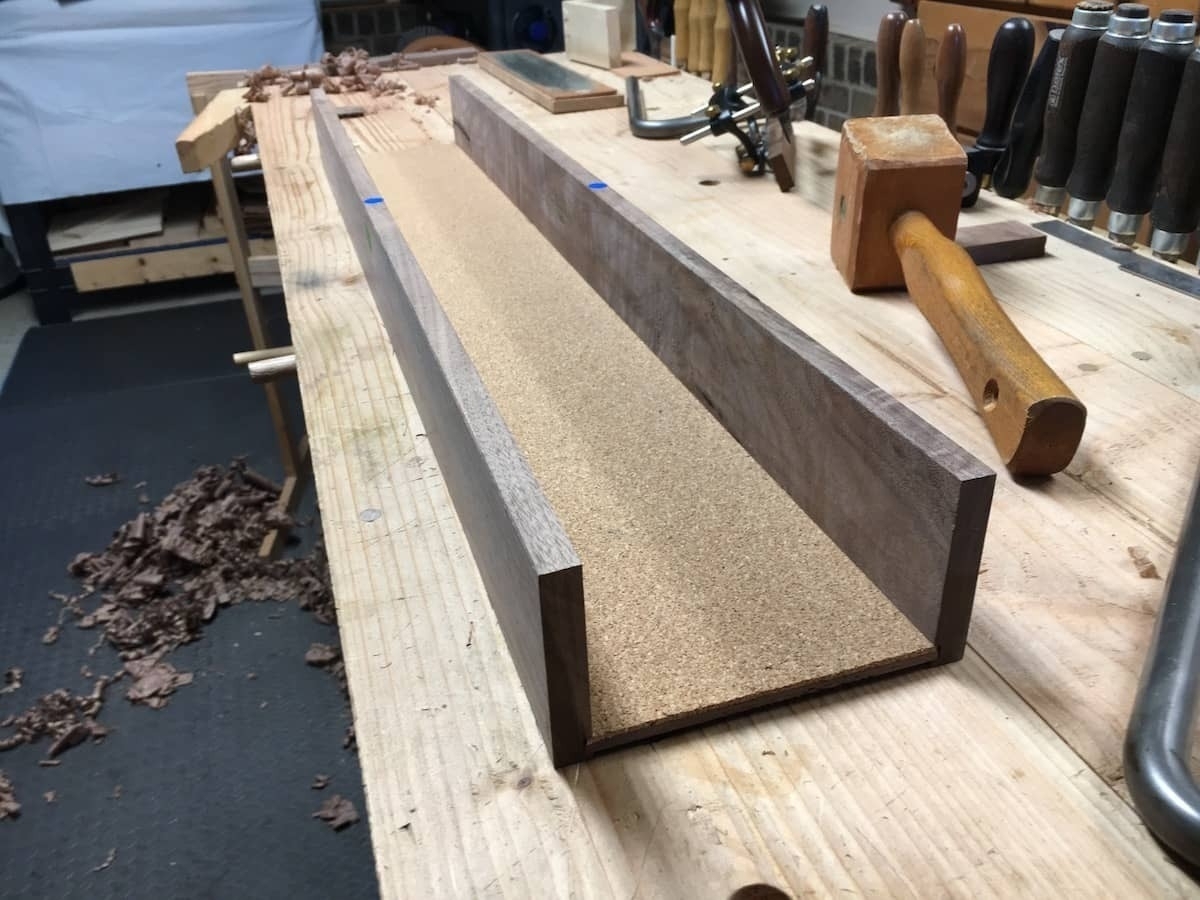
The bottom of the case was lined with cork, which I glued on.
cork liner installed, showing rabbets on side panels
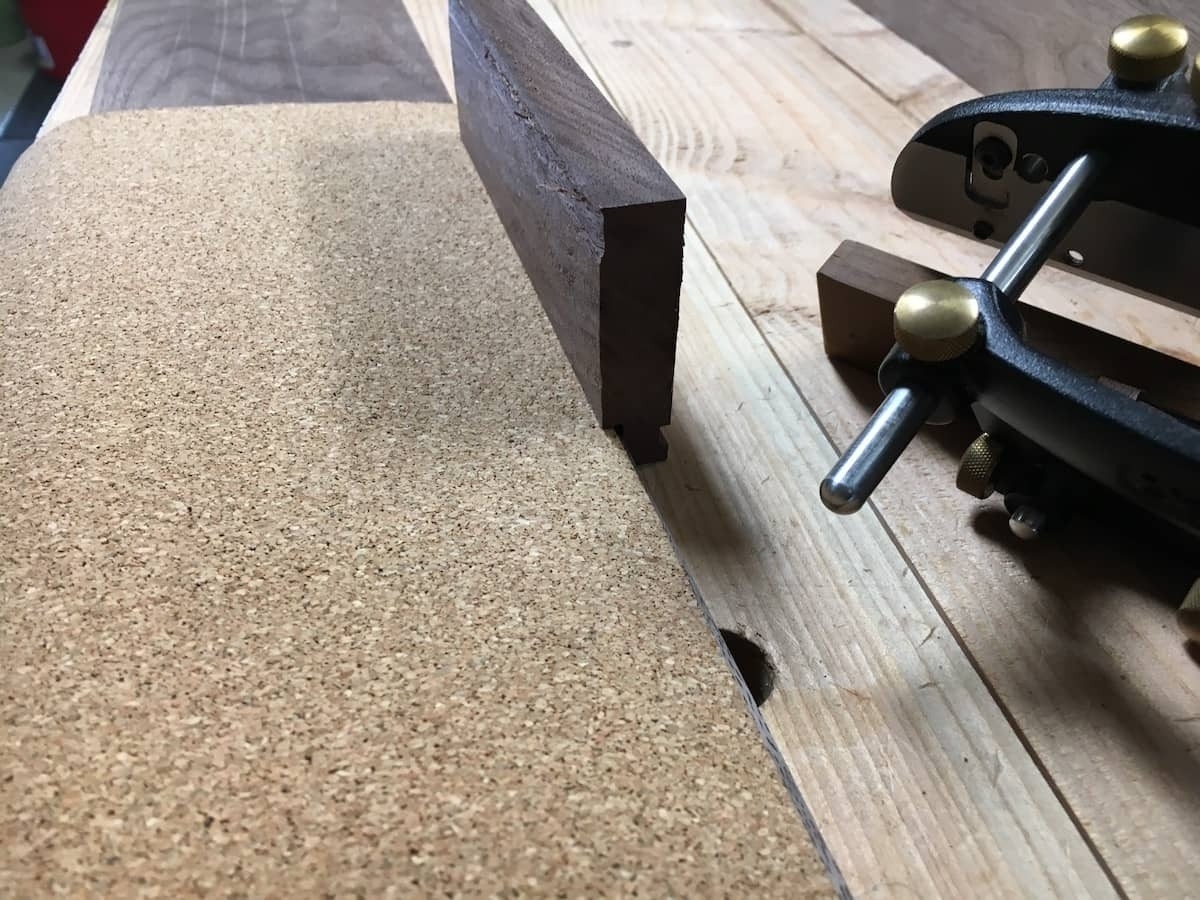
Once the cork liner was in place, I measured the total thickness of the bottom panel. I then used a plane to get the total thickness to 5/16". This is the size of the blade I used to cut the grooves for the side panels. To cut the grooves, I used a Veritas combination plane.
Paper sketch of dovetail set-up
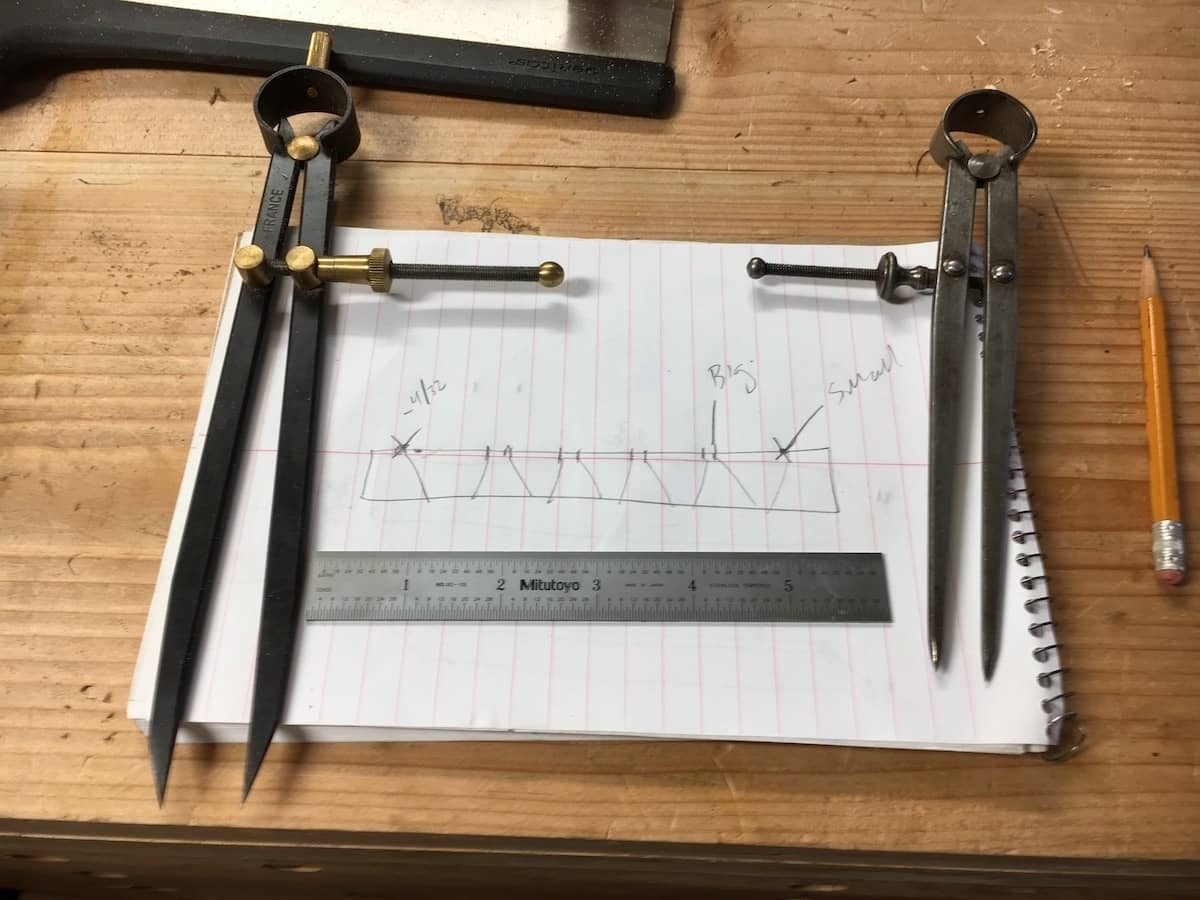
I sketched out the dovetails on paper before I started cutting. I decided to go with half-blind dovetails. I used two dividers because one is set to step across the end grain and the other was set to mark the distance from the edges.
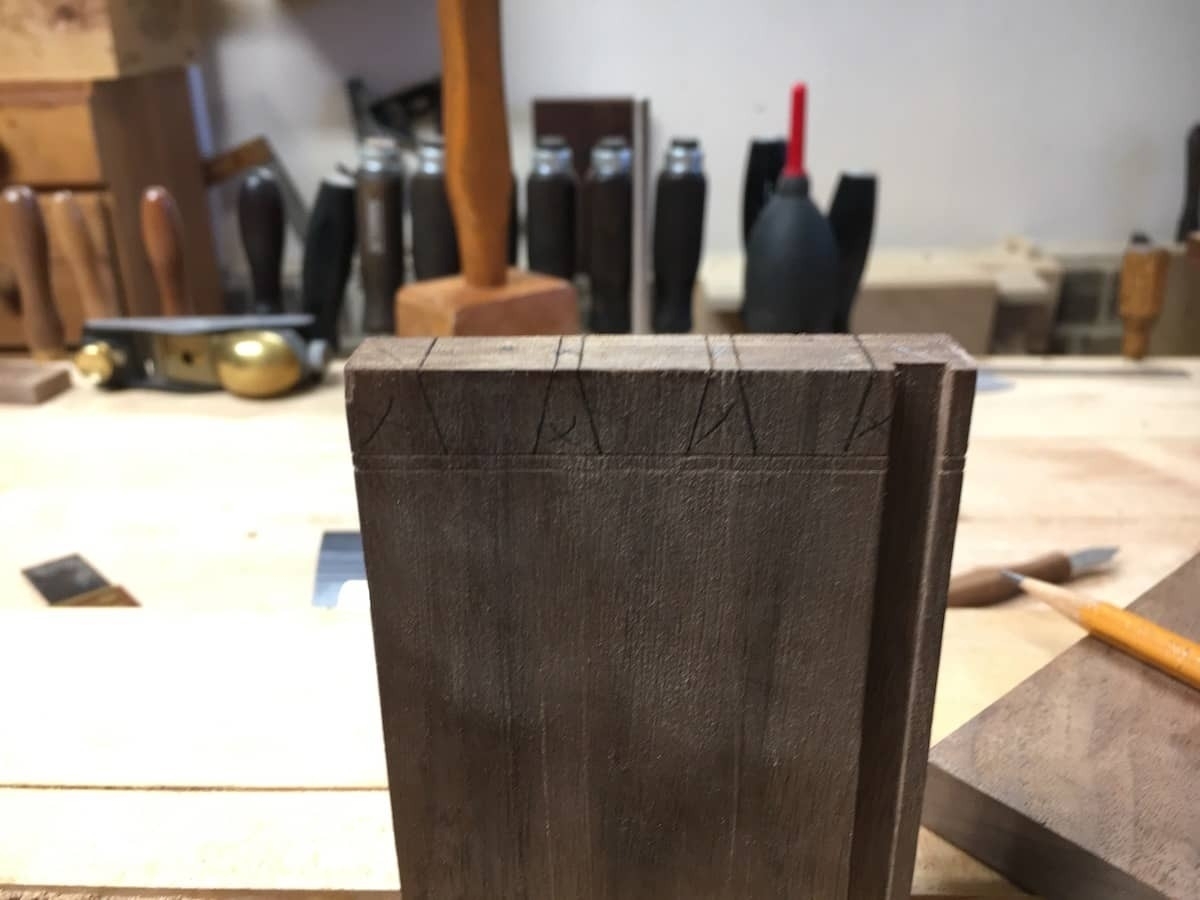
End panel with pencil marks for dovetail cuts
I marked out the tails first, then cut them out with a dovetail saw and 1/4" chisel.
marking out the pins
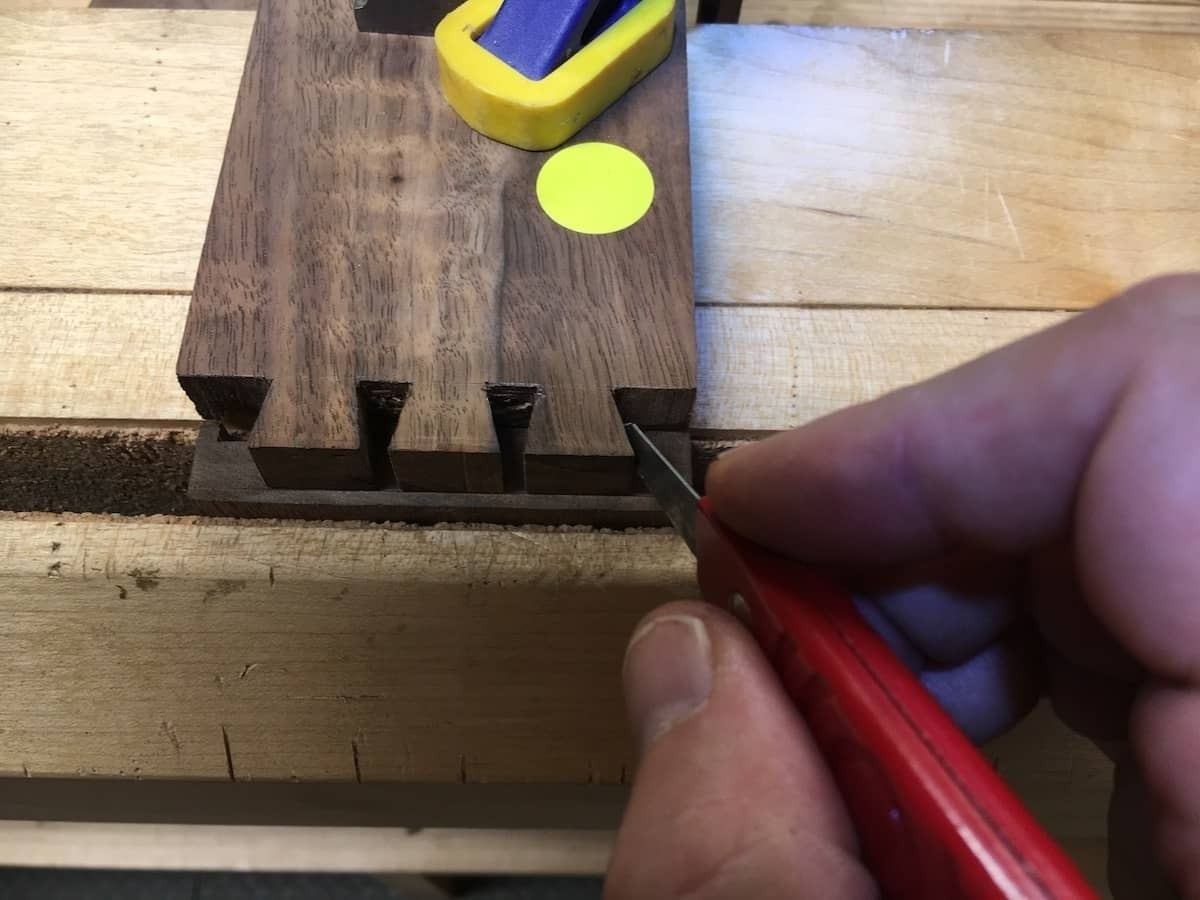
Once I had the tails cut, I marked out the pins using a dovetail knife. I secured the bottom panel here in a Moxon vise.
sawing pins of dovetail
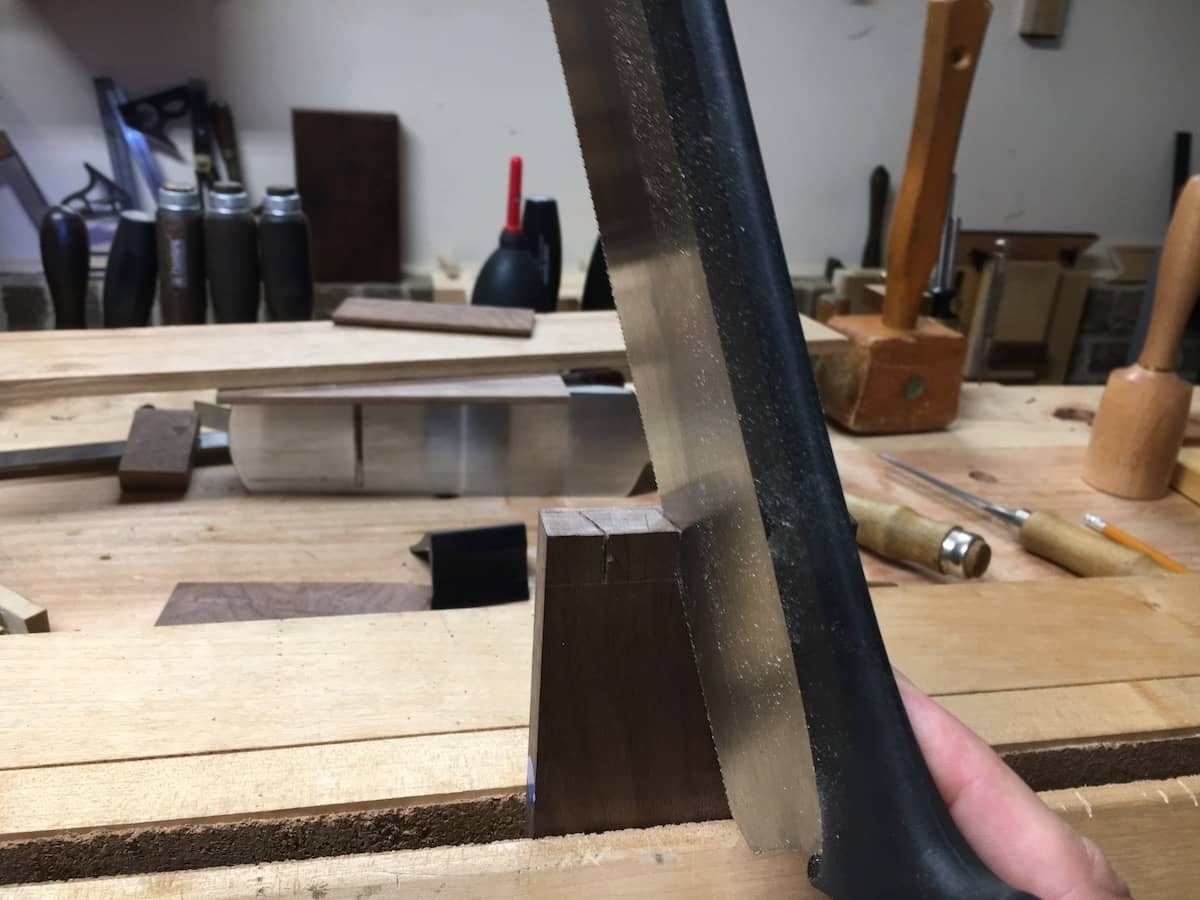
This is a shot of cutting out the pins. For half-blind, I cut at a steep angle down to my lines.
Chopping out pins with a chisel
Then I chopped out the pins with a 1/4" chisel. It was a delicate, time-consuming affair.
Rough half-blind dovetail fit together
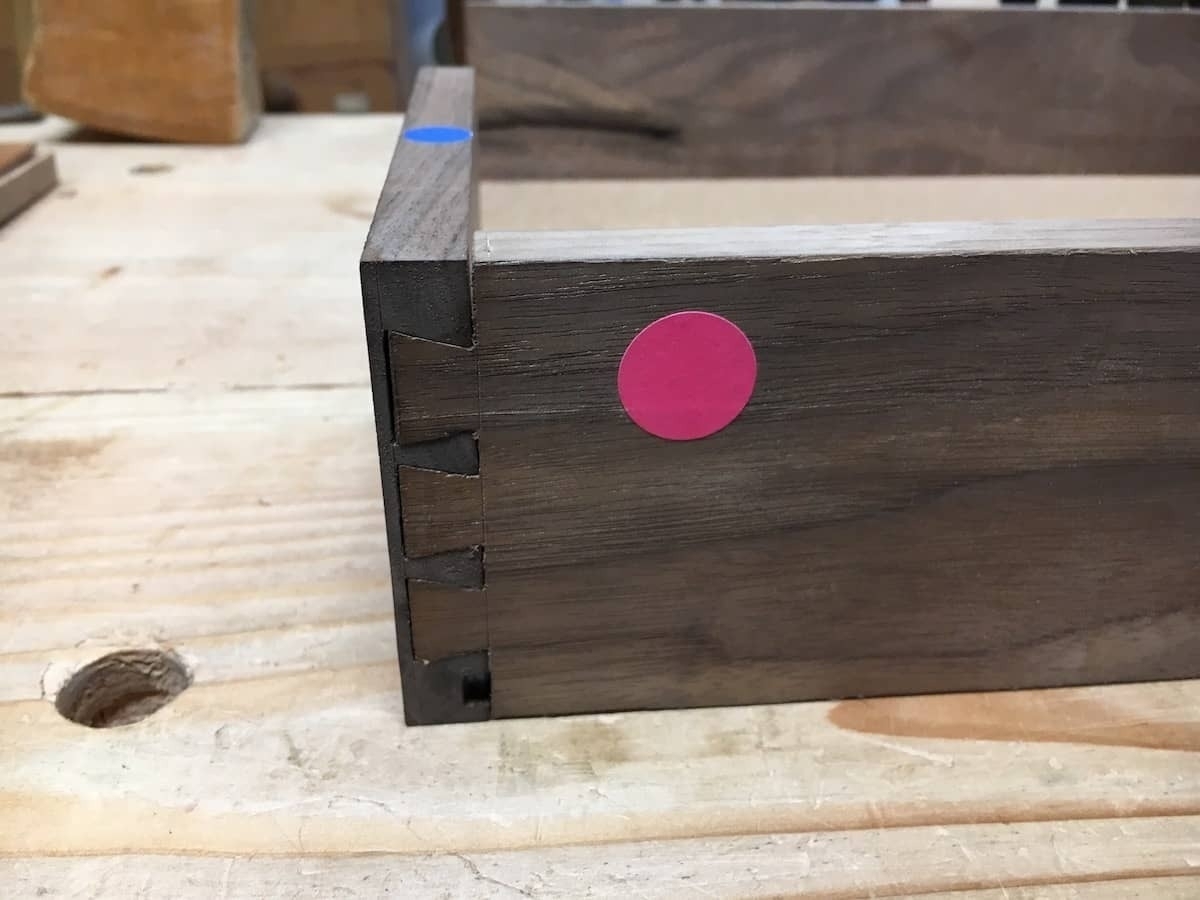
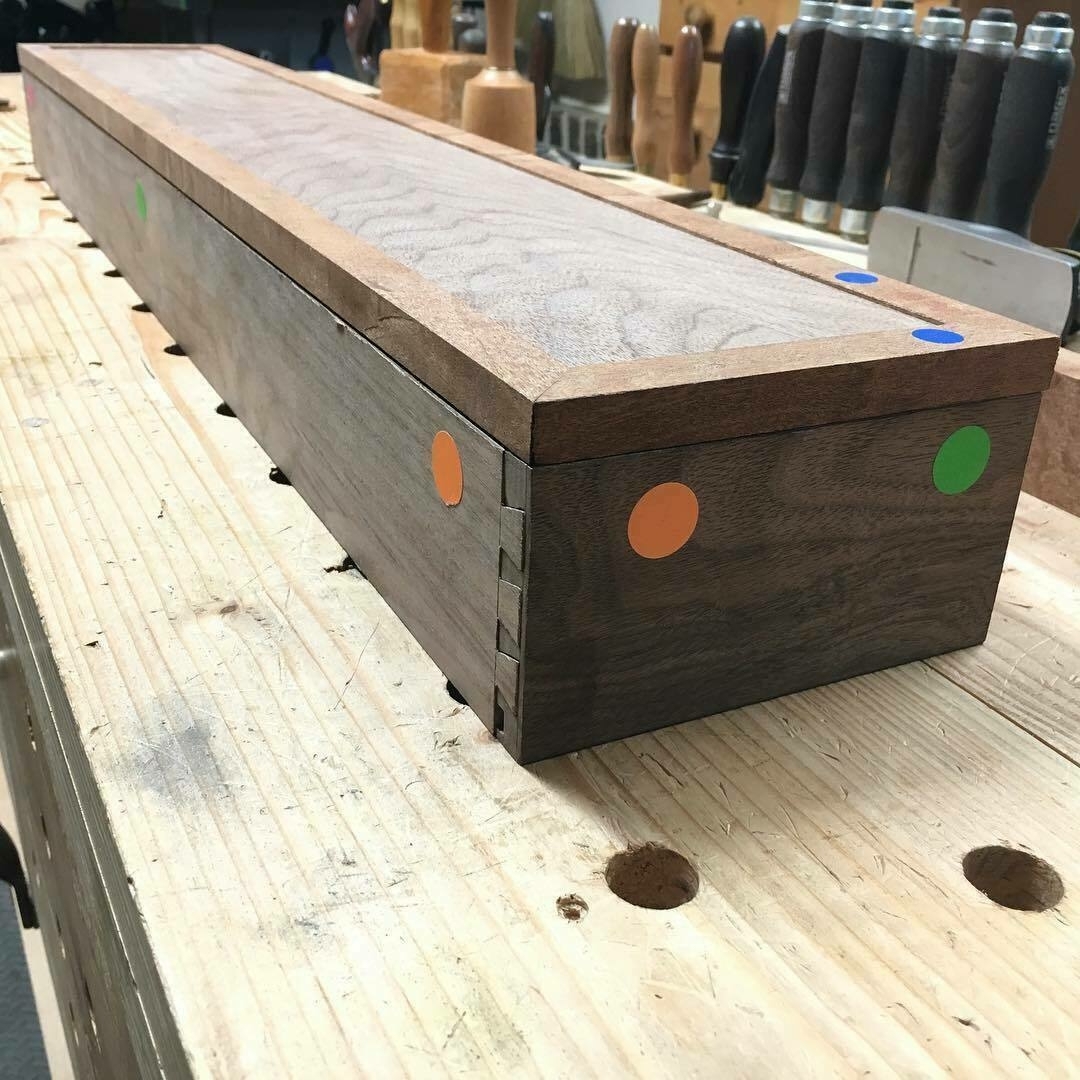
Here's one corner completed, showing the half-blind dovetail up close. I color code each part of the project so I can keep track of how the different pieces fit together. Note that I also cut my grooves through because it's just so much easier. I plug the groove holes at the end of the project and they are barely visible.
carcass assembly
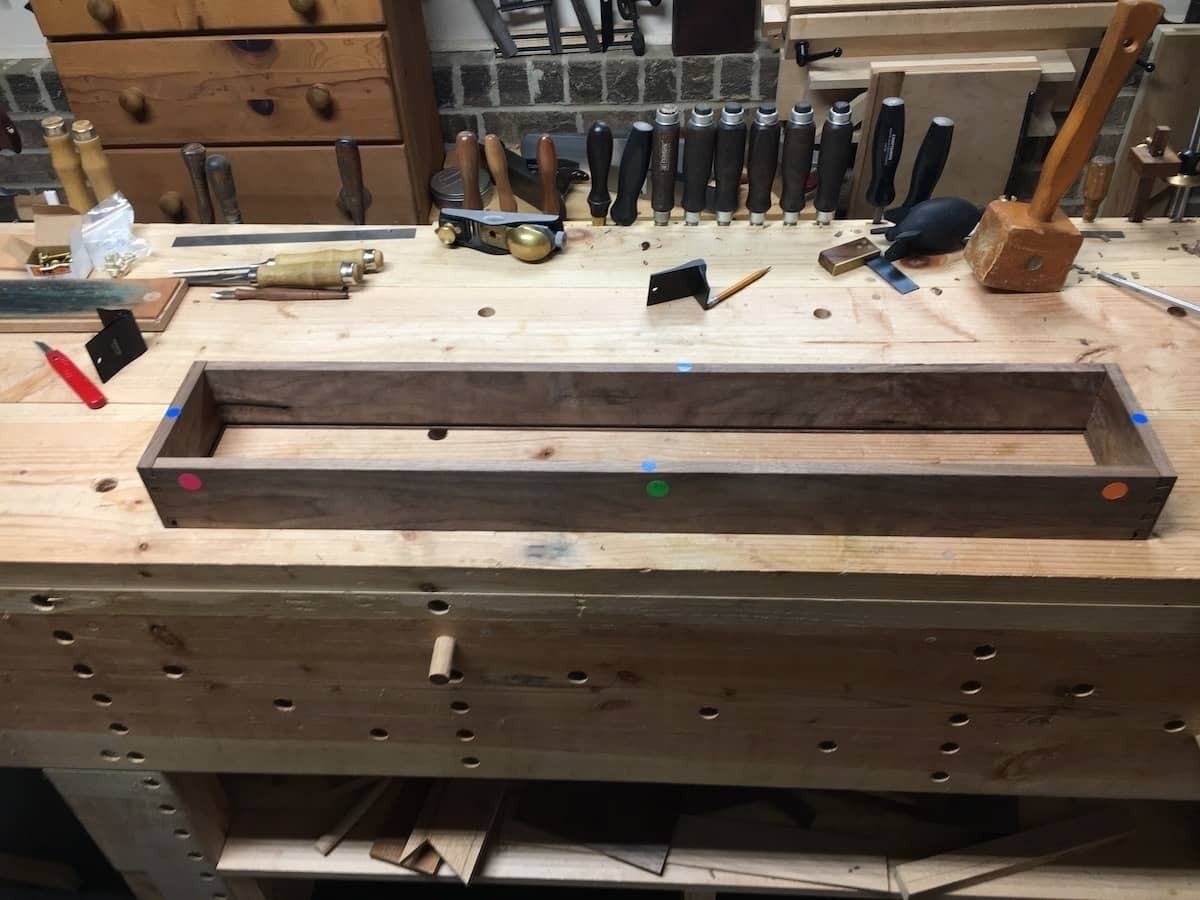
This shot shows all the dovetailed corners connected up, without the bottom panel inserted so the bottom grooves are visible.
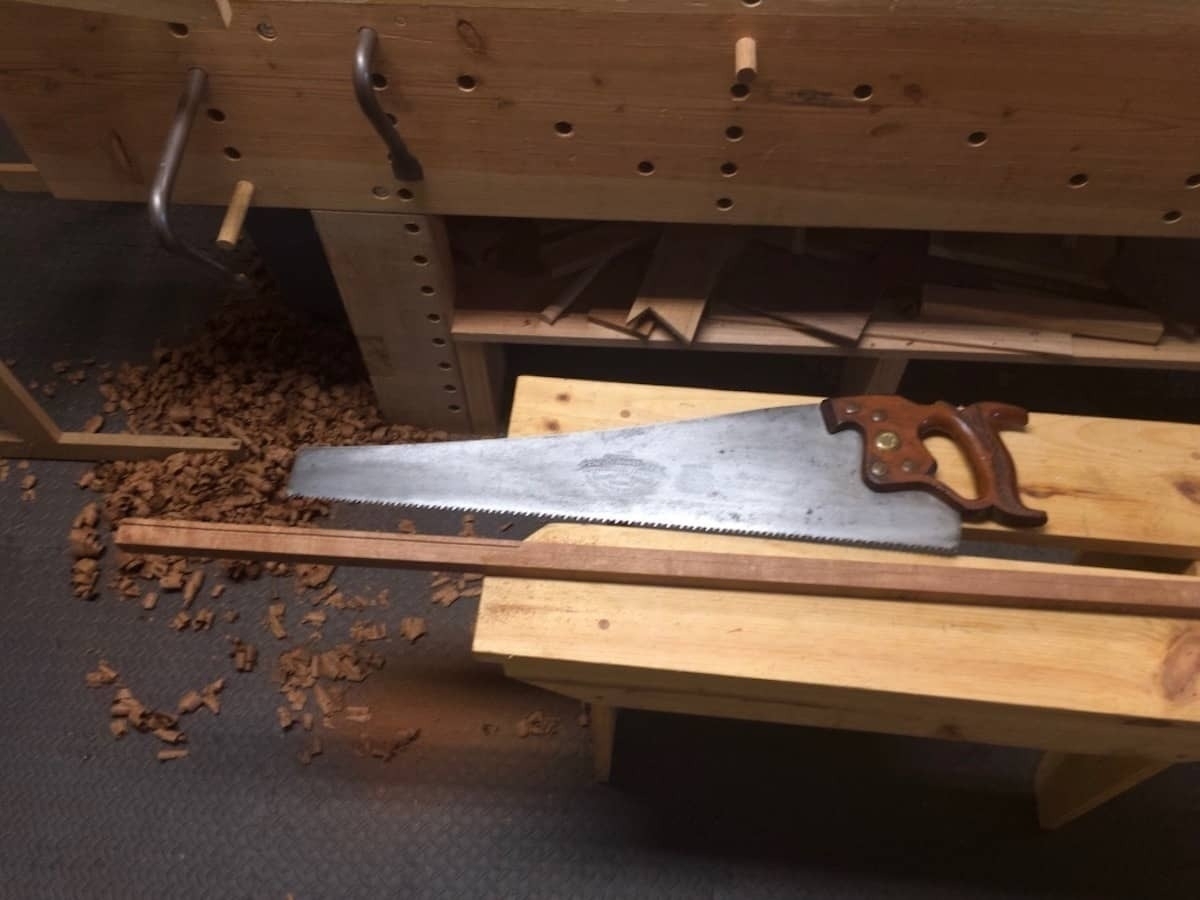
A rip saw and a thin strip of sapele
Next, I started working on the lid for the box. I used sapele for the mitered frame of the box lid, mainly because I ran out of strips of walnut! I cut the strips of sapele to size with a rip saw.
cutting miters
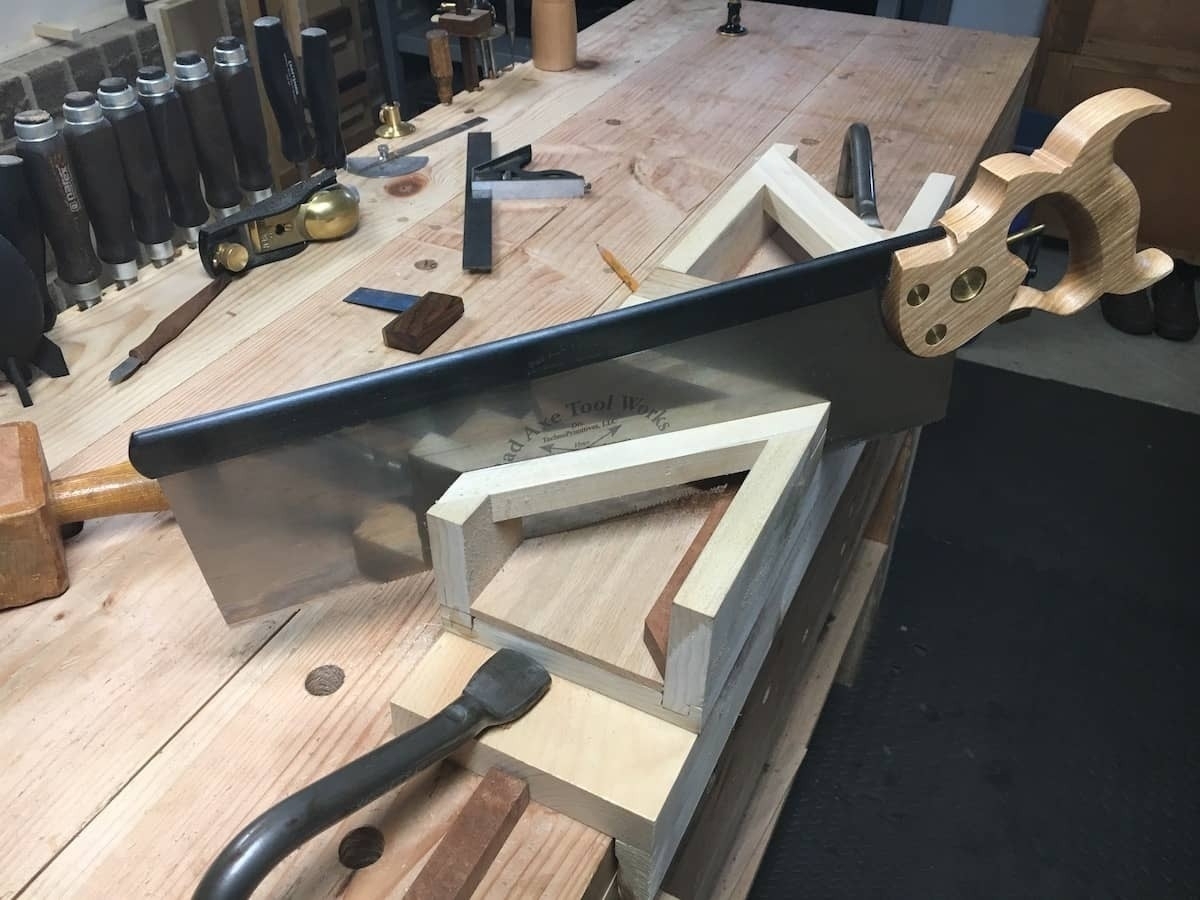
I used a miter box I made in 2017 to cut the mitered corners for the box lid frame. Here, I'm using a Bad Axe tenon saw.
using a plane to finish edges of panel
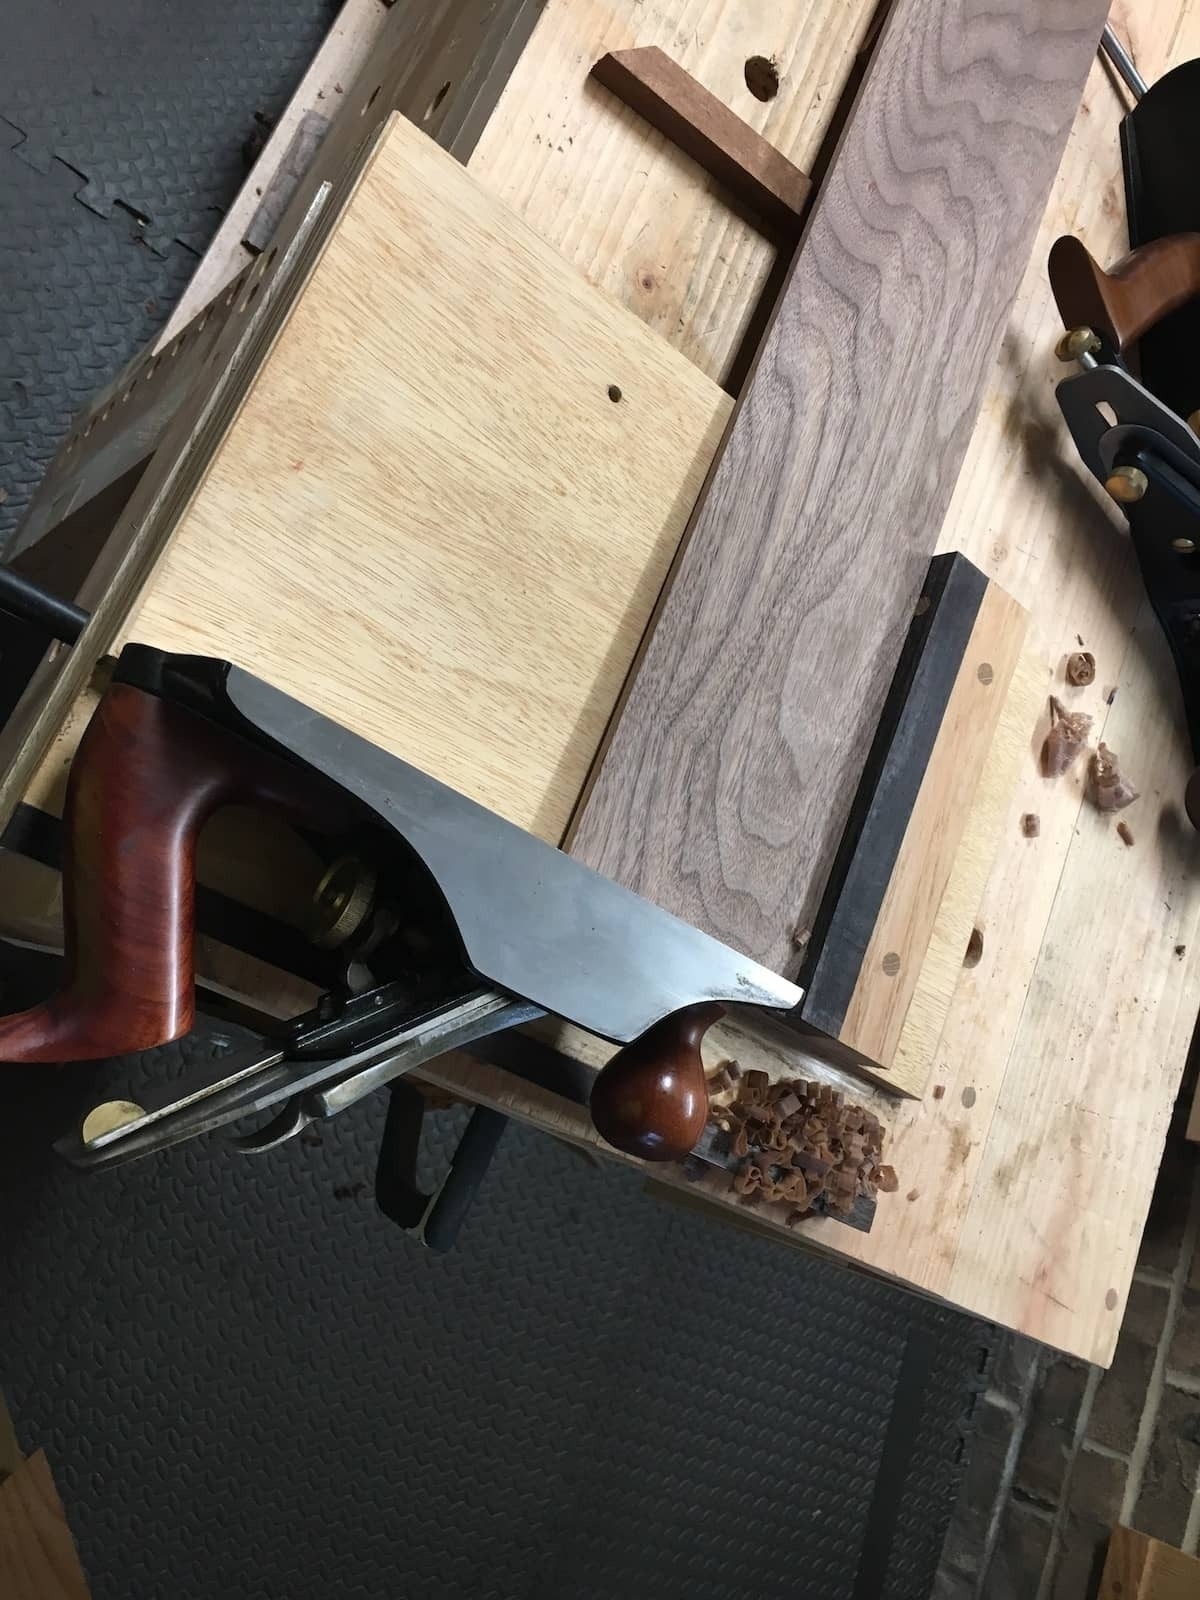
This is the inside panel of the box lid, which will be framed with sapele using mitered corners. Here, I'm using my #7 to finish up the long edges.
shooting ends of panel
Squaring up the edges of my panel using a shooting board.
box, all dry fit together
And here is the box with everything dry fit, showing the completed box lid with the miter frame in sapele and the panel in walnut.
fly rod laid out on bench
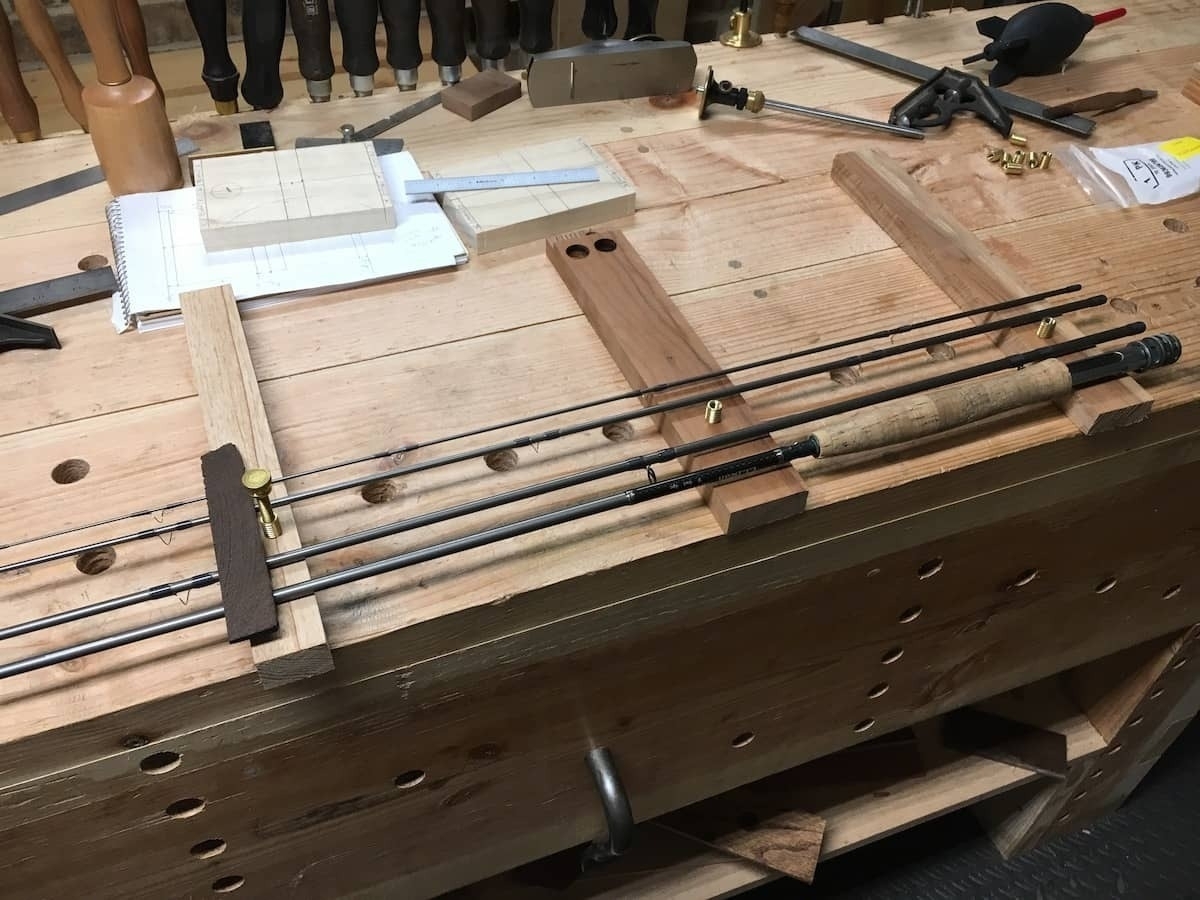
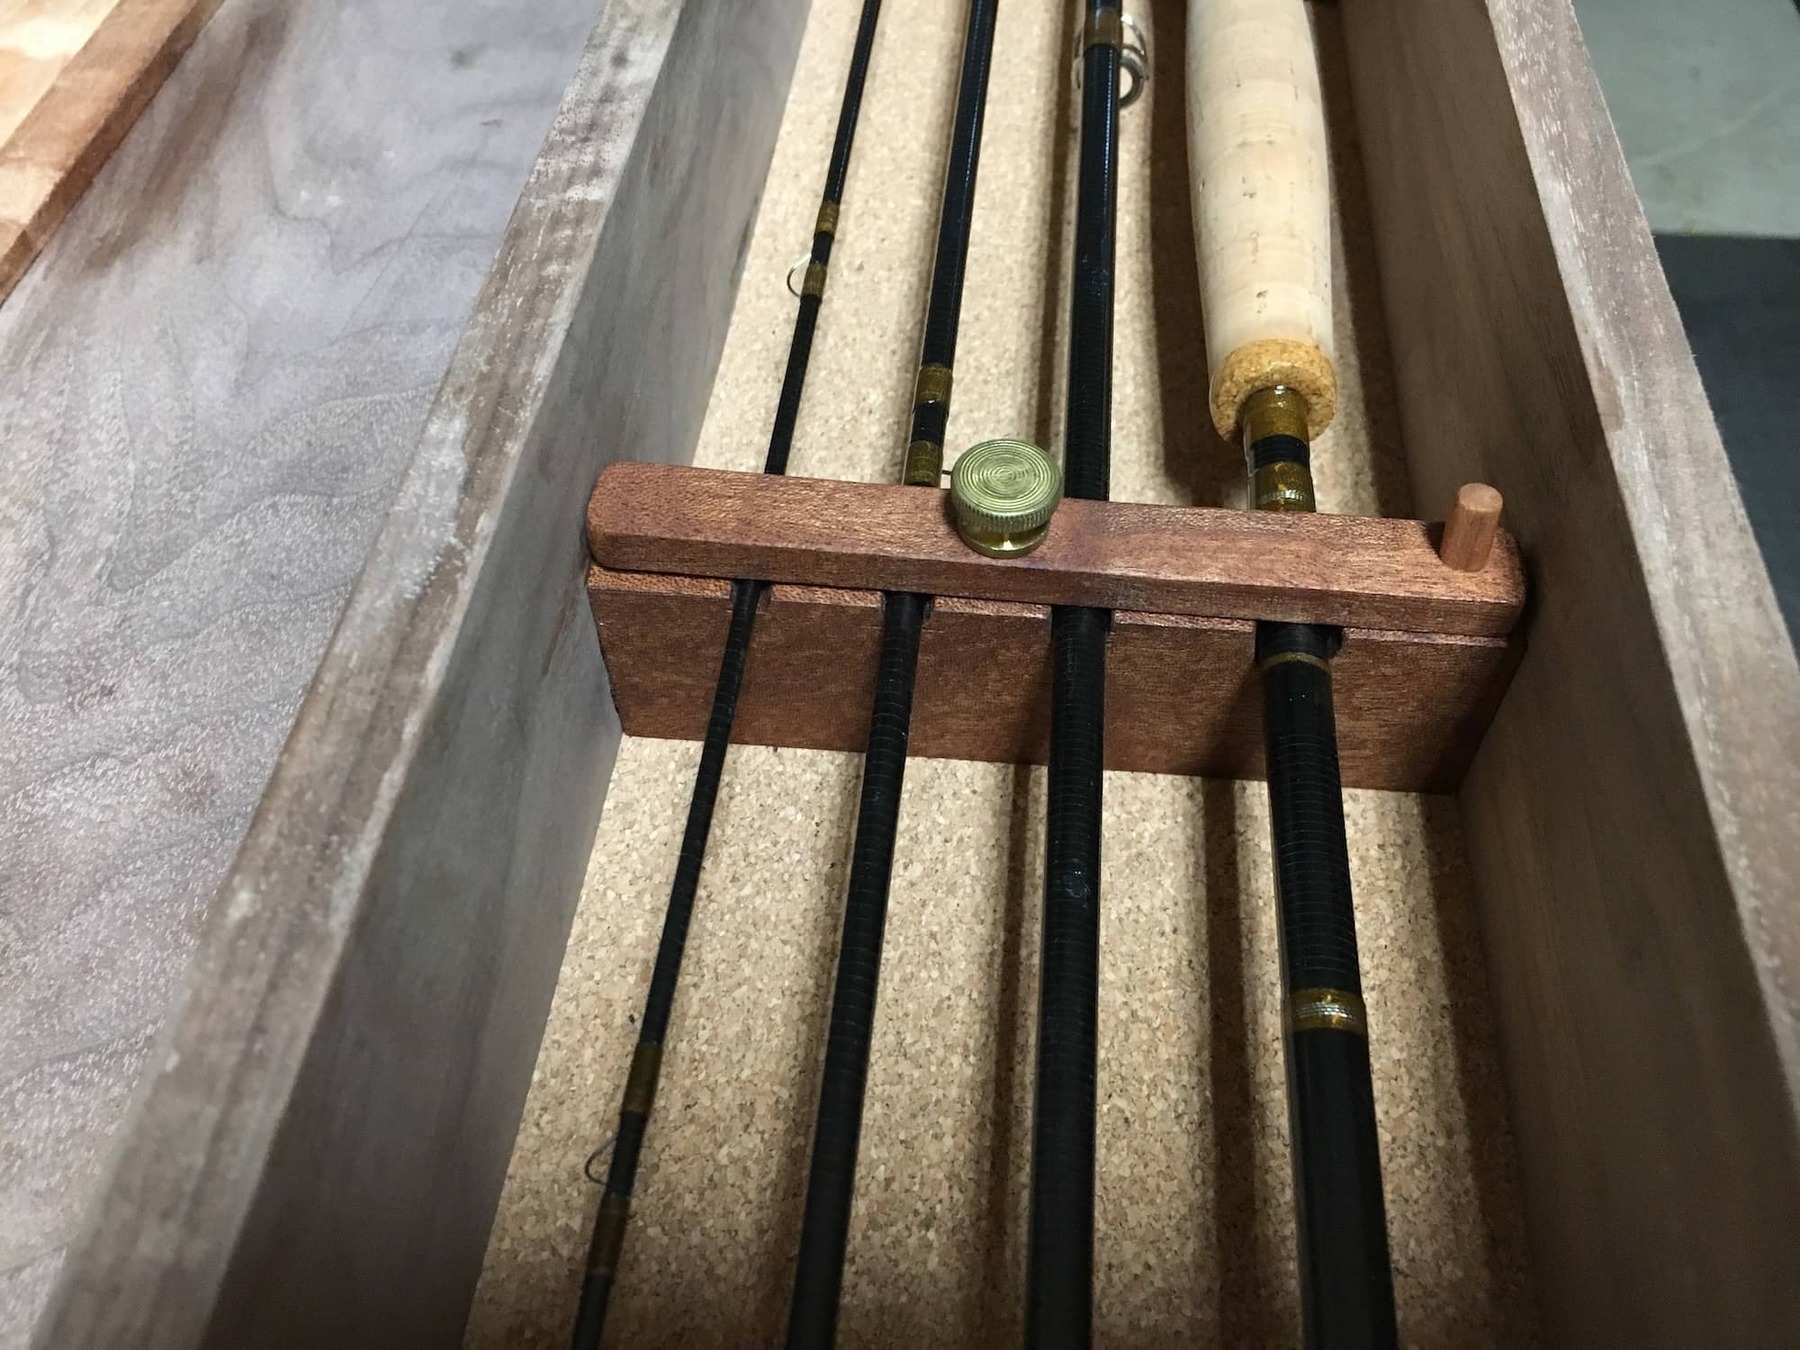
Next up, I had to figure out how to secure the rod in the box. Here, I'm laying out the rod sections on scrap wood to see where to place the inserts in the box that will hold it in place. I used sapele for the inserts (to match the mitered frame of the box lid) because I thought it balanced it out nicely with the contrasting walnut.
inserts that will hold the rod
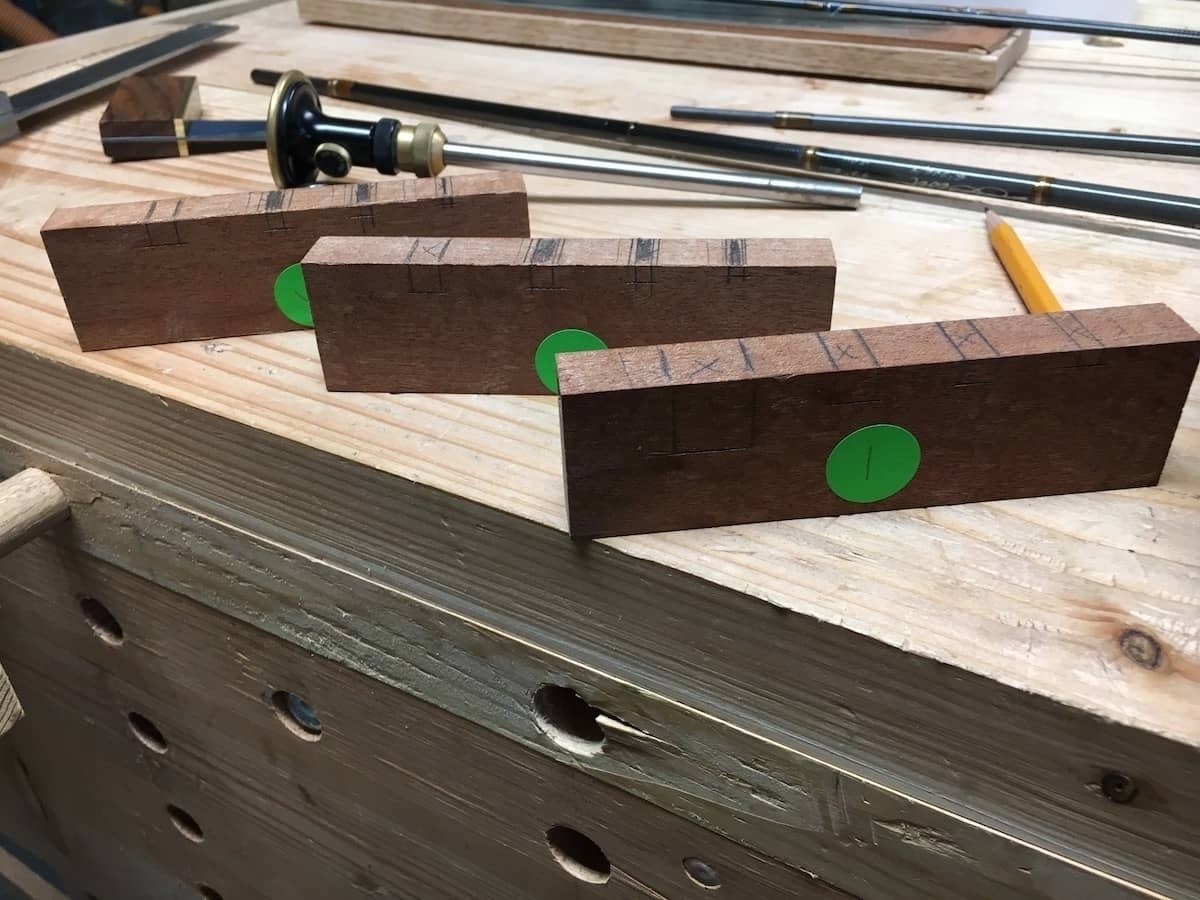
And here are the inserts that will hold the rod. I used double-sided tape to hold the rod pieces in place on these blanks, then used a pencil to mark out the lines. I used a marking gauge to figure out how deep to make each groove.
filing out the rod holding grooves
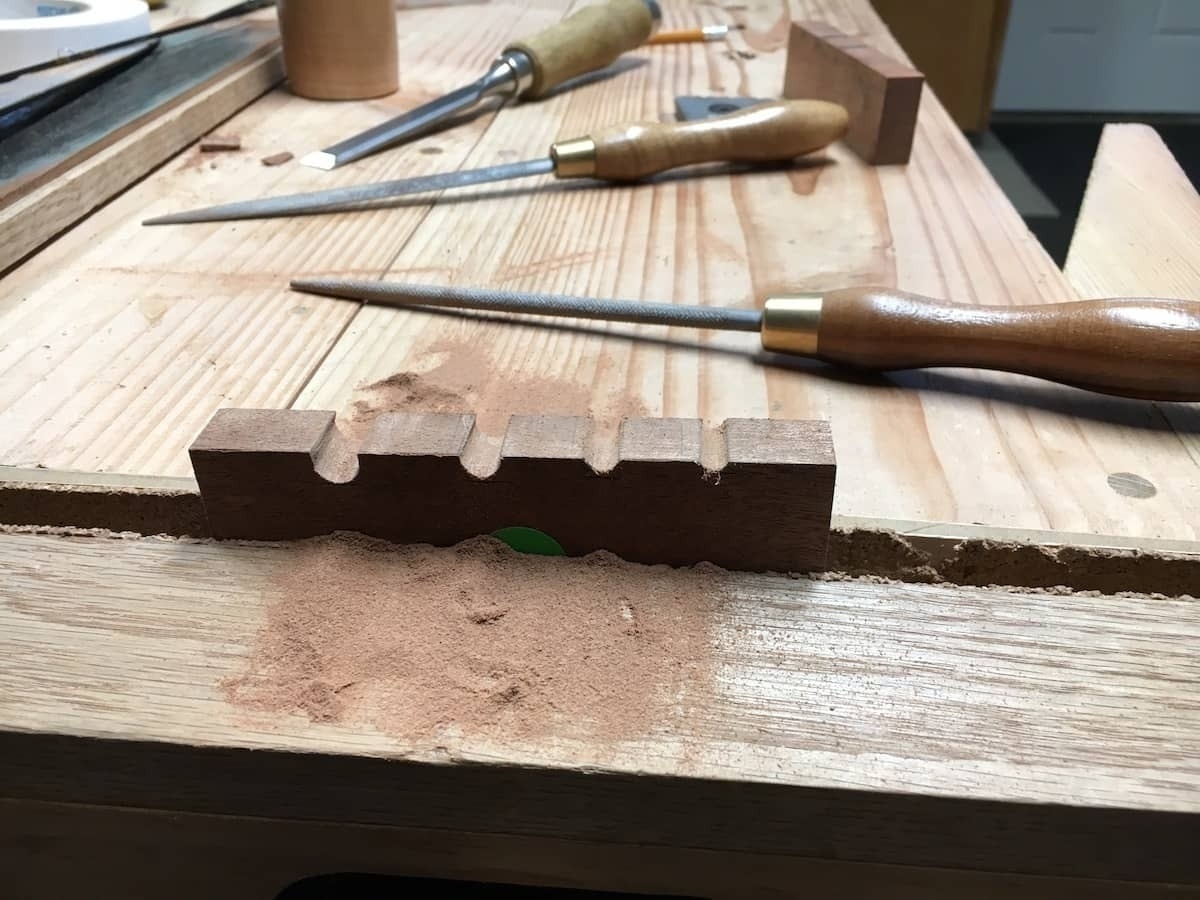
I used Auriou rasps to file out the grooves to hold the rod in place. These rasps are expensive, but they are so worth it.
tapping thread in wood
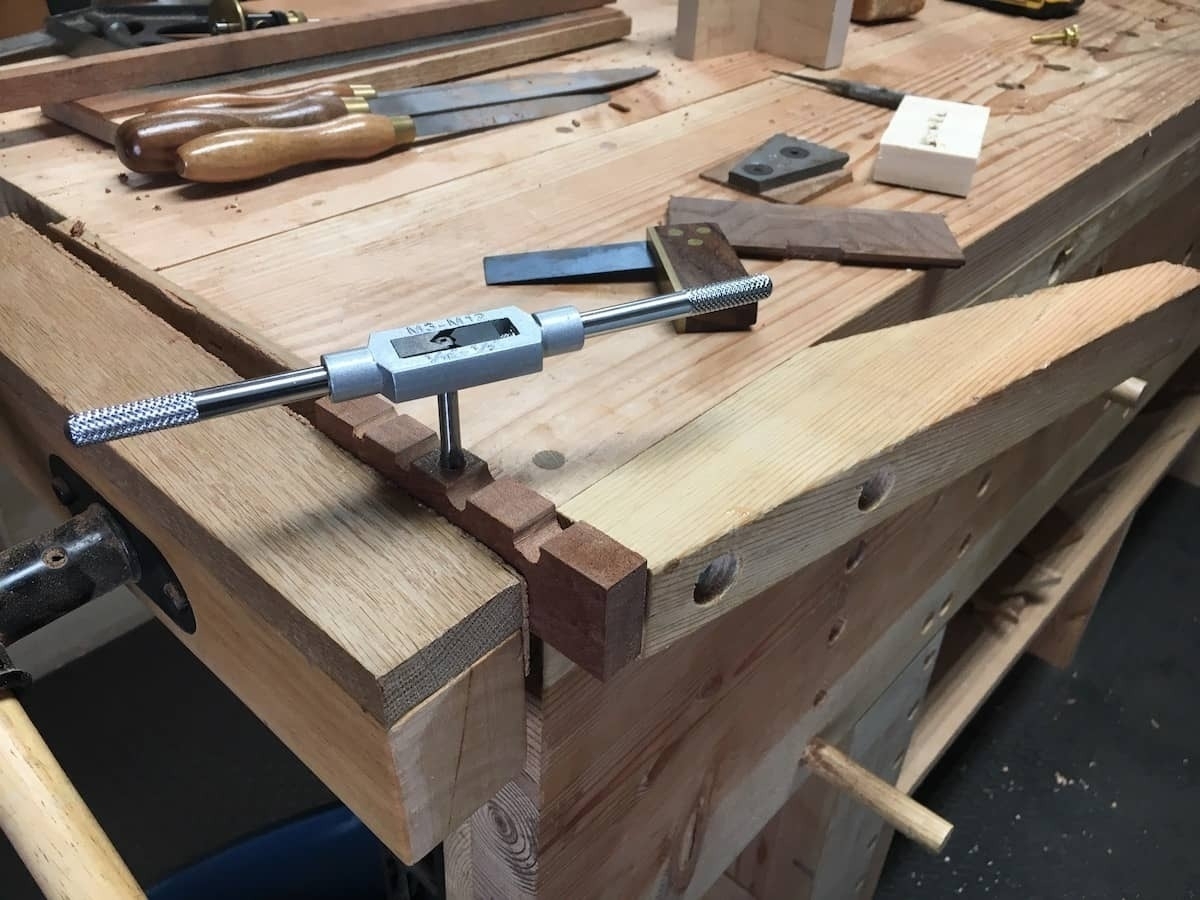
For the center insert that goes in the box, I threaded the wood. Why I did this will be apparent in the next photo.
Center insert with holding arm
This is the center insert with the threaded hole. I used a brass thumb screw here from McMaster-Carr to attach a small swinging arm. This arm keeps the four rod sections held firm when locked down.
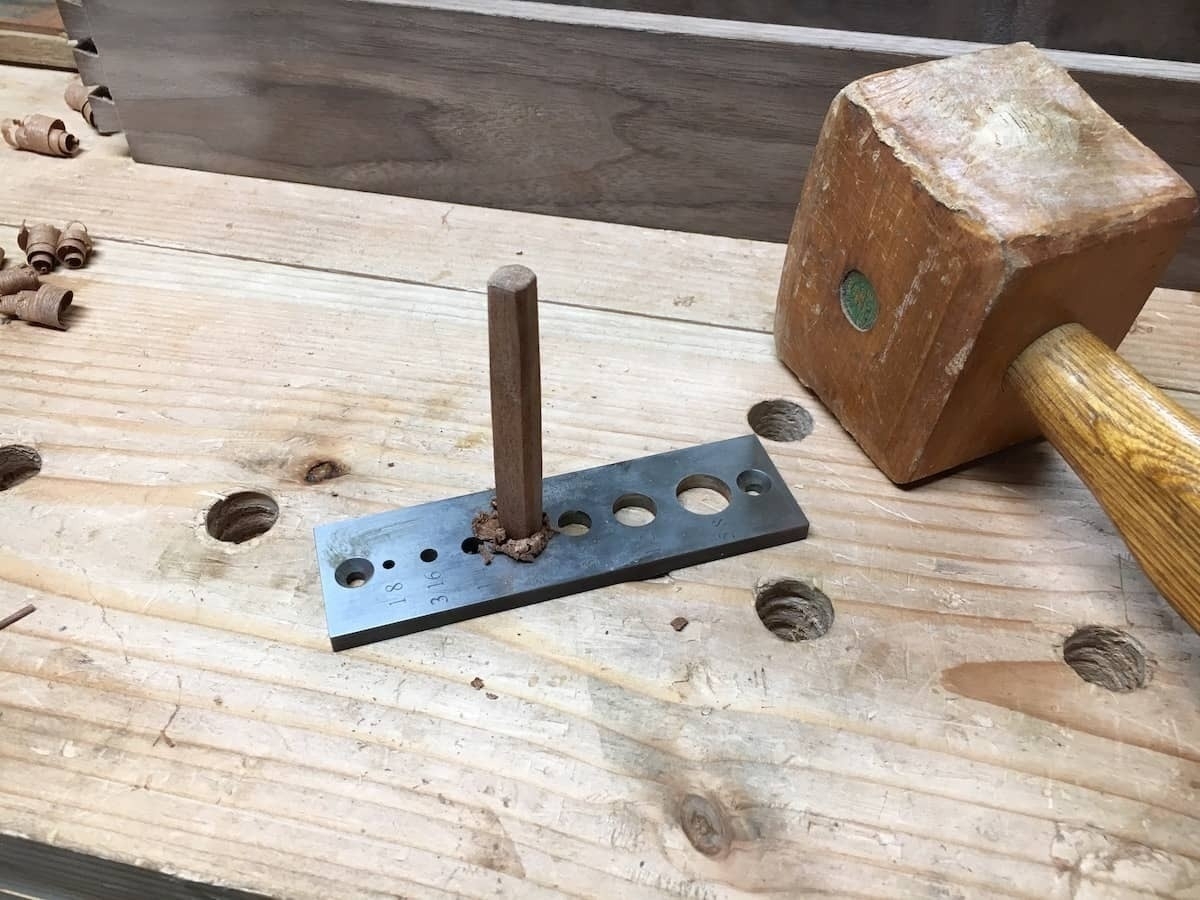
making a dowel
Next, I made a 1/4" dowel, which is used to hold the reel in place in the box.
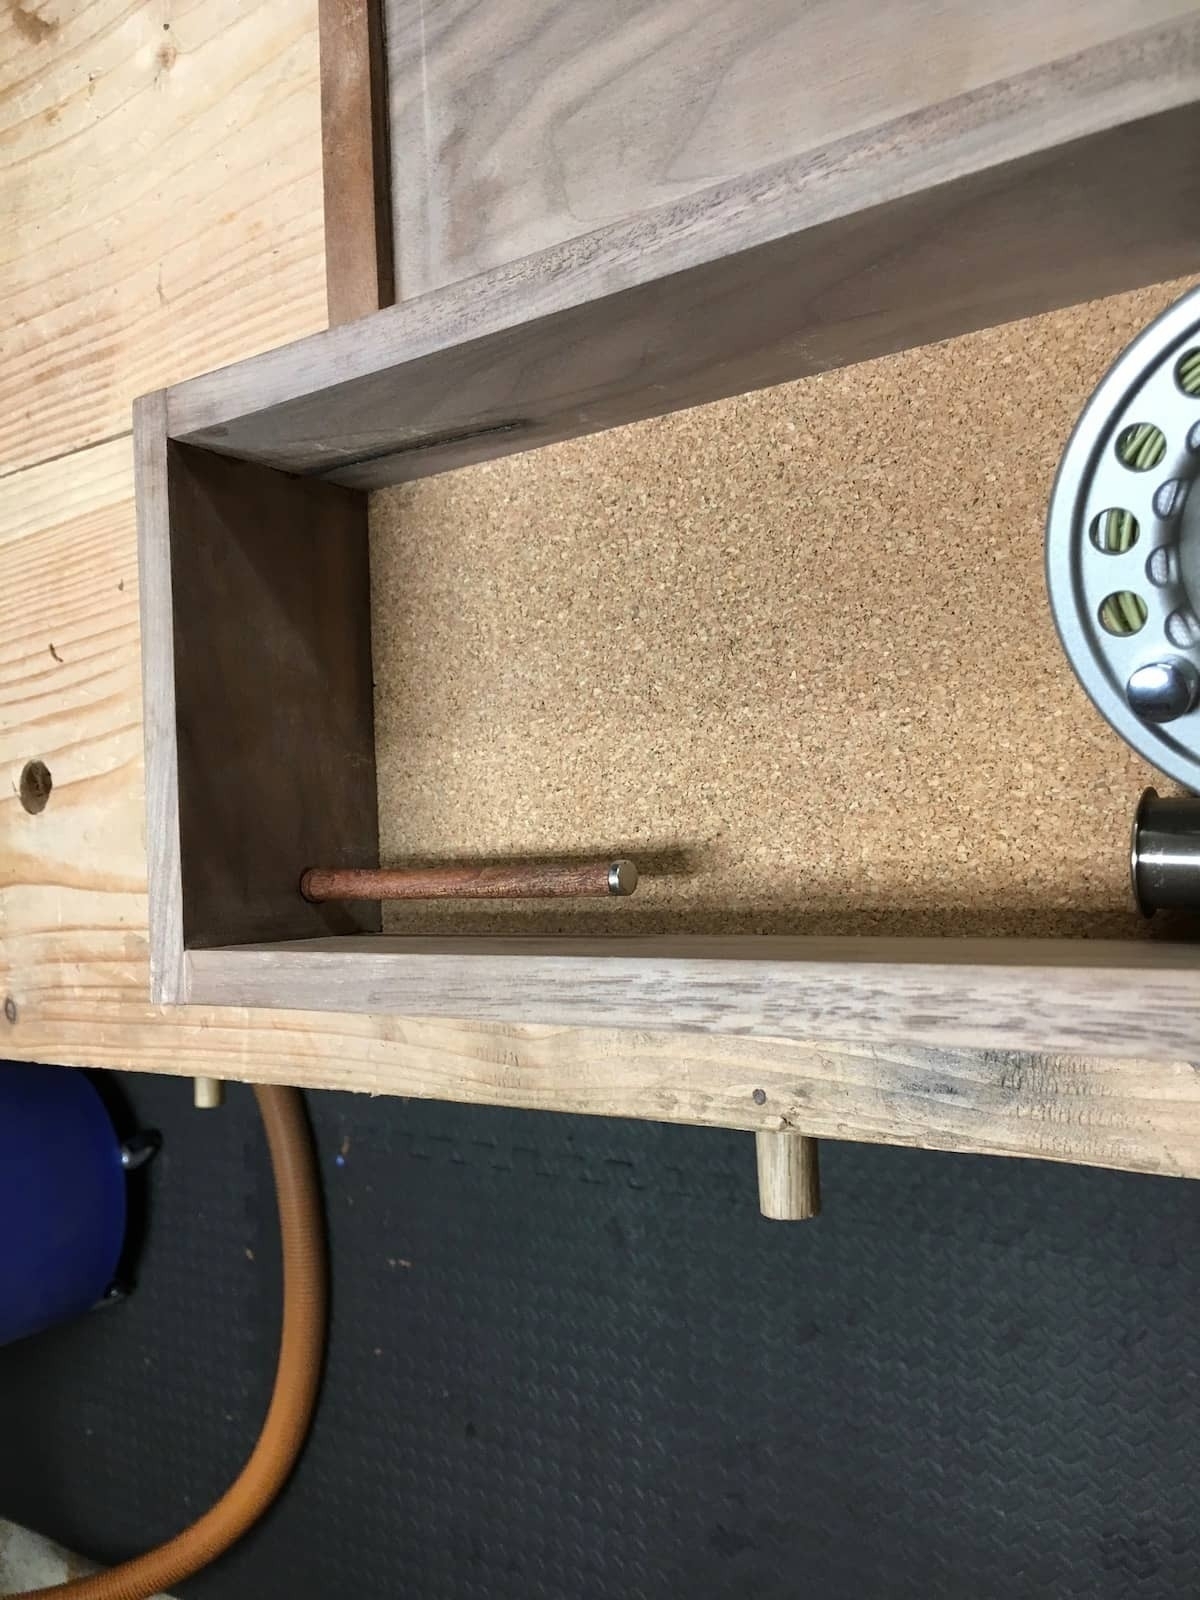
dowel attached to box, used to hold the reel
Here is the dowel attached to the inside panel of the box. I glued a small rare earth magnet to the end of the dowel. For the reel, I'm holding it with a reel seat blank, in which I  also glued a magnet. When the reel seat is slid down onto the dowel, it locks in place with the magnets so to hold it securely in place.
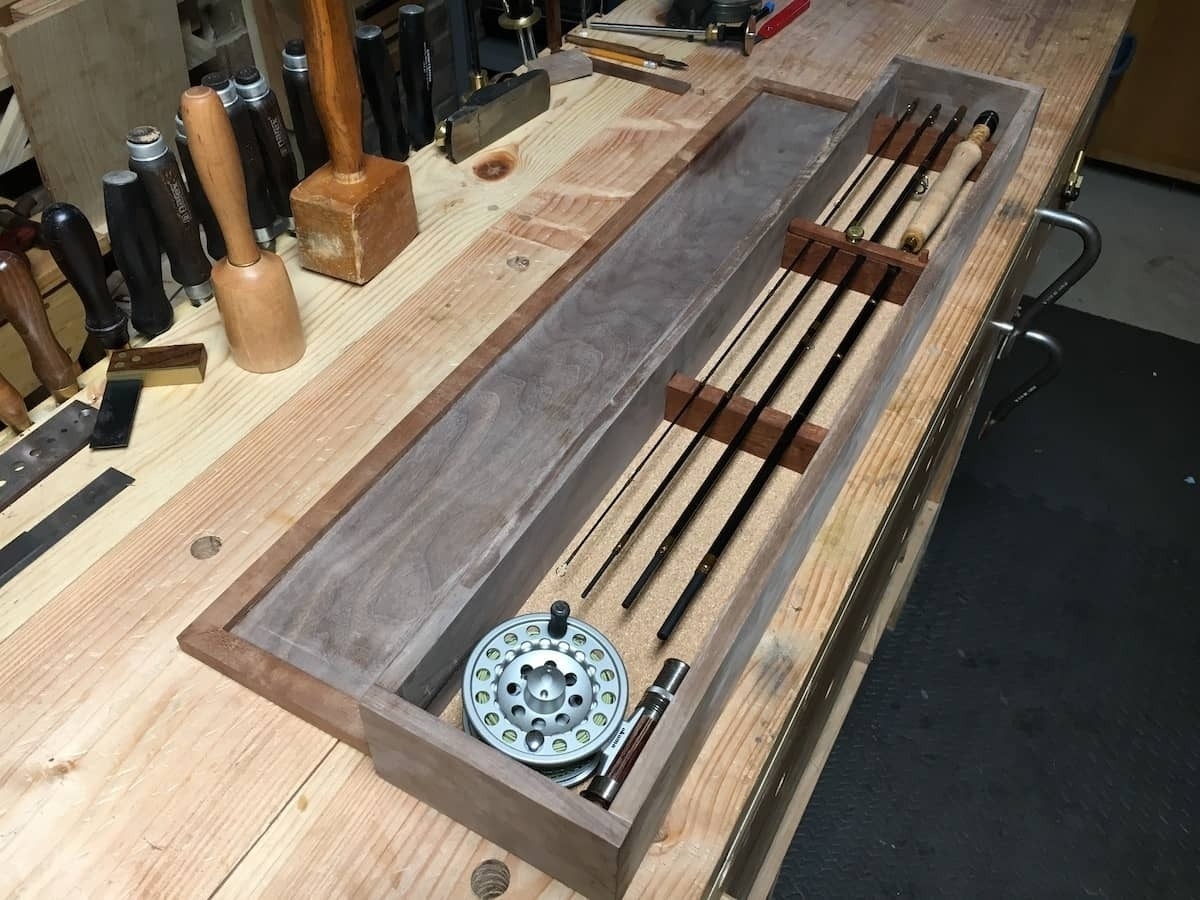
Interior of box with rod and reel in place
Here's what it looks like when it's all put together, with the rod and reel locked in place.
chisel cuts for butt hinge mortise
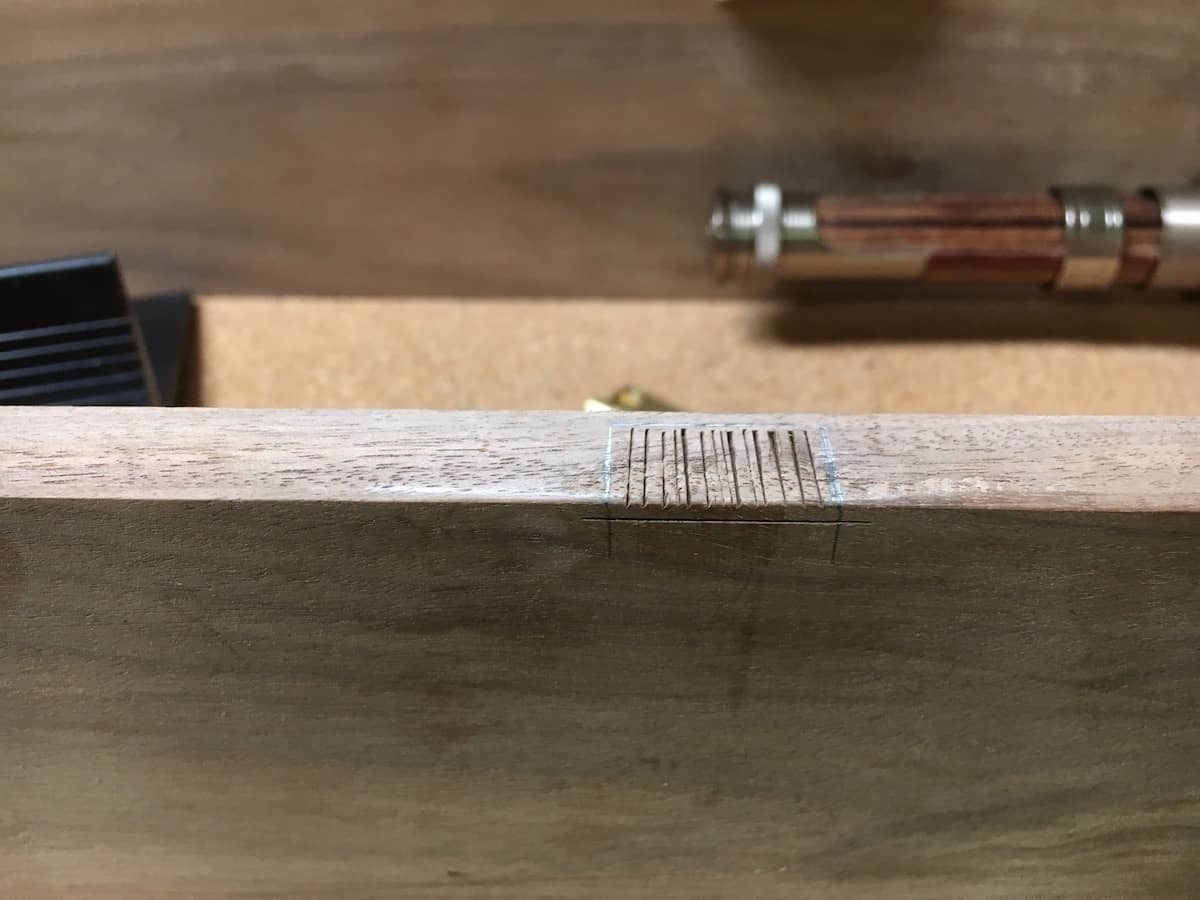
Now all that's left i installing the hardware. Here, I'm cutting a mortise for a butt hinge. I used Brusso hinges for this project and they are worth the money. I started out with some gentle chisel cuts. The depth of the hinge mortise is set with a marking gauge.
router plane for butt hinge
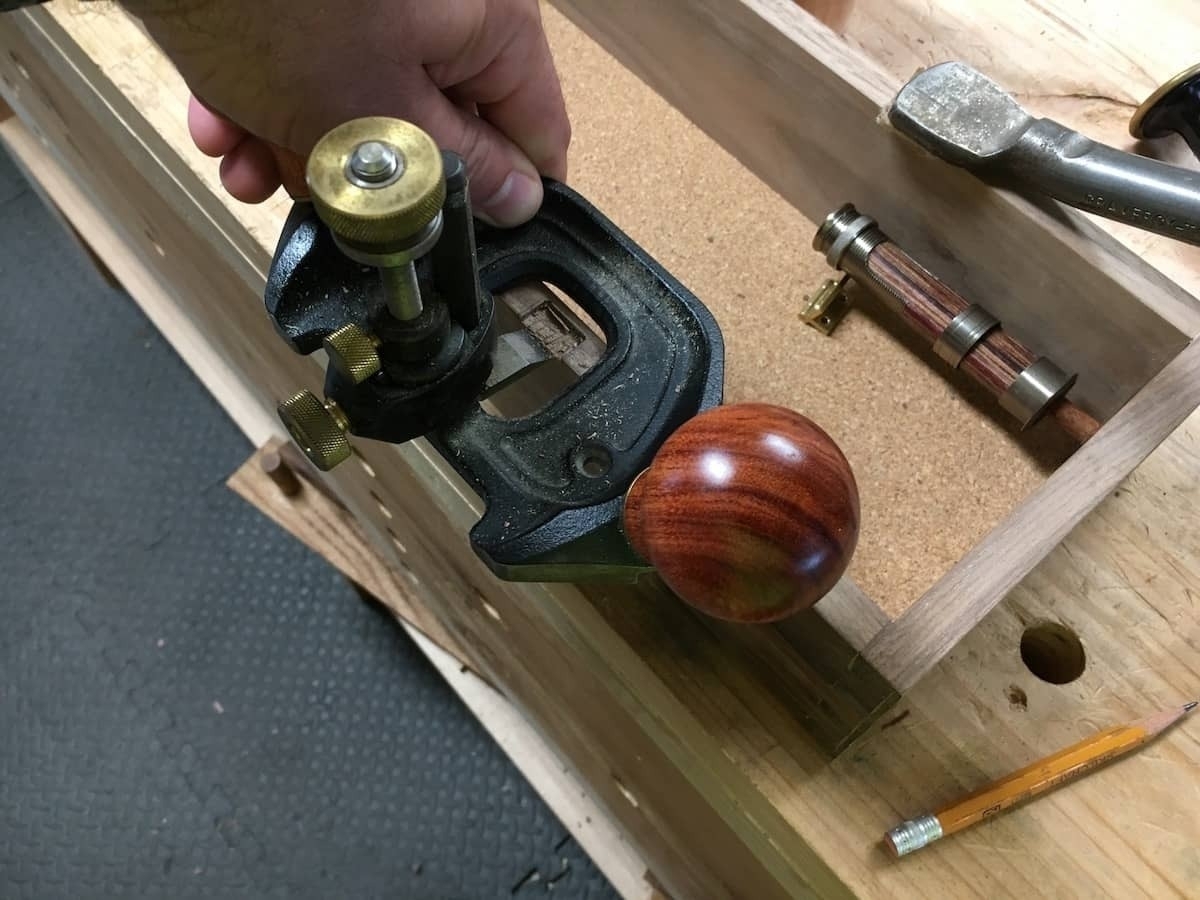
Then I used my router plane to smooth the bottom of the hinge mortise after I chiseled out most of the waste. I slowly crept up on my lines and dry fit the hinges many times to ensure a tight fit.
butt hinge in place
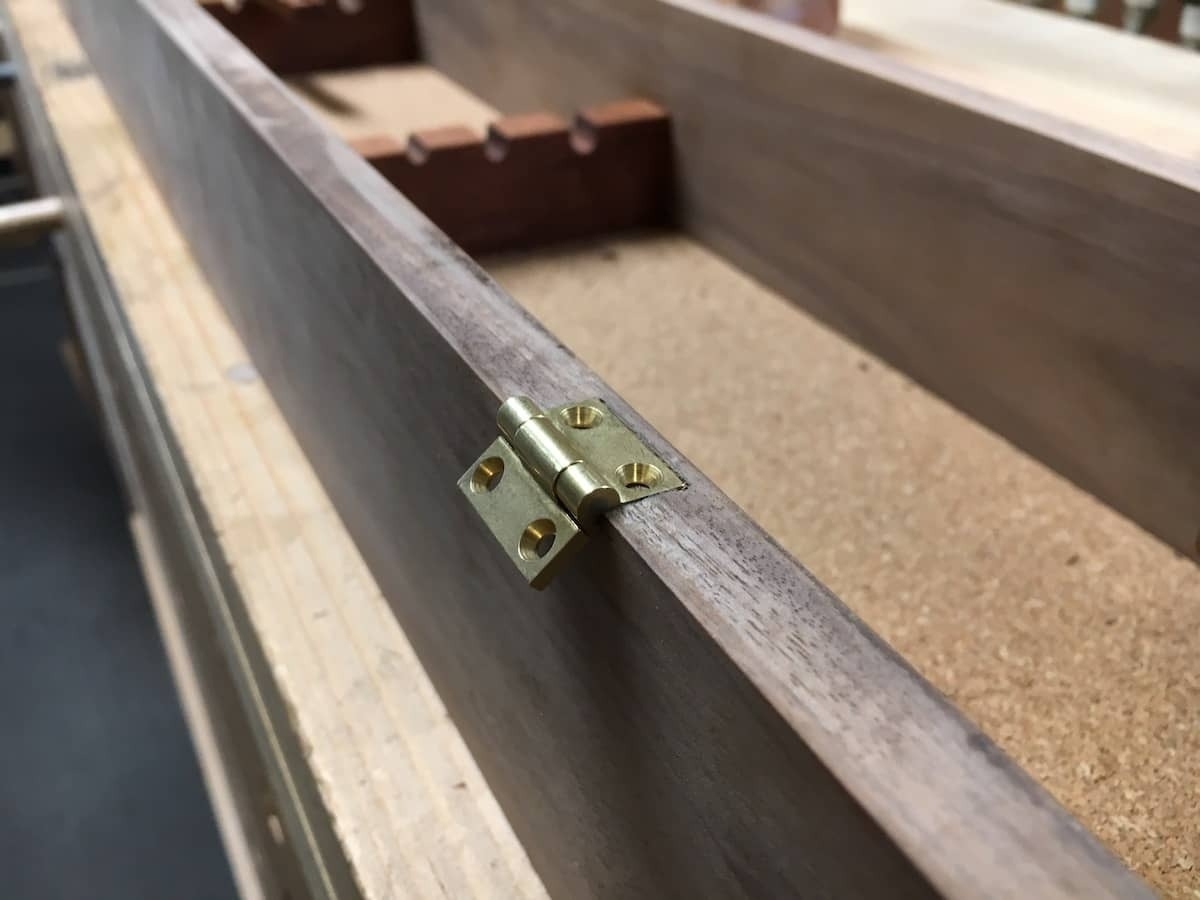
This is one of the butt hinges in place after the mortise was completed.
All hardware in place
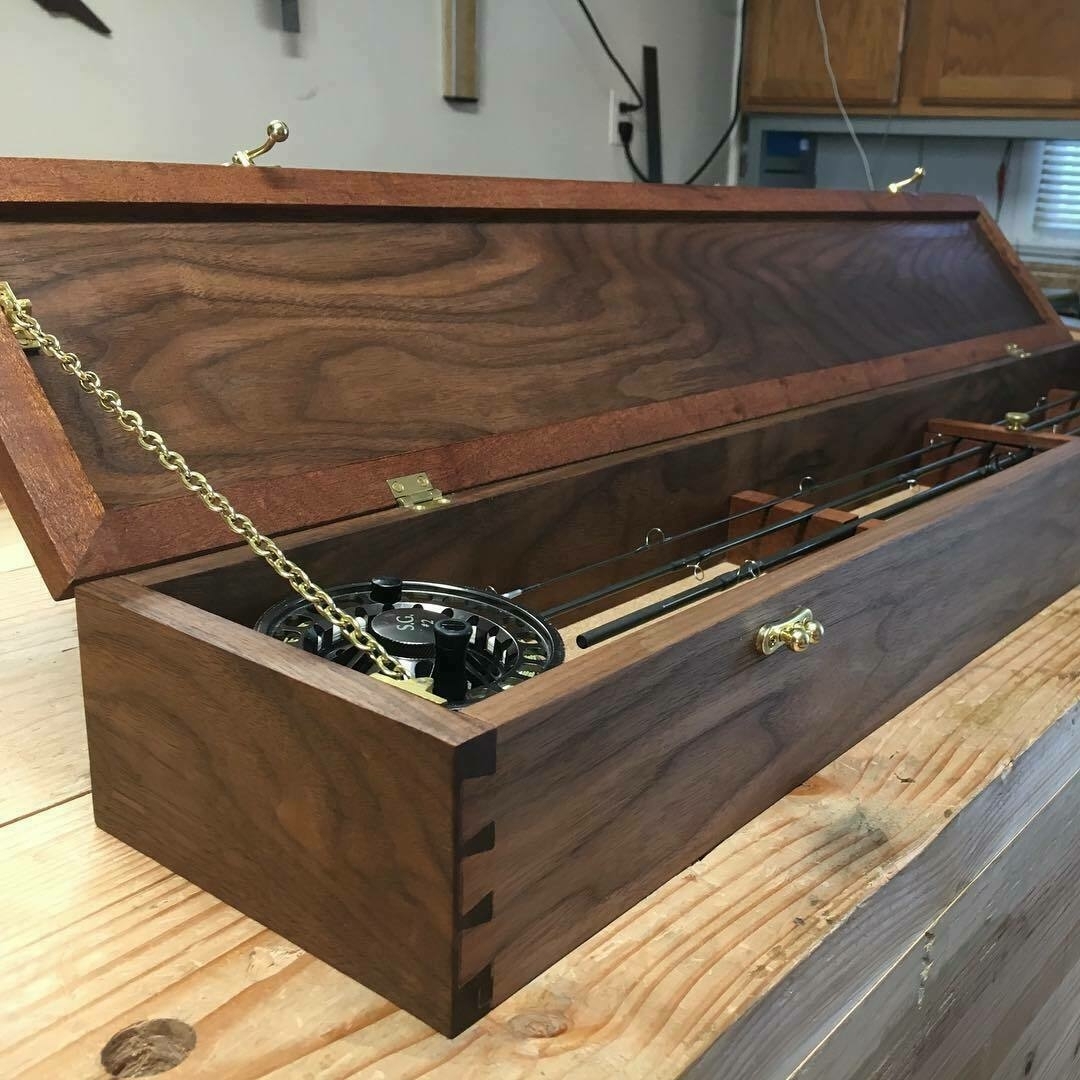
And here is the box with all the hardware attached. In addition to the butt hinges, I installed small box ball clasps from Woodcraft to hold the box closed. The chain support is from Rockler.
completed box
I finished the box with two coats of Osmo wood wax.
Making some Sloyd hooks today. My mistake was choosing a scrap of hard Maple. I'm getting a workout. #handtoolschool
[gallery size=full columns=1]
Finished my fly rod/reel box! I'll soon post a "how it was made" article, for posterity.
[gallery size=full columns=1]
Fly rod case coming together. I'll do the inside parts next. #handtoolschool
[gallery size=full columns=1]